![]()
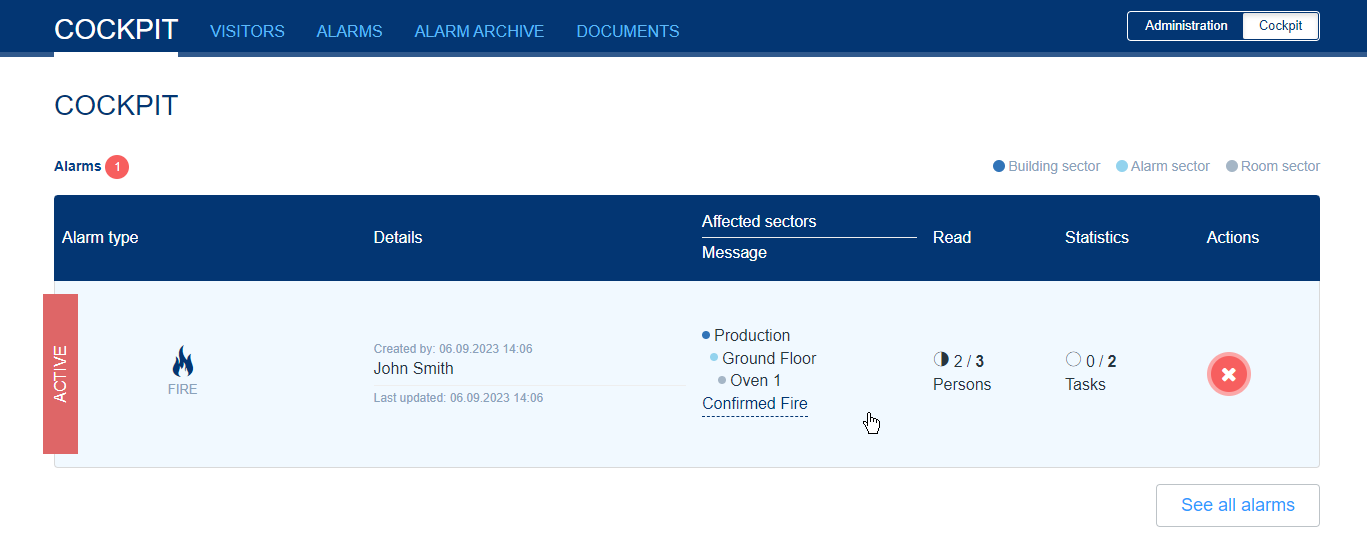
As soon as a new alarm has been created, it appears in the overview of the cockpit.
You will be shown what kind of alarm it is (alarm type), who created the alarm, where the alarm is located (building), the number of participating users and the number of tasks within the alarm.
To get to the details view of an alarm, press on the respective alarm.
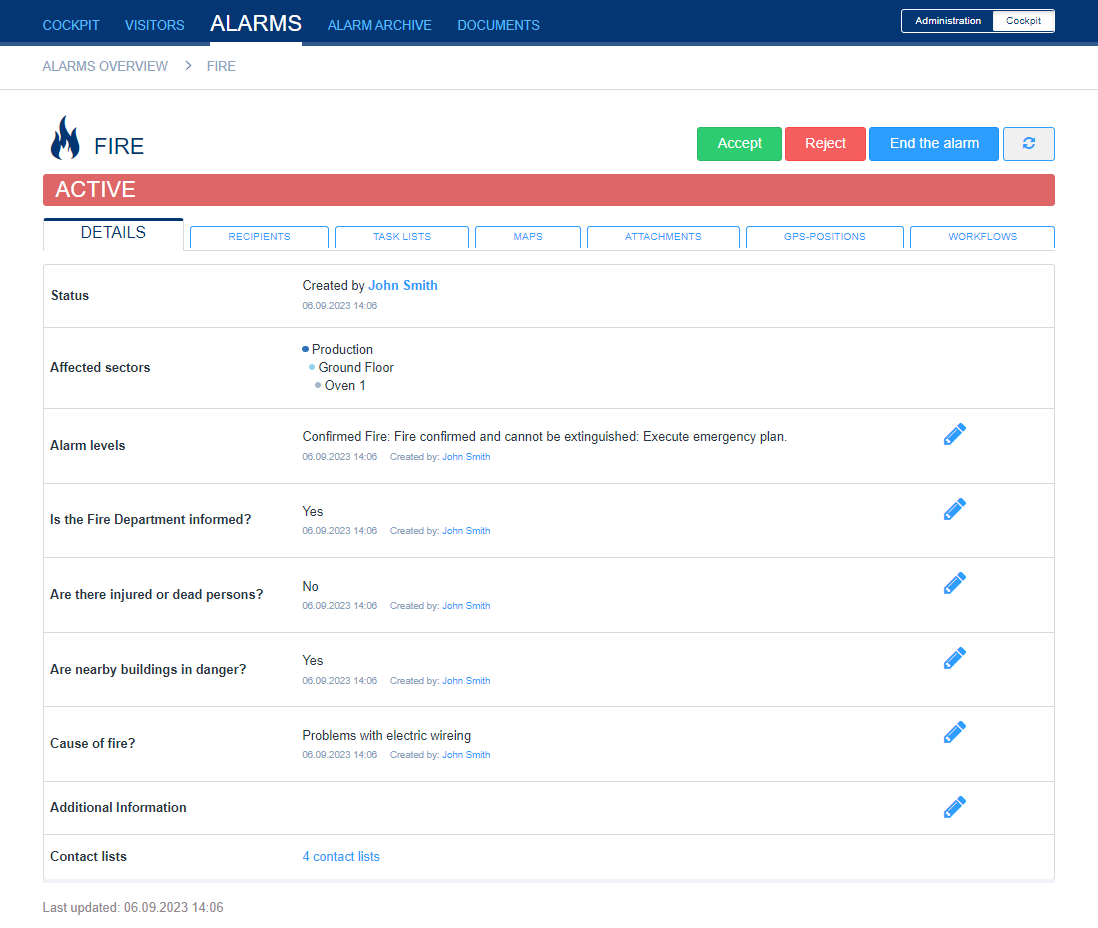
In the "Details" tab you will always find all current information about the alarm and can edit or update it (depends on your permissions for this alarm).
You will be shown the alarm location, the system message (if the alarm was created by a connected system), the alarm levels already selected and all additional information. If a number is specified in the additional information, it is displayed in blue and can be clicked.
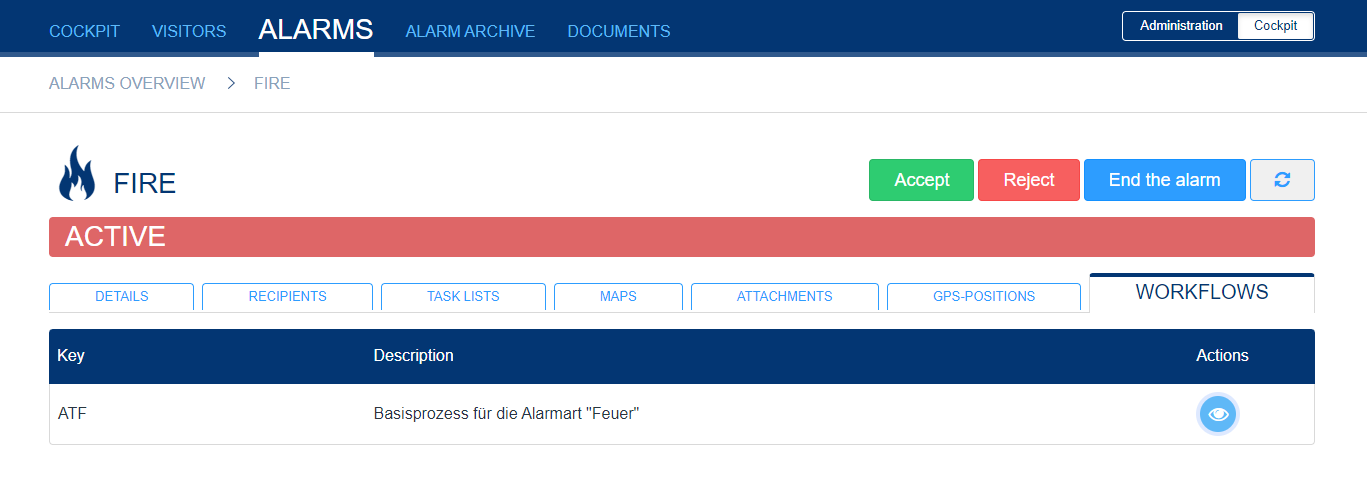
In the upper right area you can "Accept" or "Reject" the alarm (if configured accordingly via the workflows) and thus give the other participants feedback about your availability.
You will also find all the contact lists assigned to the alert at the bottom.
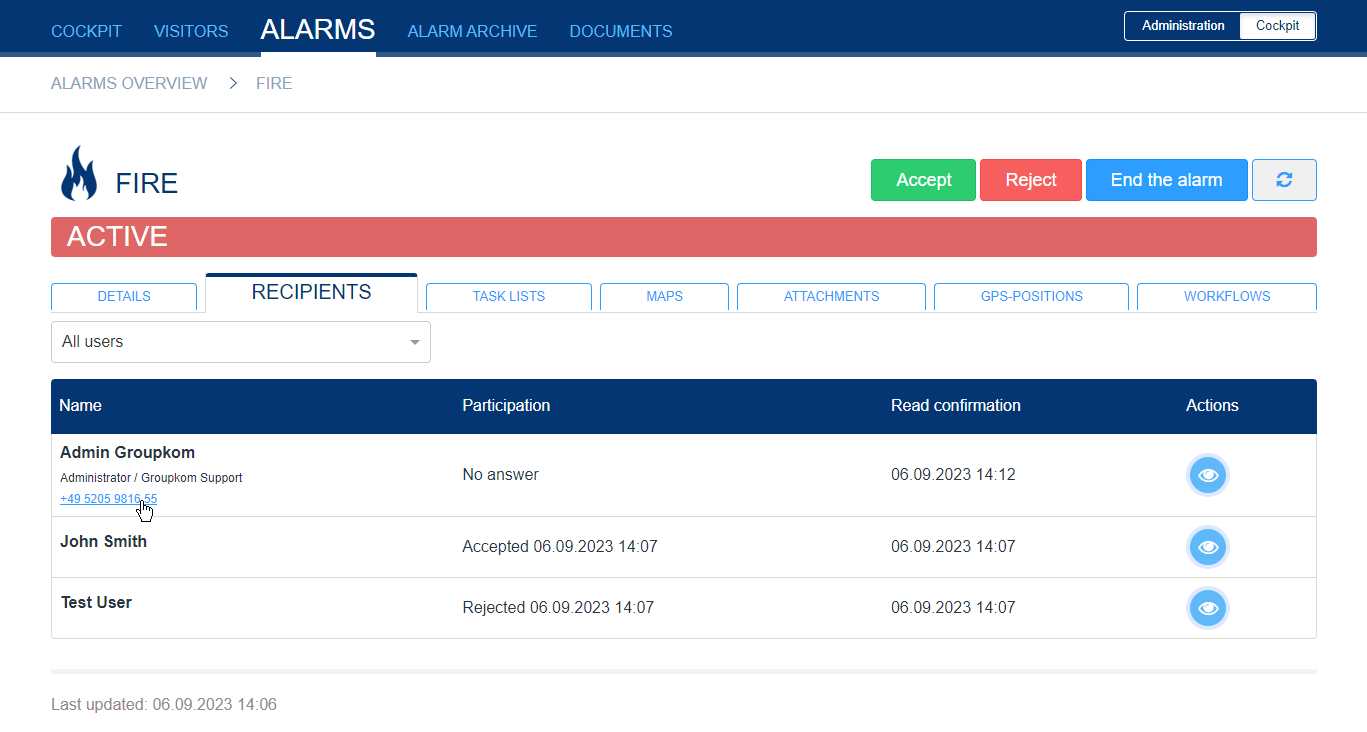
In the "Recipients" tab you can see all alerted users.
You can see which users have read the alert and whether they have accepted the alert, rejected it, or not yet responded.
You will also automatically see the contact details of the relevant persons. For more contact information on users, click on the eye on the right.
In addition, you have the option of dialing the number of the person concerned directly.
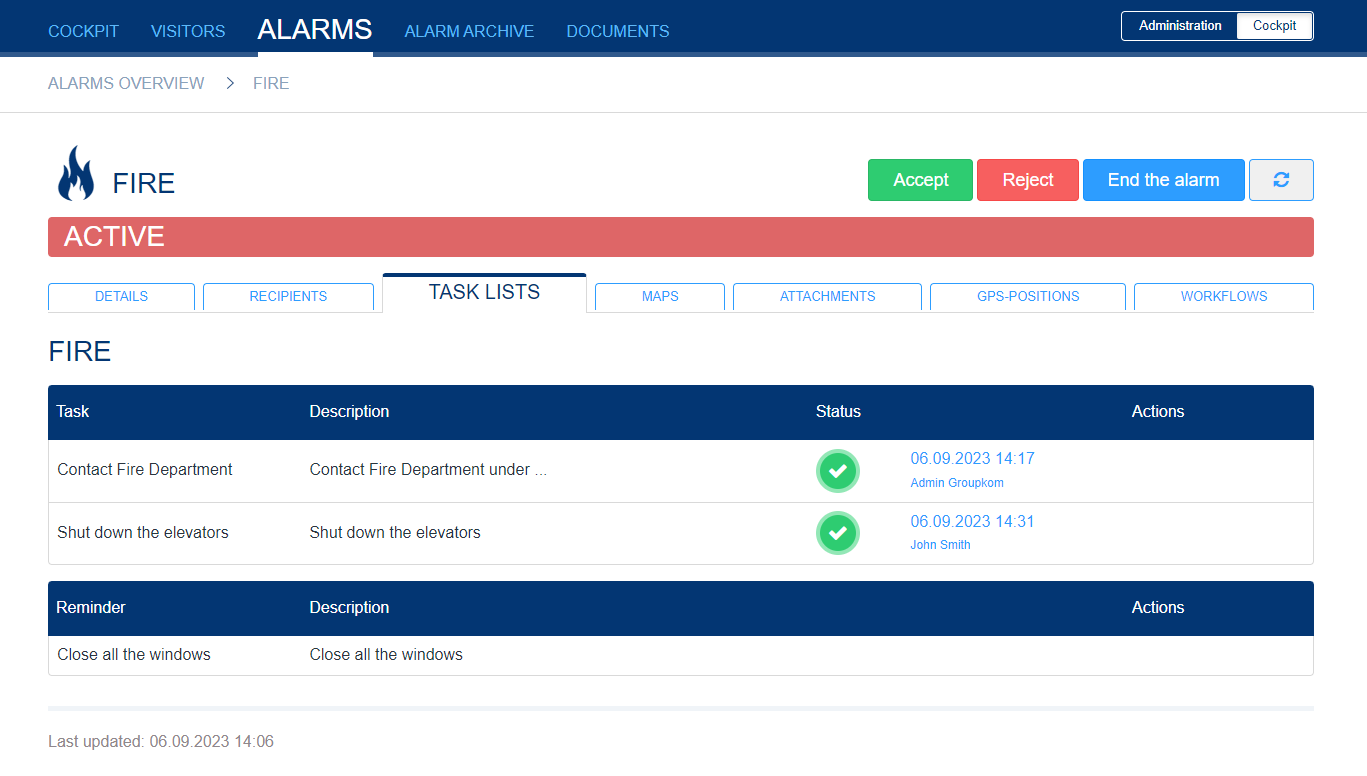
In the "Task Lists" tab you can see the task lists assigned to you via the workflows (the exception to this is administrators, who always see all the task lists of the alarm).
You can complete tasks yourself and also see when other users who also have access to the corresponding task list have completed a task (with time stamp).
Notes, on the other hand, cannot be acknowledged and are for information only.
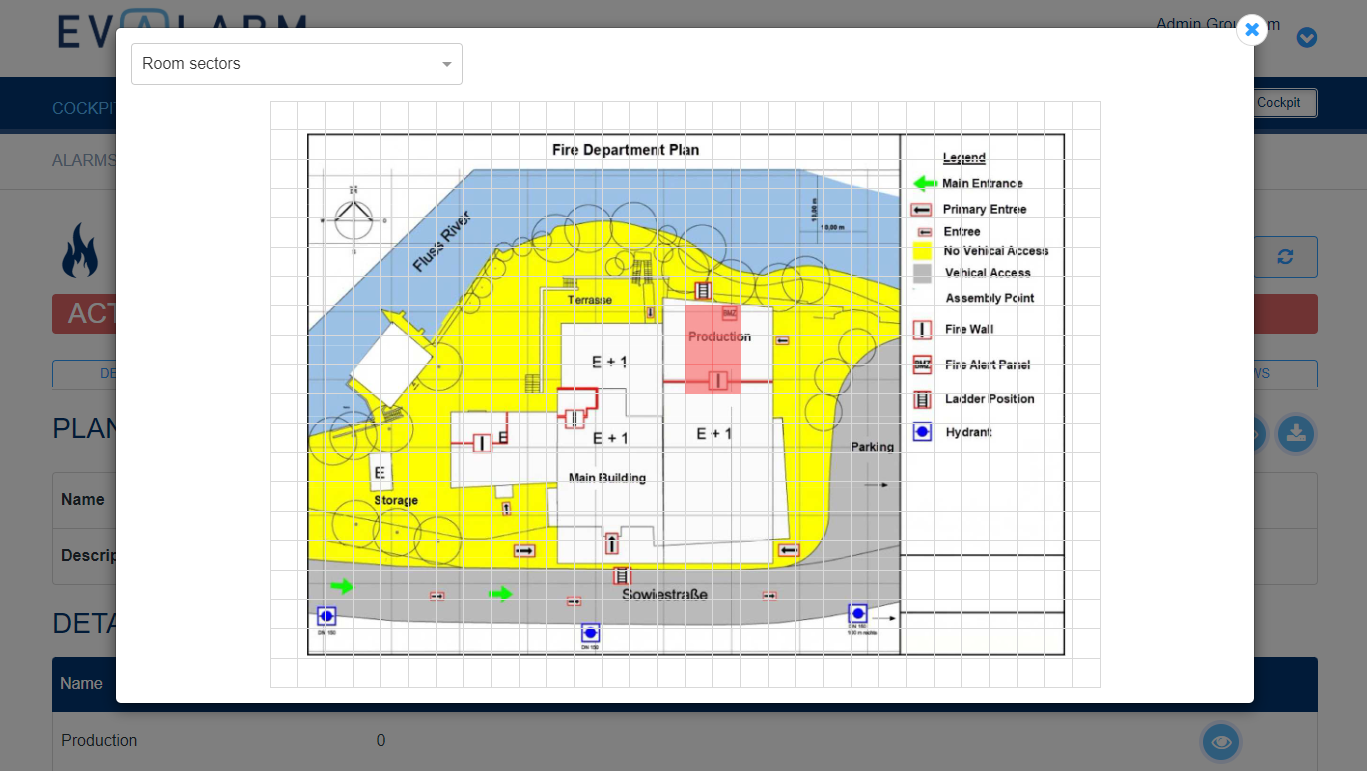
Under the "Maps" tab you can view plans, detailed maps and route maps (if this has been configured accordingly for the building selected in the alarm)
You can call them up using the respective button (eye).
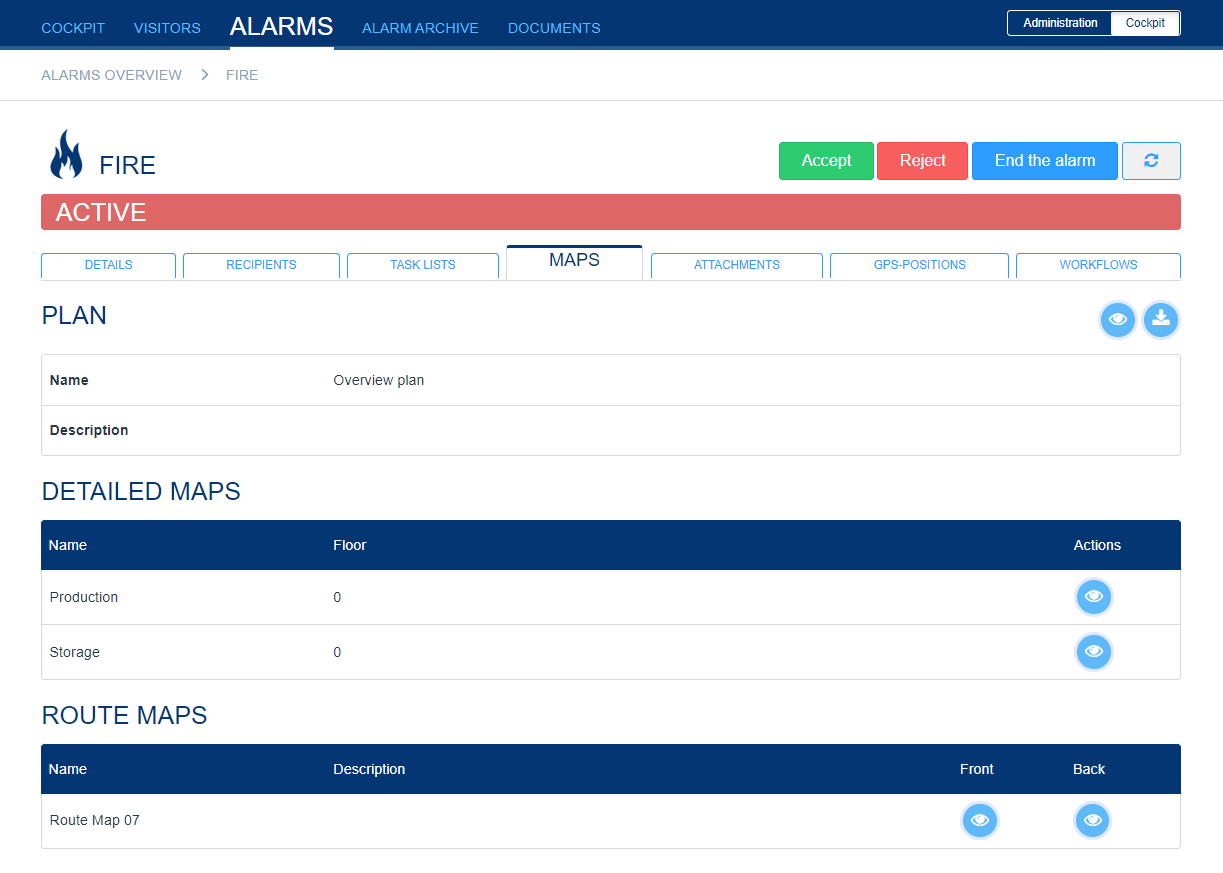
In the overview plan, the alarm location is shown to you in more detail by a red flashing (if configured).
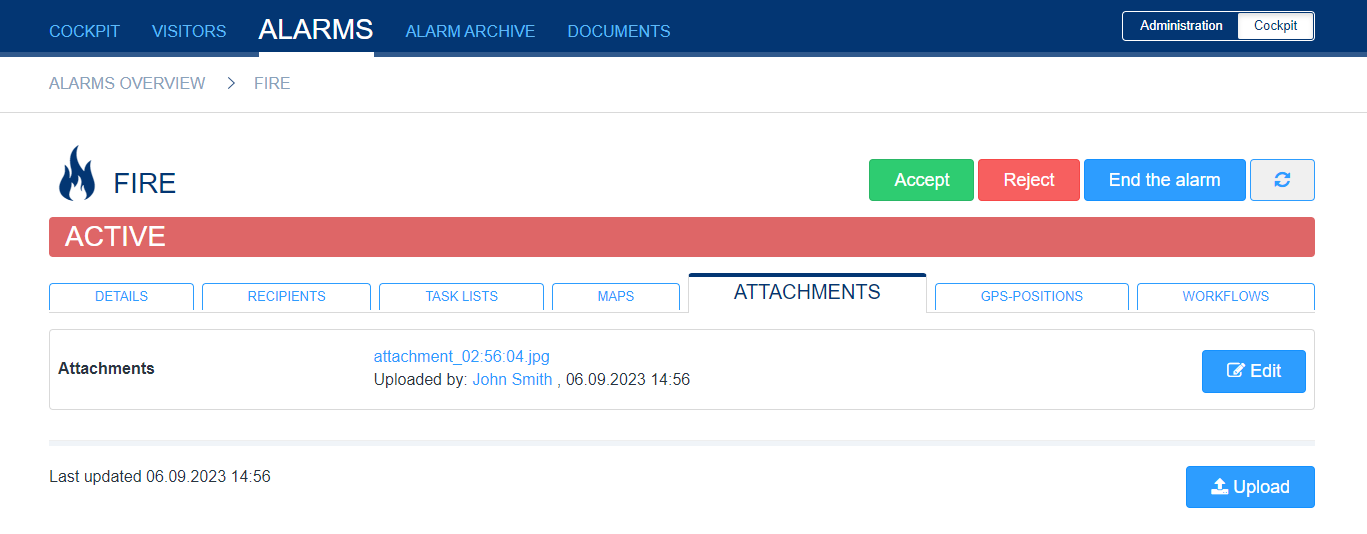
In the "Attachments" tab you can upload attachments (photo, documents, ...) to the alarm or view attachments that have already been uploaded.
If you click on the attachment, it will be downloaded and will then be available in your Downloads folder.
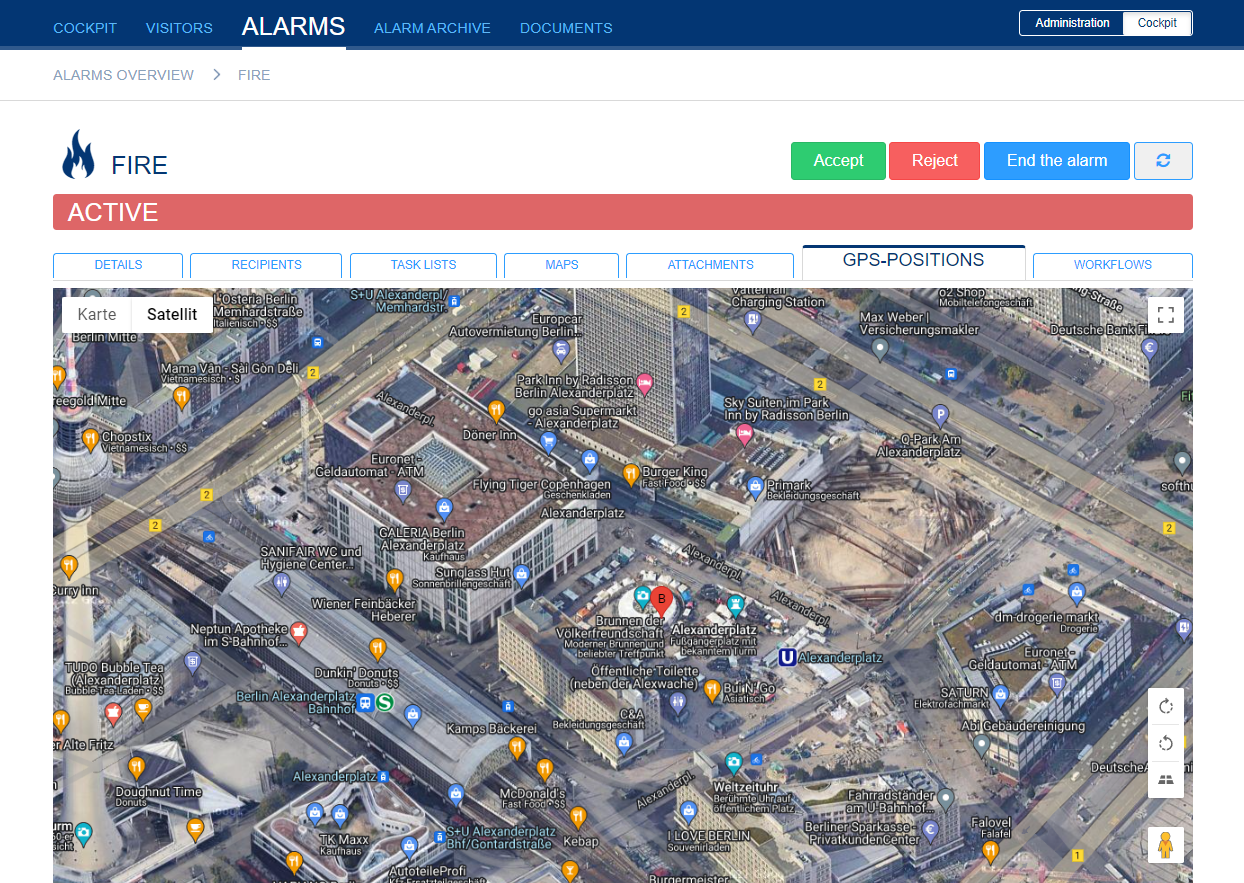
In the "GPS-Positions" tab you can see all GPS positions for the alarm. This can be the GPS position of your location, the affected building or the alarm creator, depending on what has been configured.
In the last tab "Workflows" you can see all workflows triggered for this active alarm.
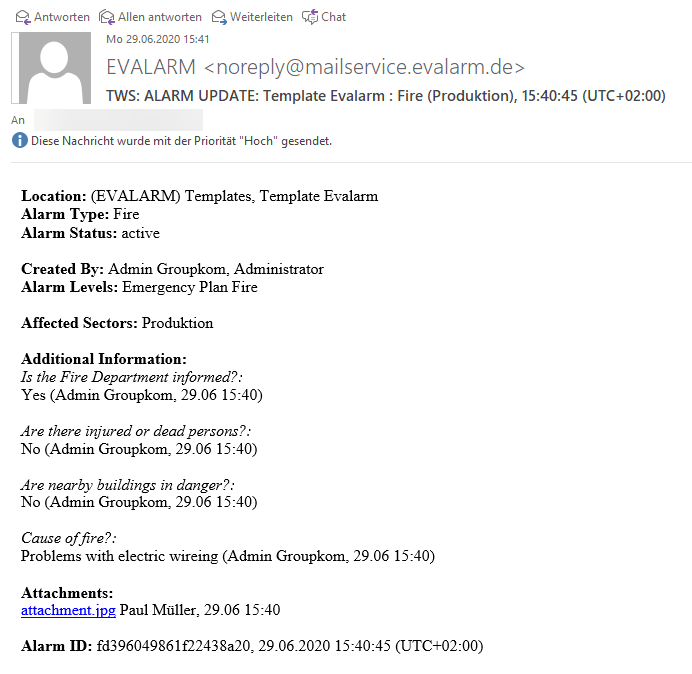
Alarm E-mail
If you have configurated the additional alerting via e-mail, the receivers of the alert receive an e-mail like you can see on the right.
If you want to end the alarm, click on the "End the alarm" button at the top right.
To end an alarm, you must have the appropriate permission.
You will be asked to give a reason for ending the alarm. After confirming your entry, the alarm is ended.

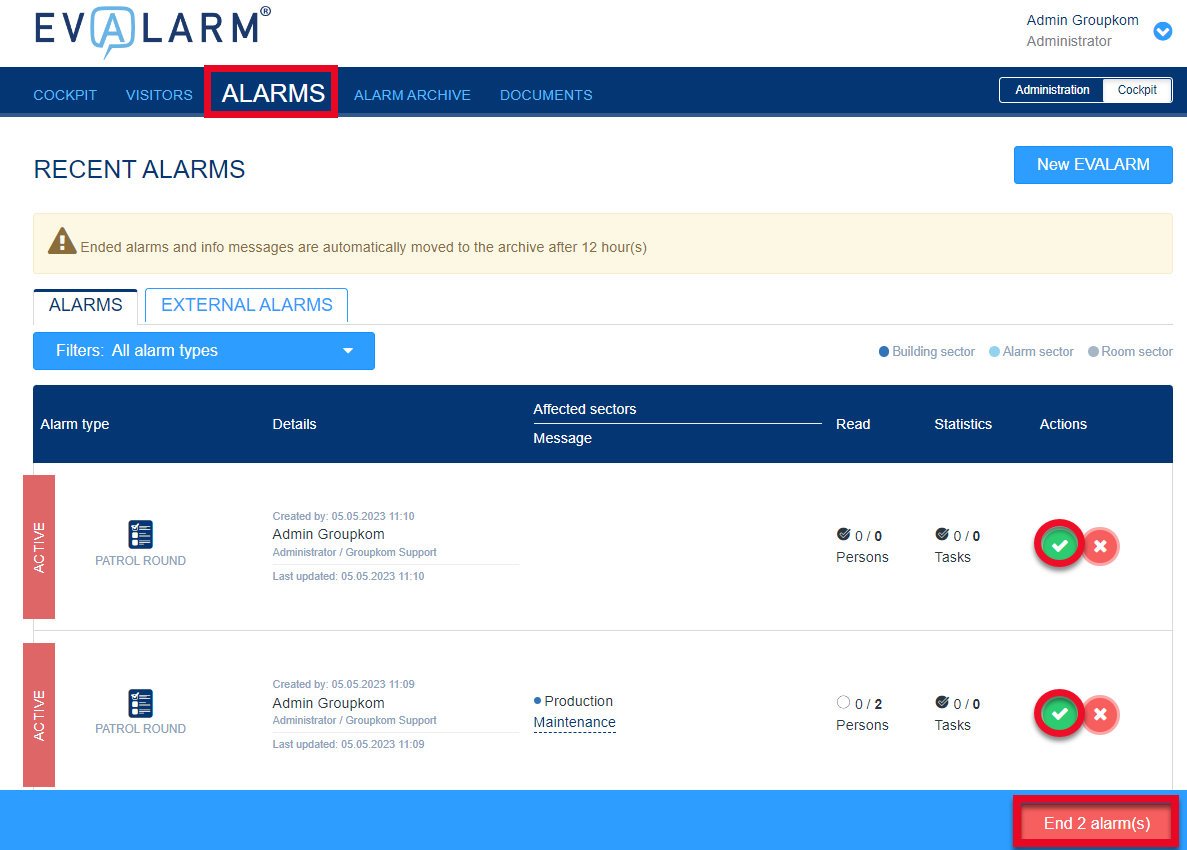
In the "Alarms" tab you will find an overview of the current alarms. Alarms with the priority 3 can be ended with multiple selection. Select the appropriate alarms. To end the alarms, press the "End alarm(s)" button at the bottom right.
Überblick
Inhalte