Seitenhistorie
You can use the app to receive alerts at any time.
Since the transmission of this primarily works via PUSH notifications, it does not matter whether the app is active or the phone is in idle mode.
This ensures that you are always informed about current alerts and do not overlook them.
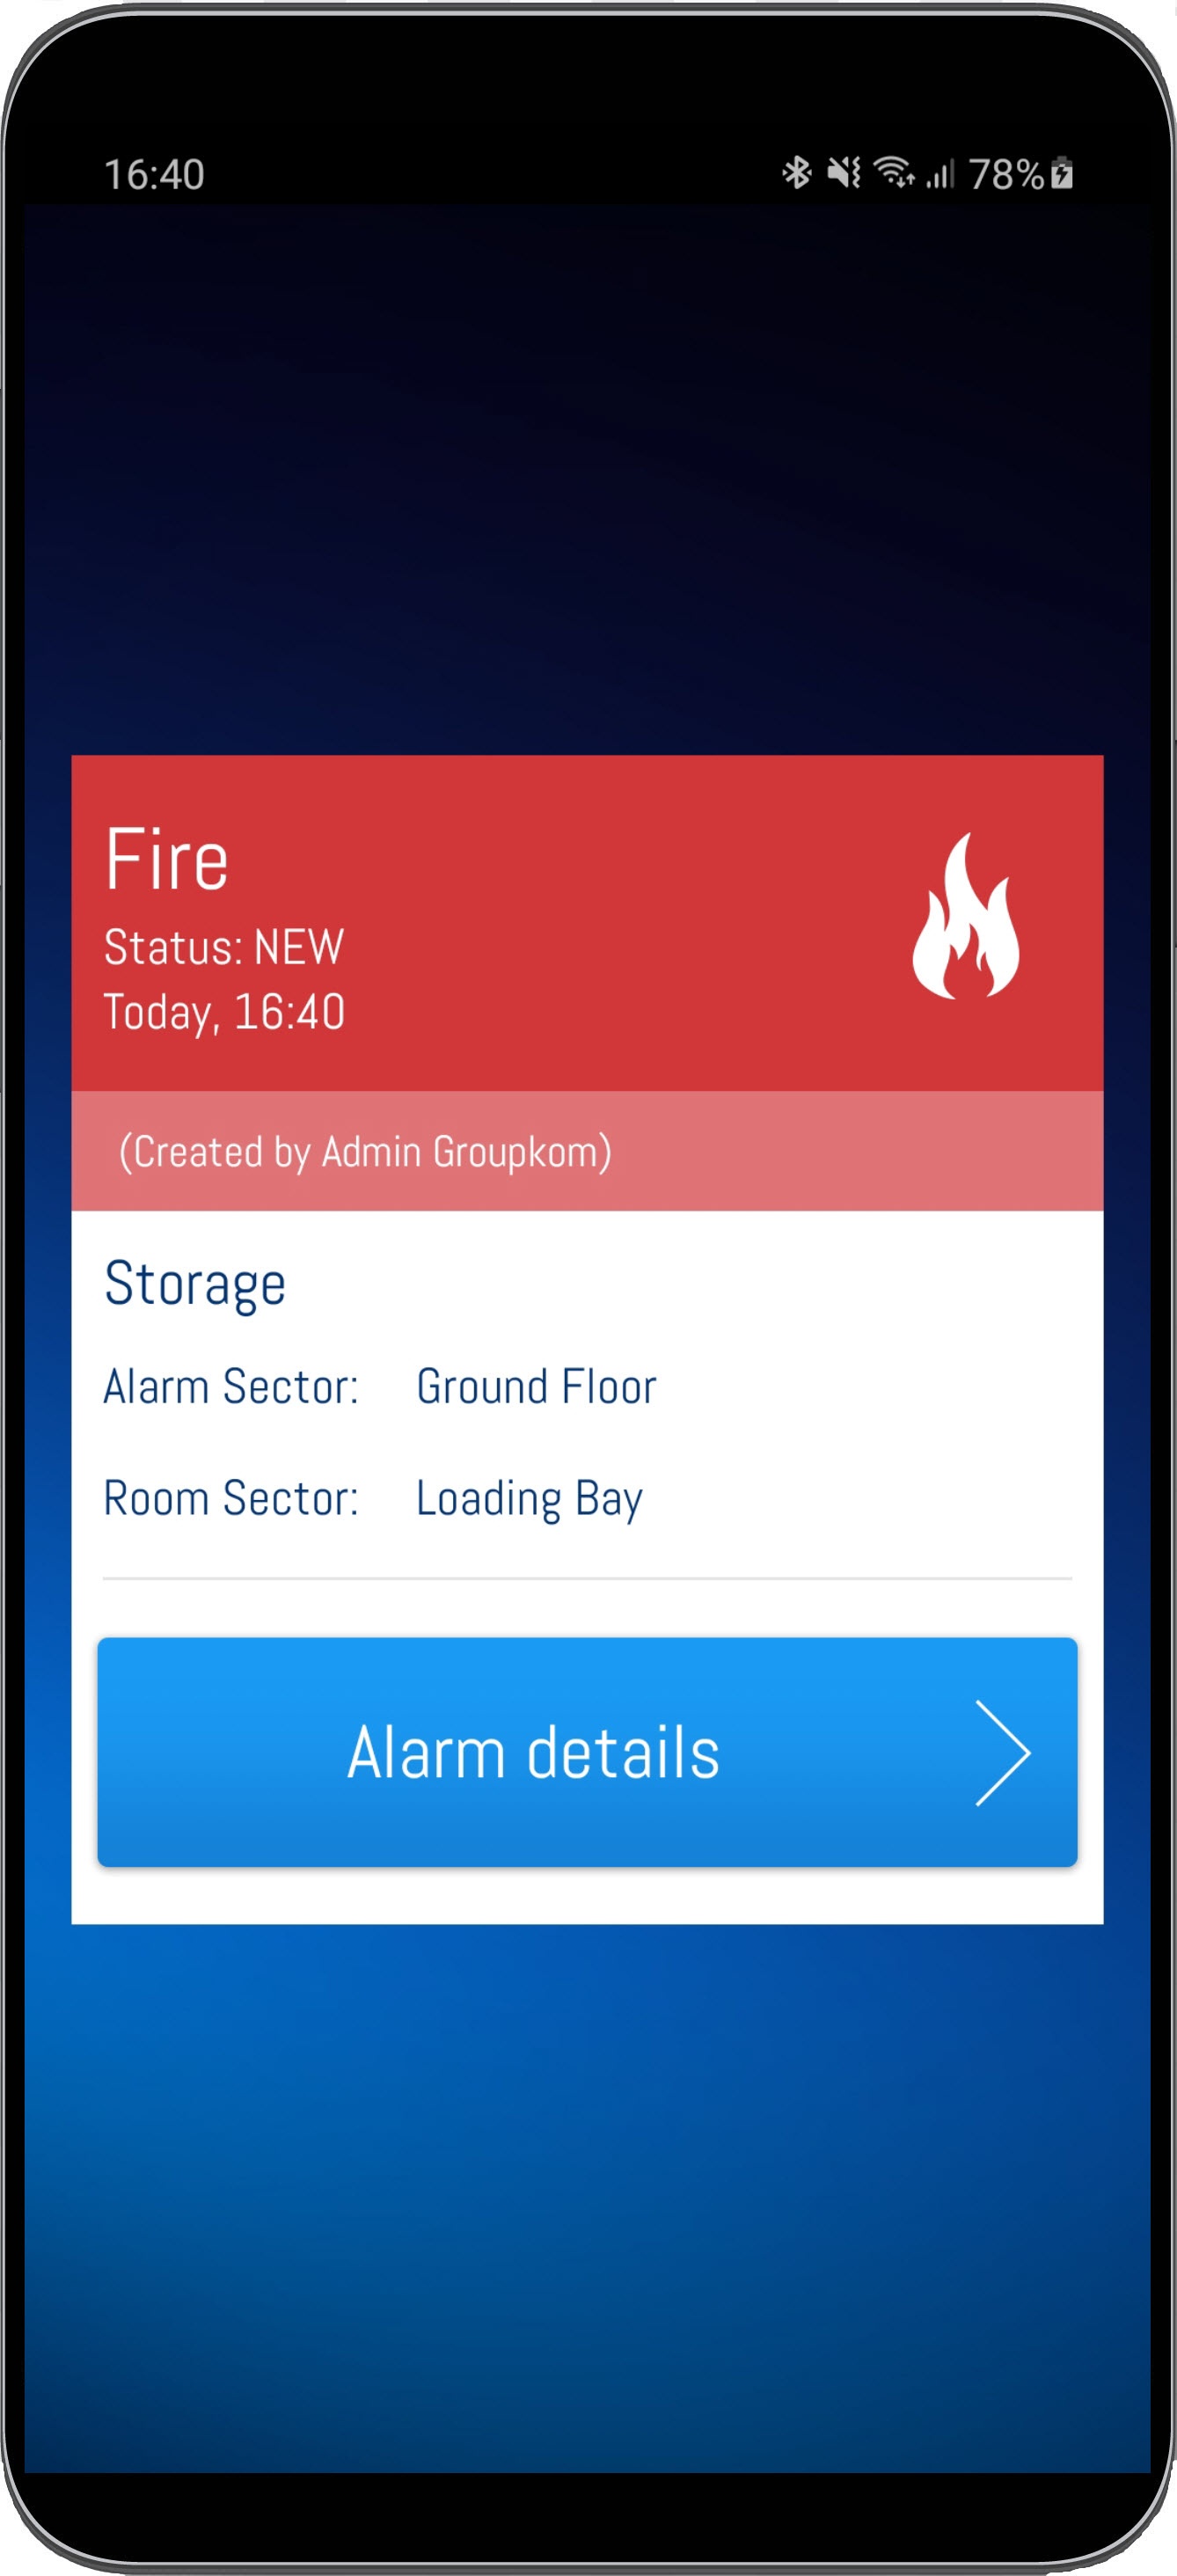
When an alert is triggered, a message appears on your phone screen.
The alarm details button brings you directly to the current alert.
If the settings for the alarm via email are set, the alarm recipients are also alarmed via email. How to do this configuration is explained in "Setting up workflows".![]()
| Warnung |
|---|
The emails with the alarm details are sent by our system with the priority "high". This means that they are marked with an exclamation mark in Outlook. |
![]()
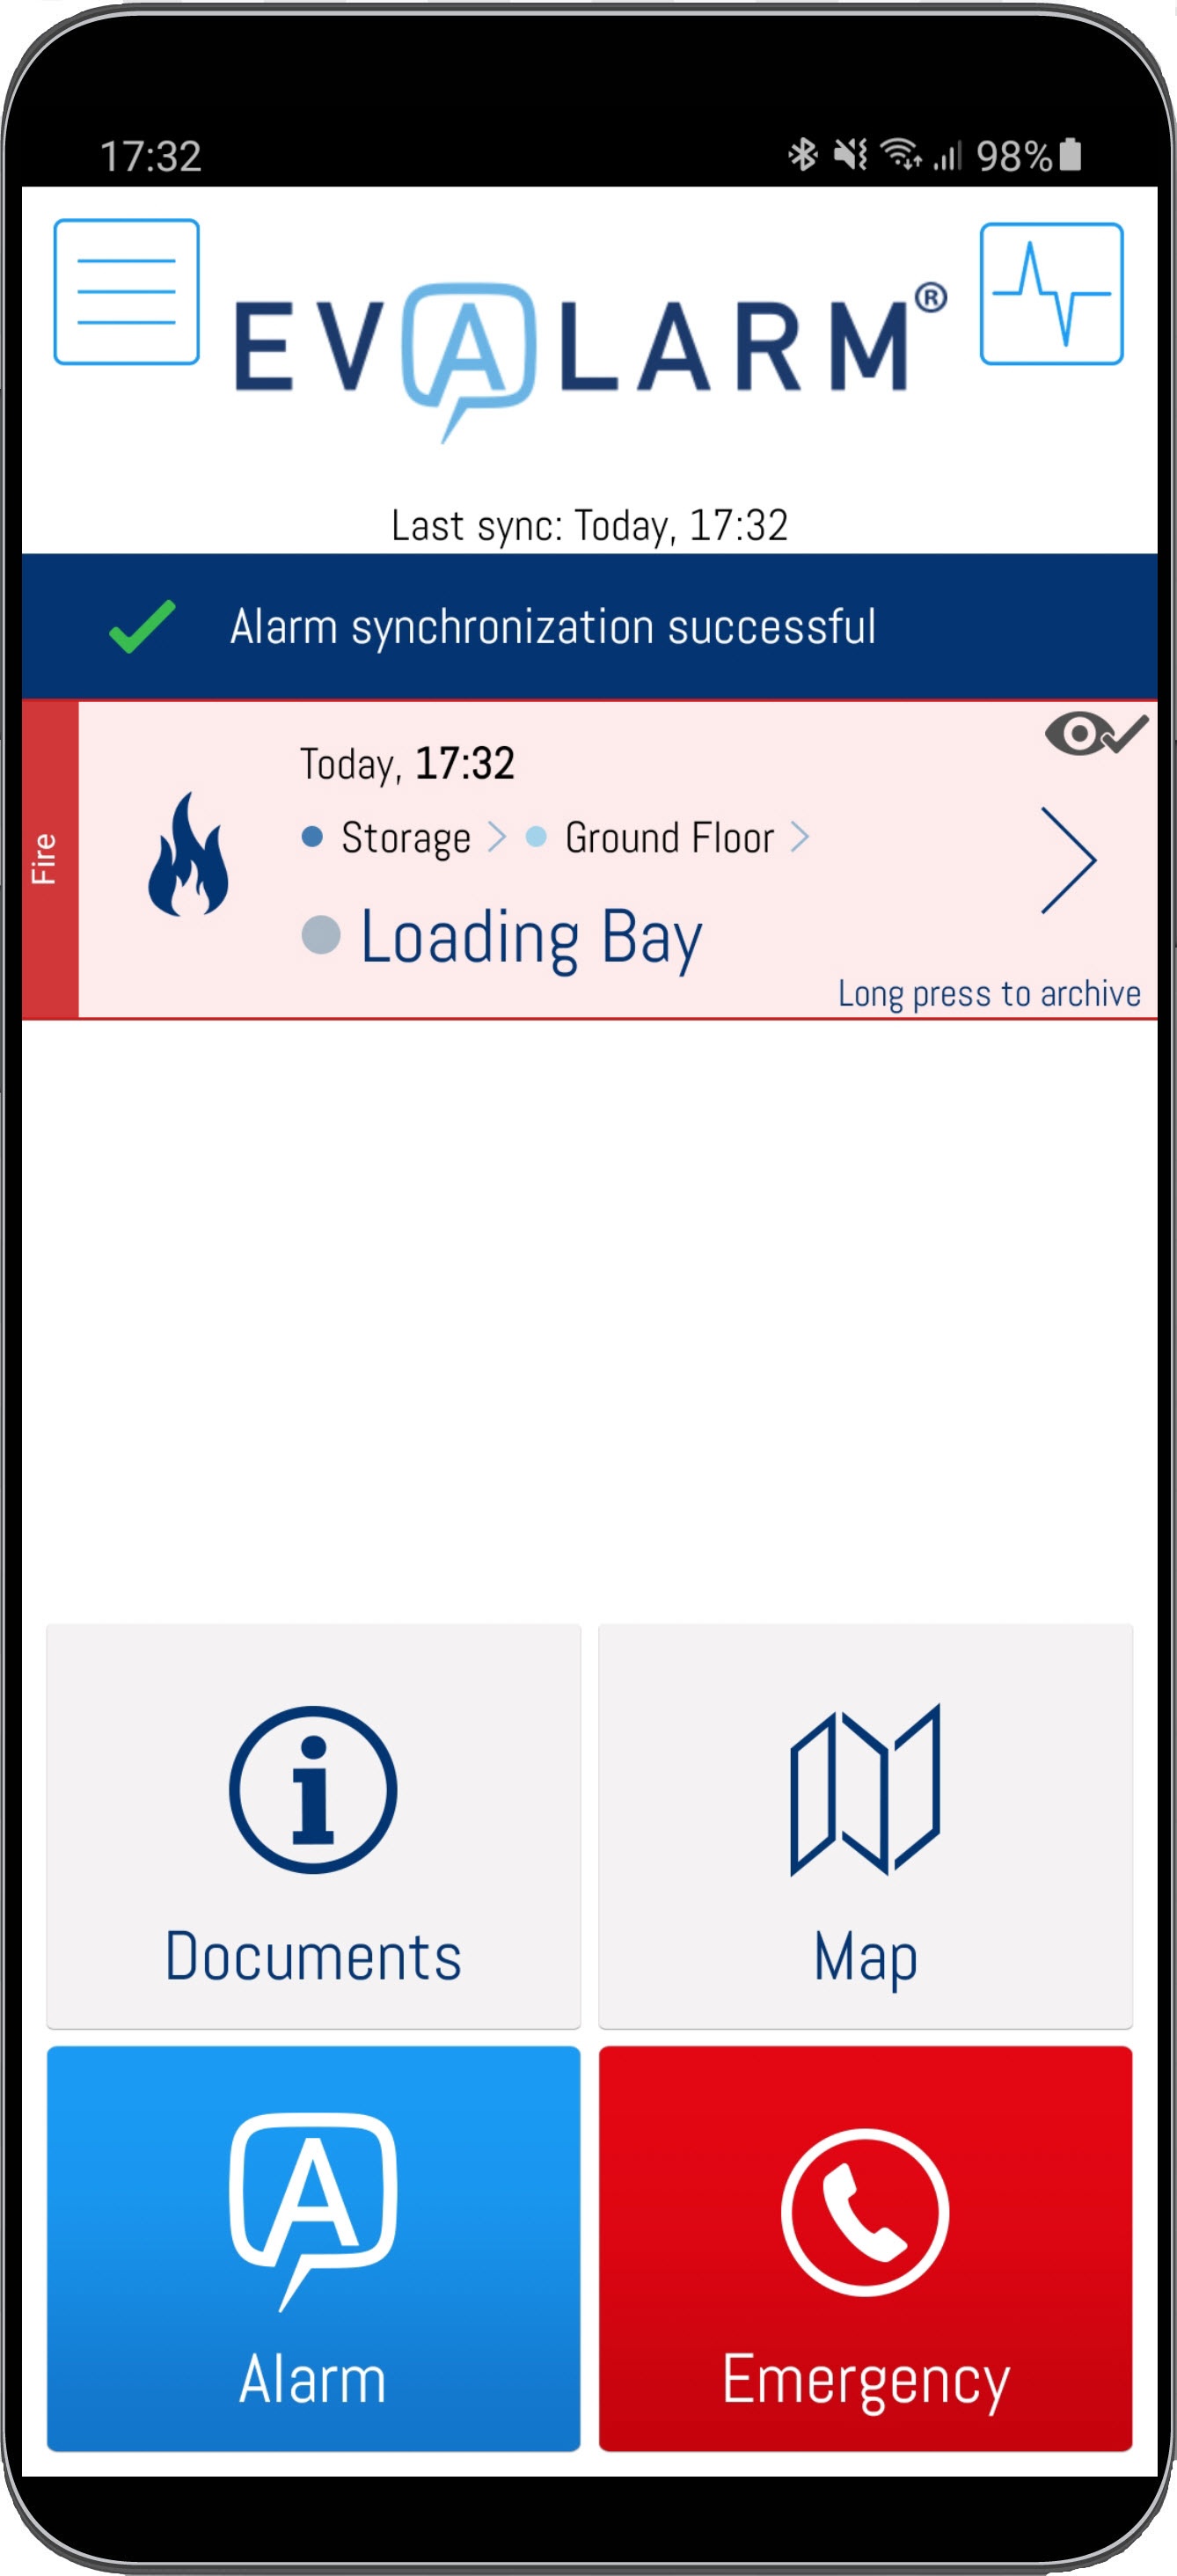
On the home screen you can look over all current alarms and messages and view them individually.
If you have a current alert, you have all the important information to complete your function as part of the countermeasures.
The range of the information and functions displayed are dependent on the type of alert and your user role. This is the only way to ensure targeted processes.
First, you can view the alarm details already presented and edit them if necessary (dependend on your user role).
This keeps the alarm up to date and simplifies the communication.| Warnung |
|---|
If several people are editing a detail at the same time, the alarm will only be updated by the first change. So no important information get lost. |
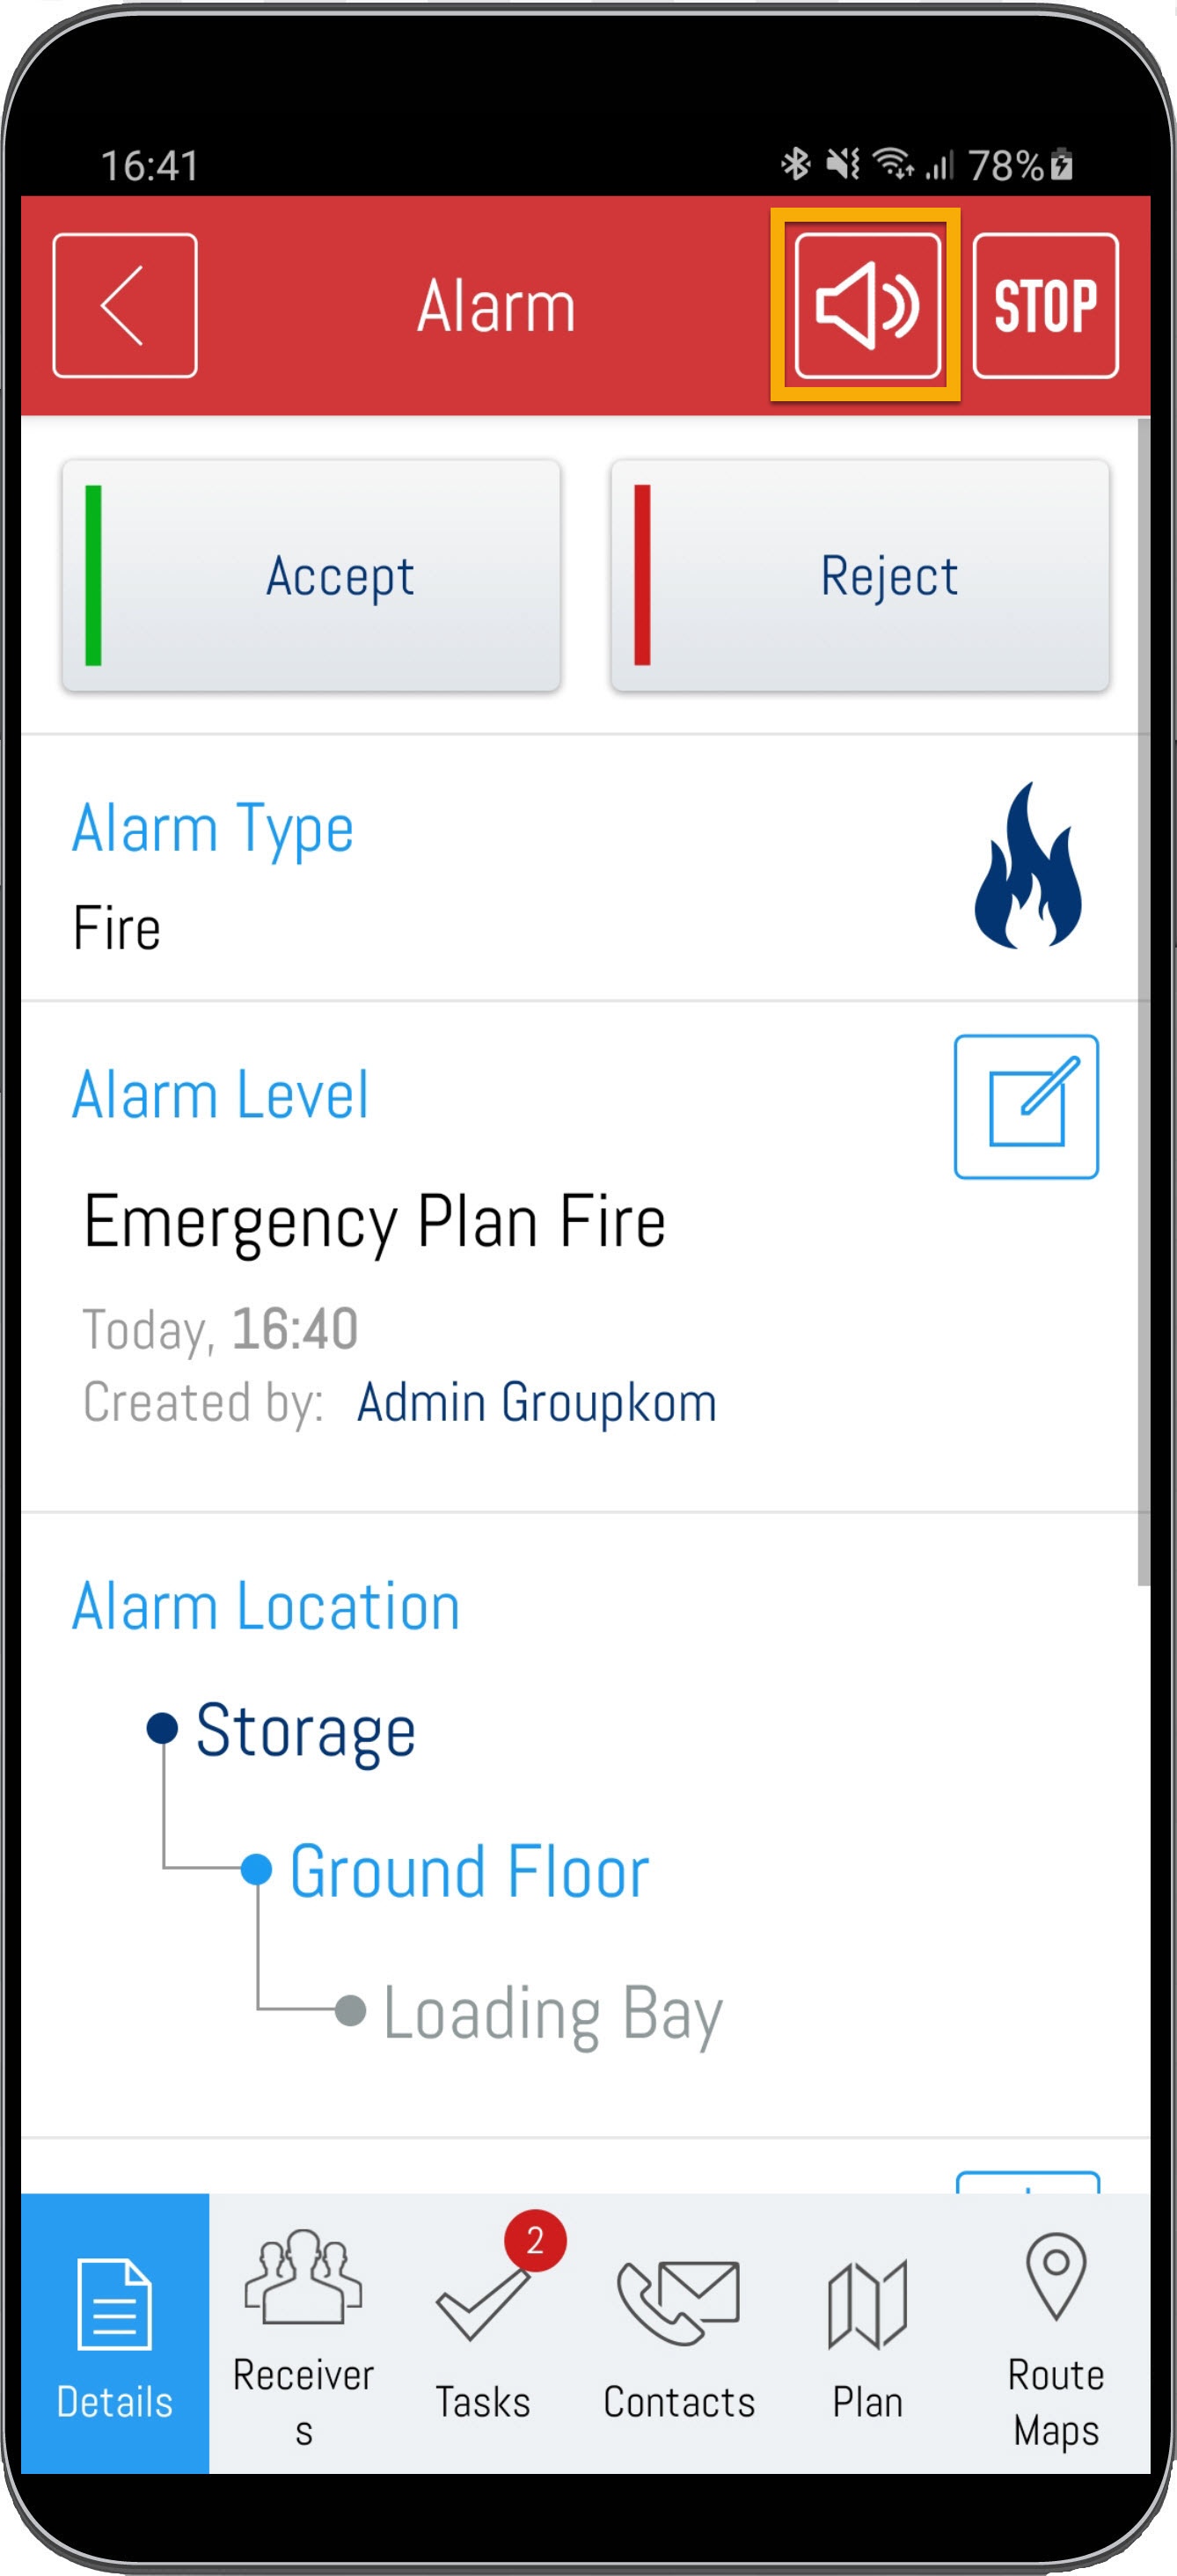
In addition, you have the option of accept or reject the alarm. Every responsible person knows at any time who is actively working on the emergency process. As a result, redundant actions can be prevented.
There is also the option to change your confirmation status, for example from "Reject" to "Accept".
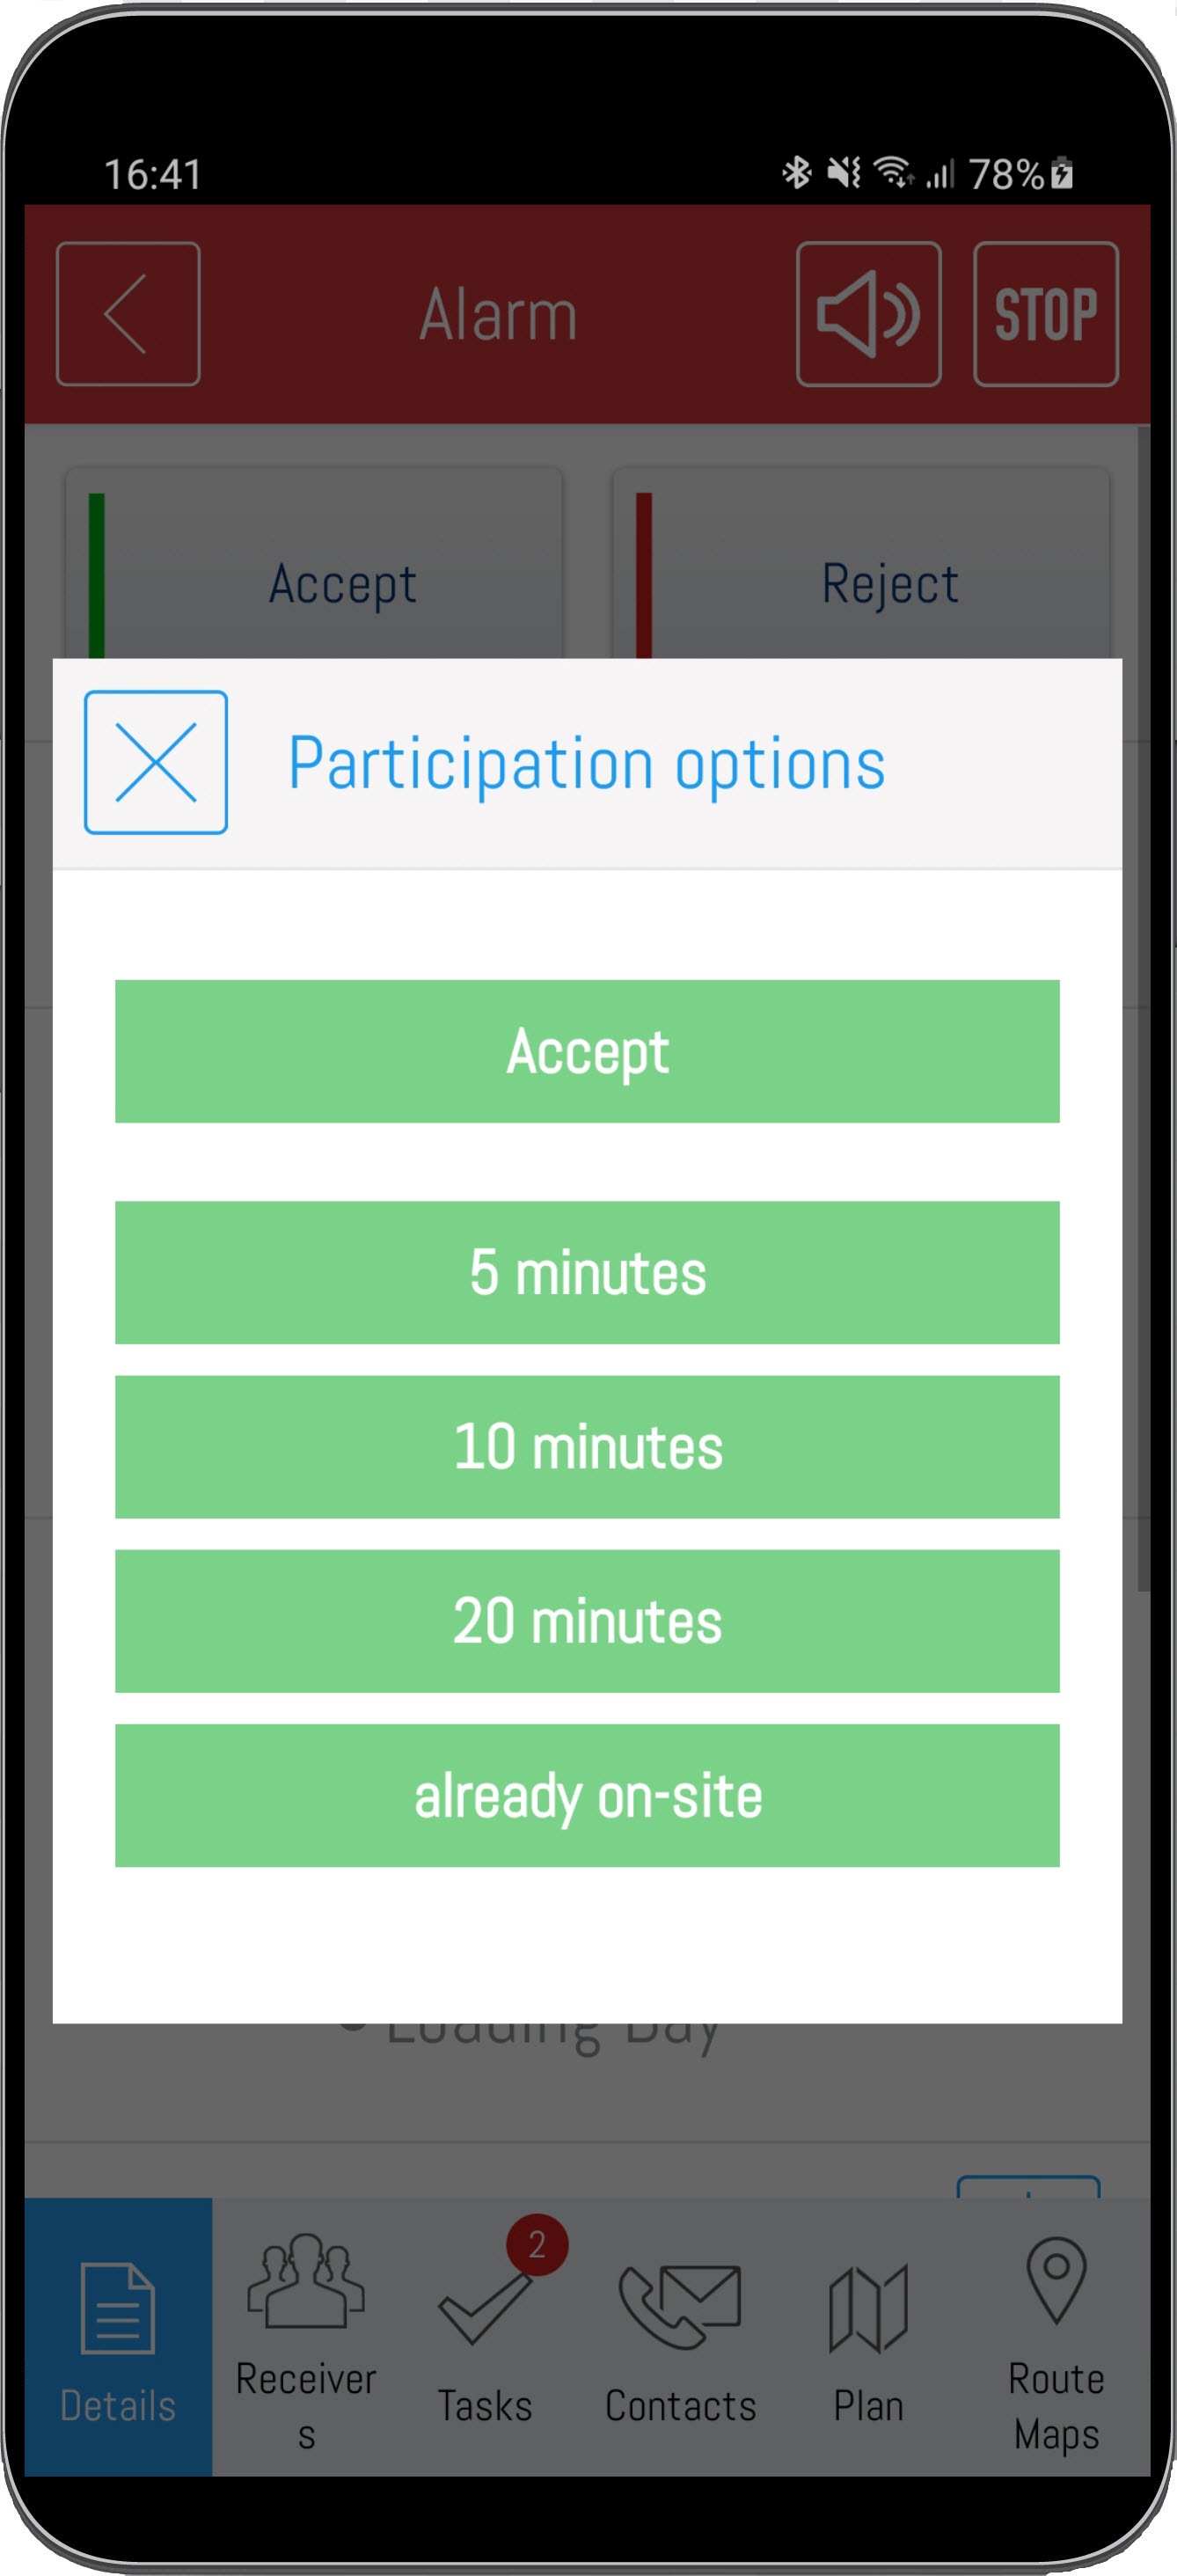
The configured "participation options" getting displayed by pressing the "Accept button" and selected by "Longpress". Informations about setting up participation options, you can find here.
Additionally you have the option to set the alarm to "silent", "loud" or "vibrate" mode. You can select this modes by pressing the "Speaker symbol" next to the "Stop button" several times.
| Warnung |
|---|
Handle the deactivation of the acoustic alarmsignal with care. In this case, you will no longer receive an alarmsignal and have the risk of missing important changes from the alarm. |
Additional information helps to give a quick overview of the important questions in the event of an alarm. You can add and update these question with the "Edit Symbol". So everyone can follow the event live and see any updated information from the additional questions. It helps to react correctly at the right time.
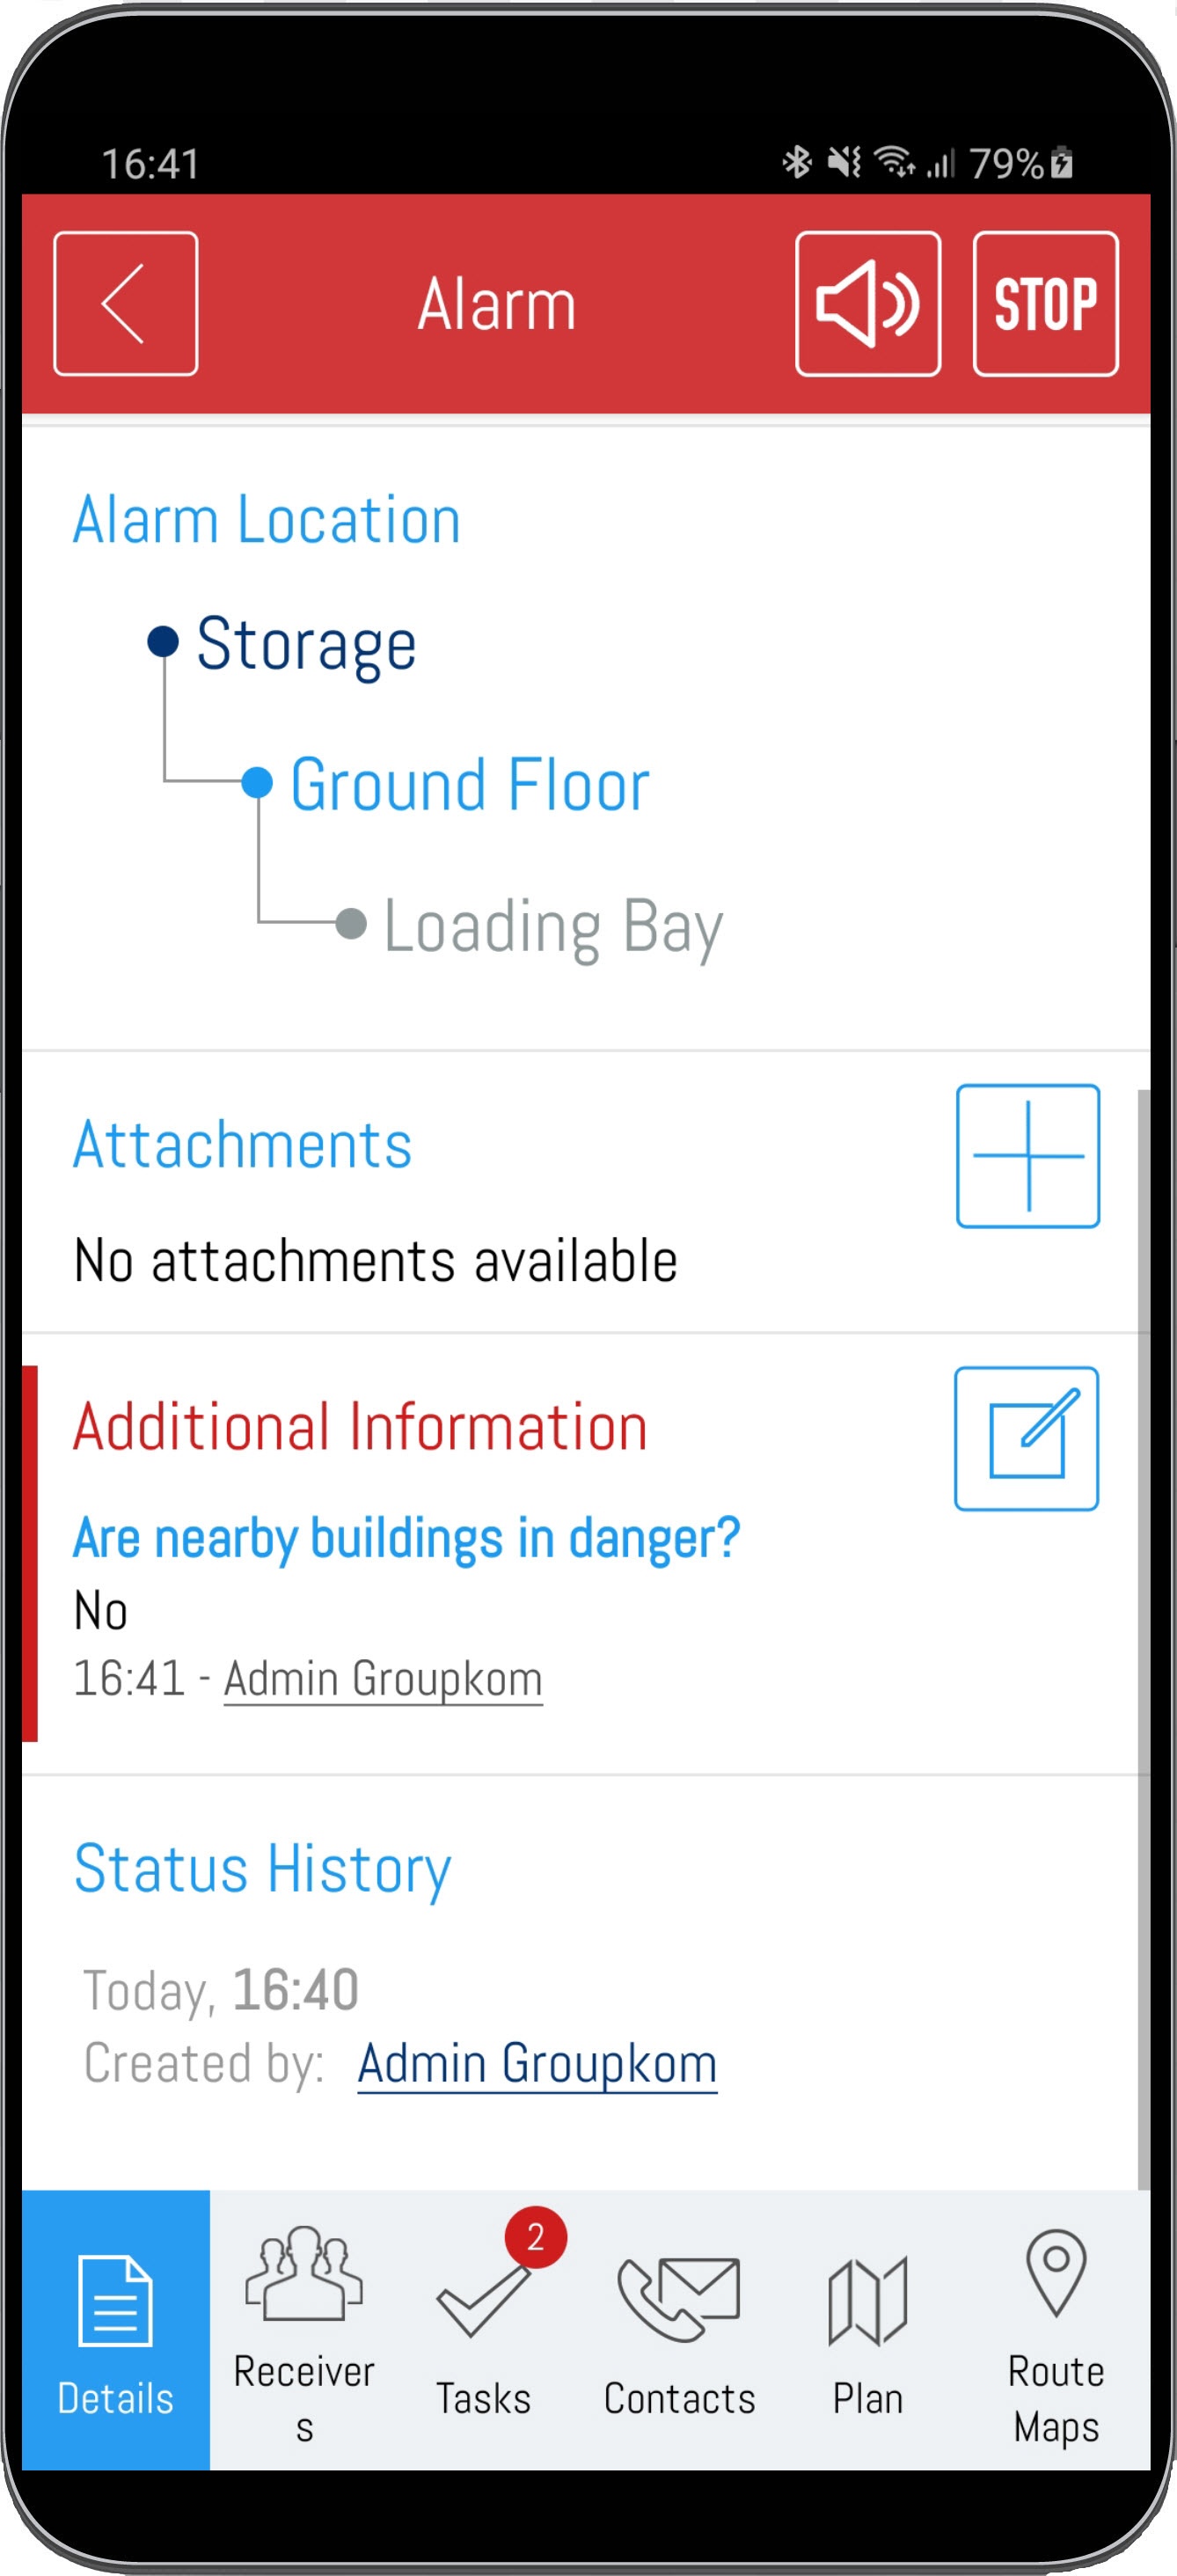
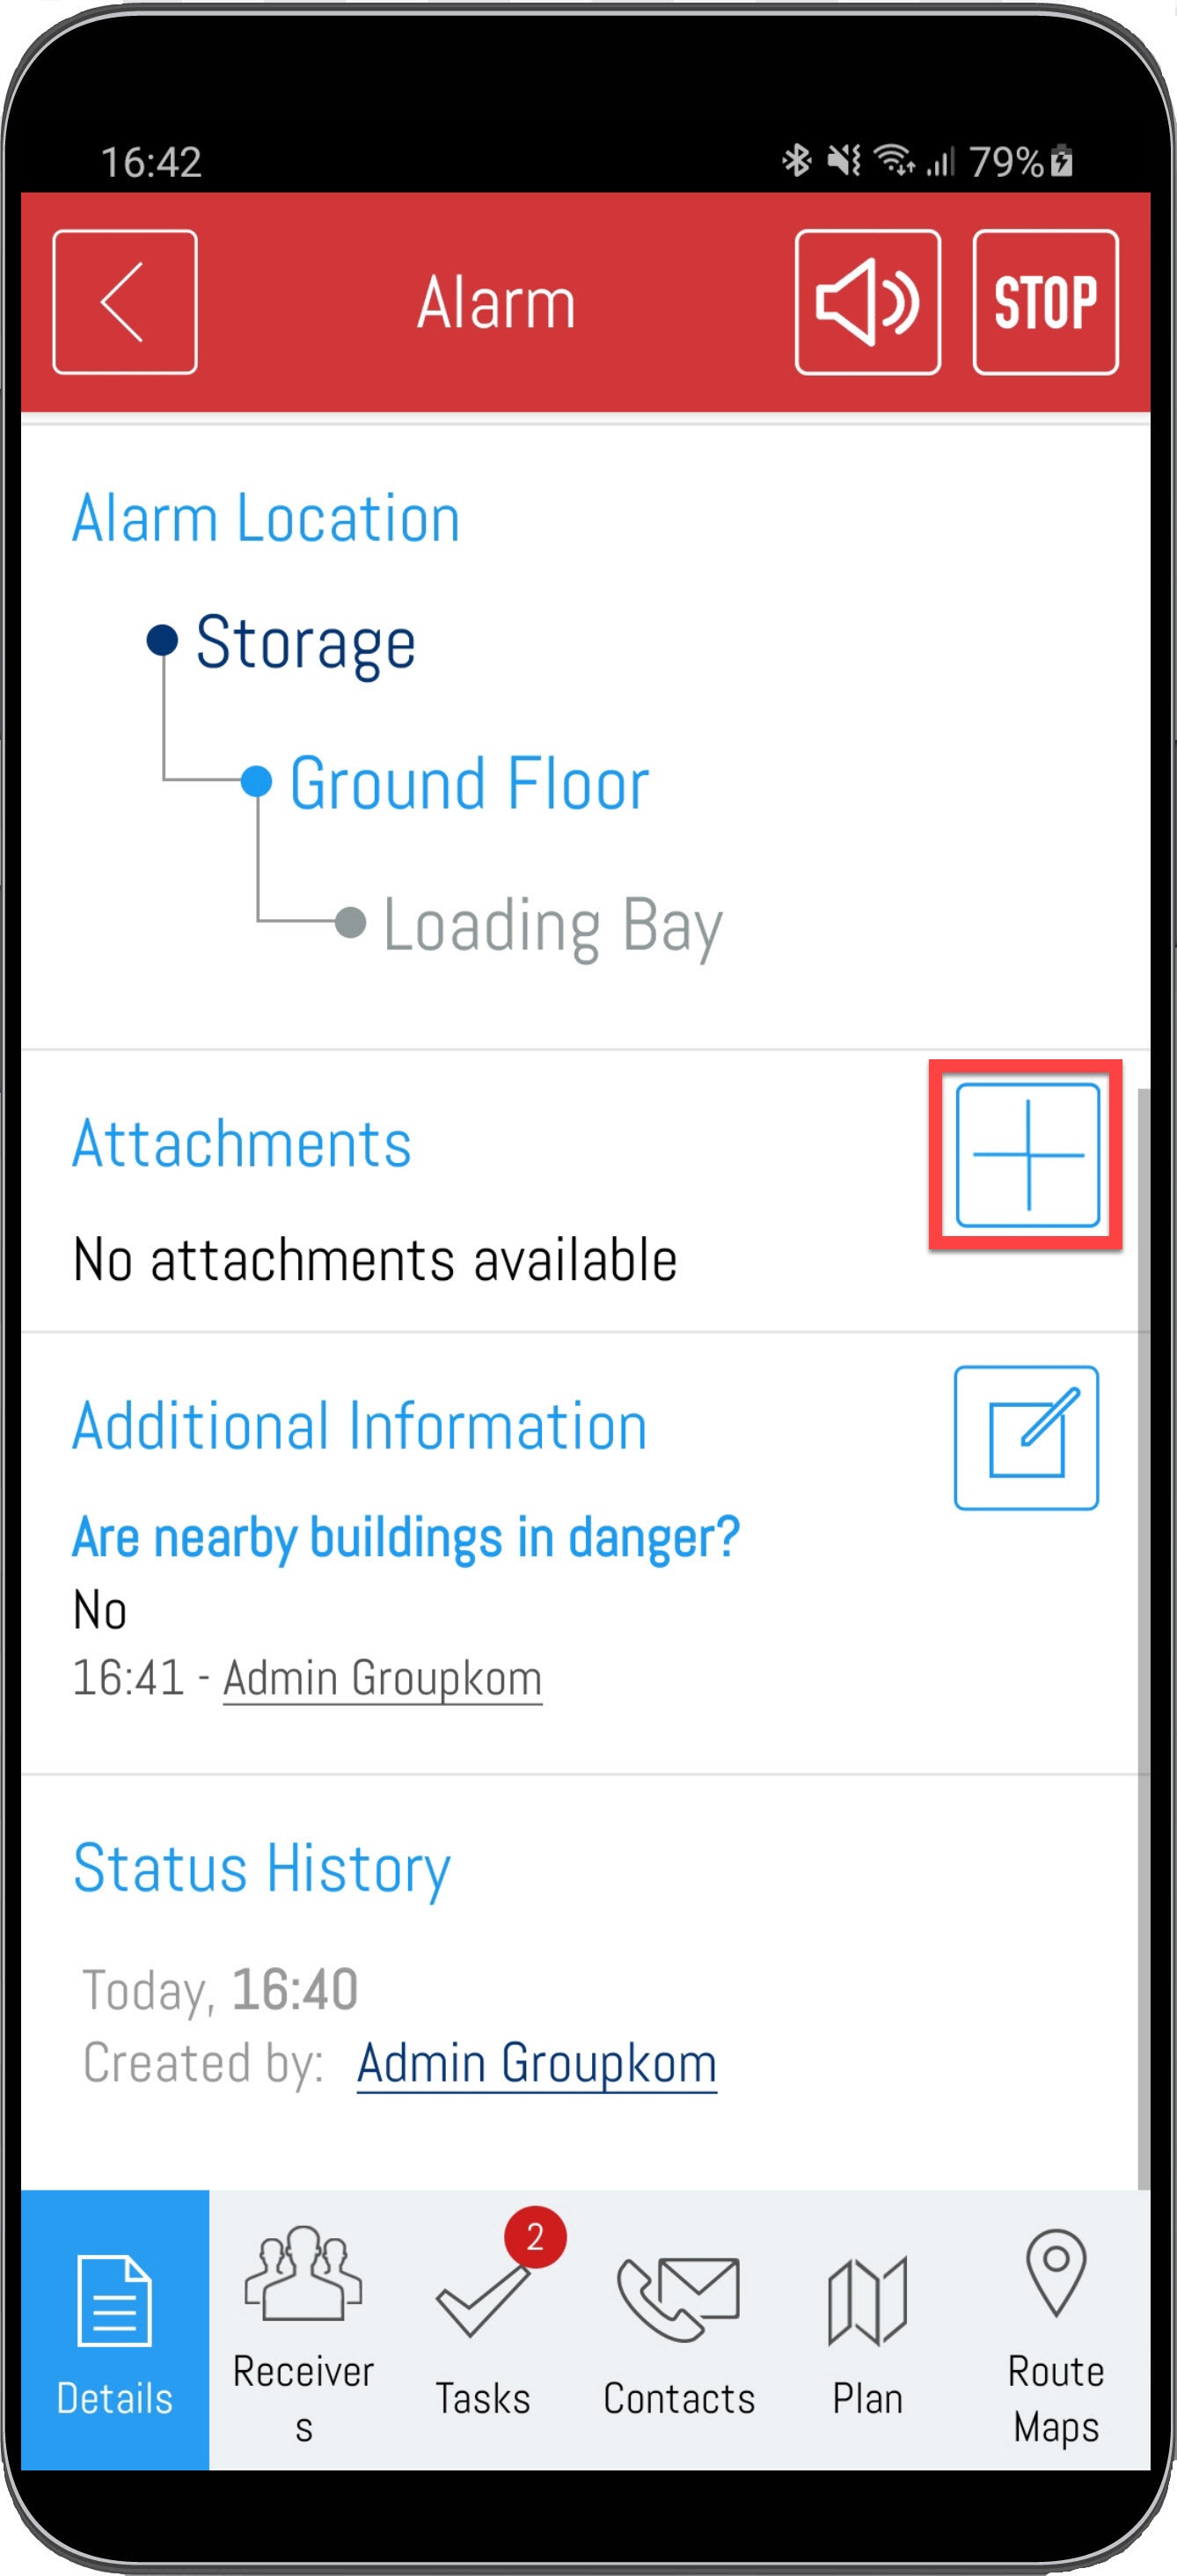
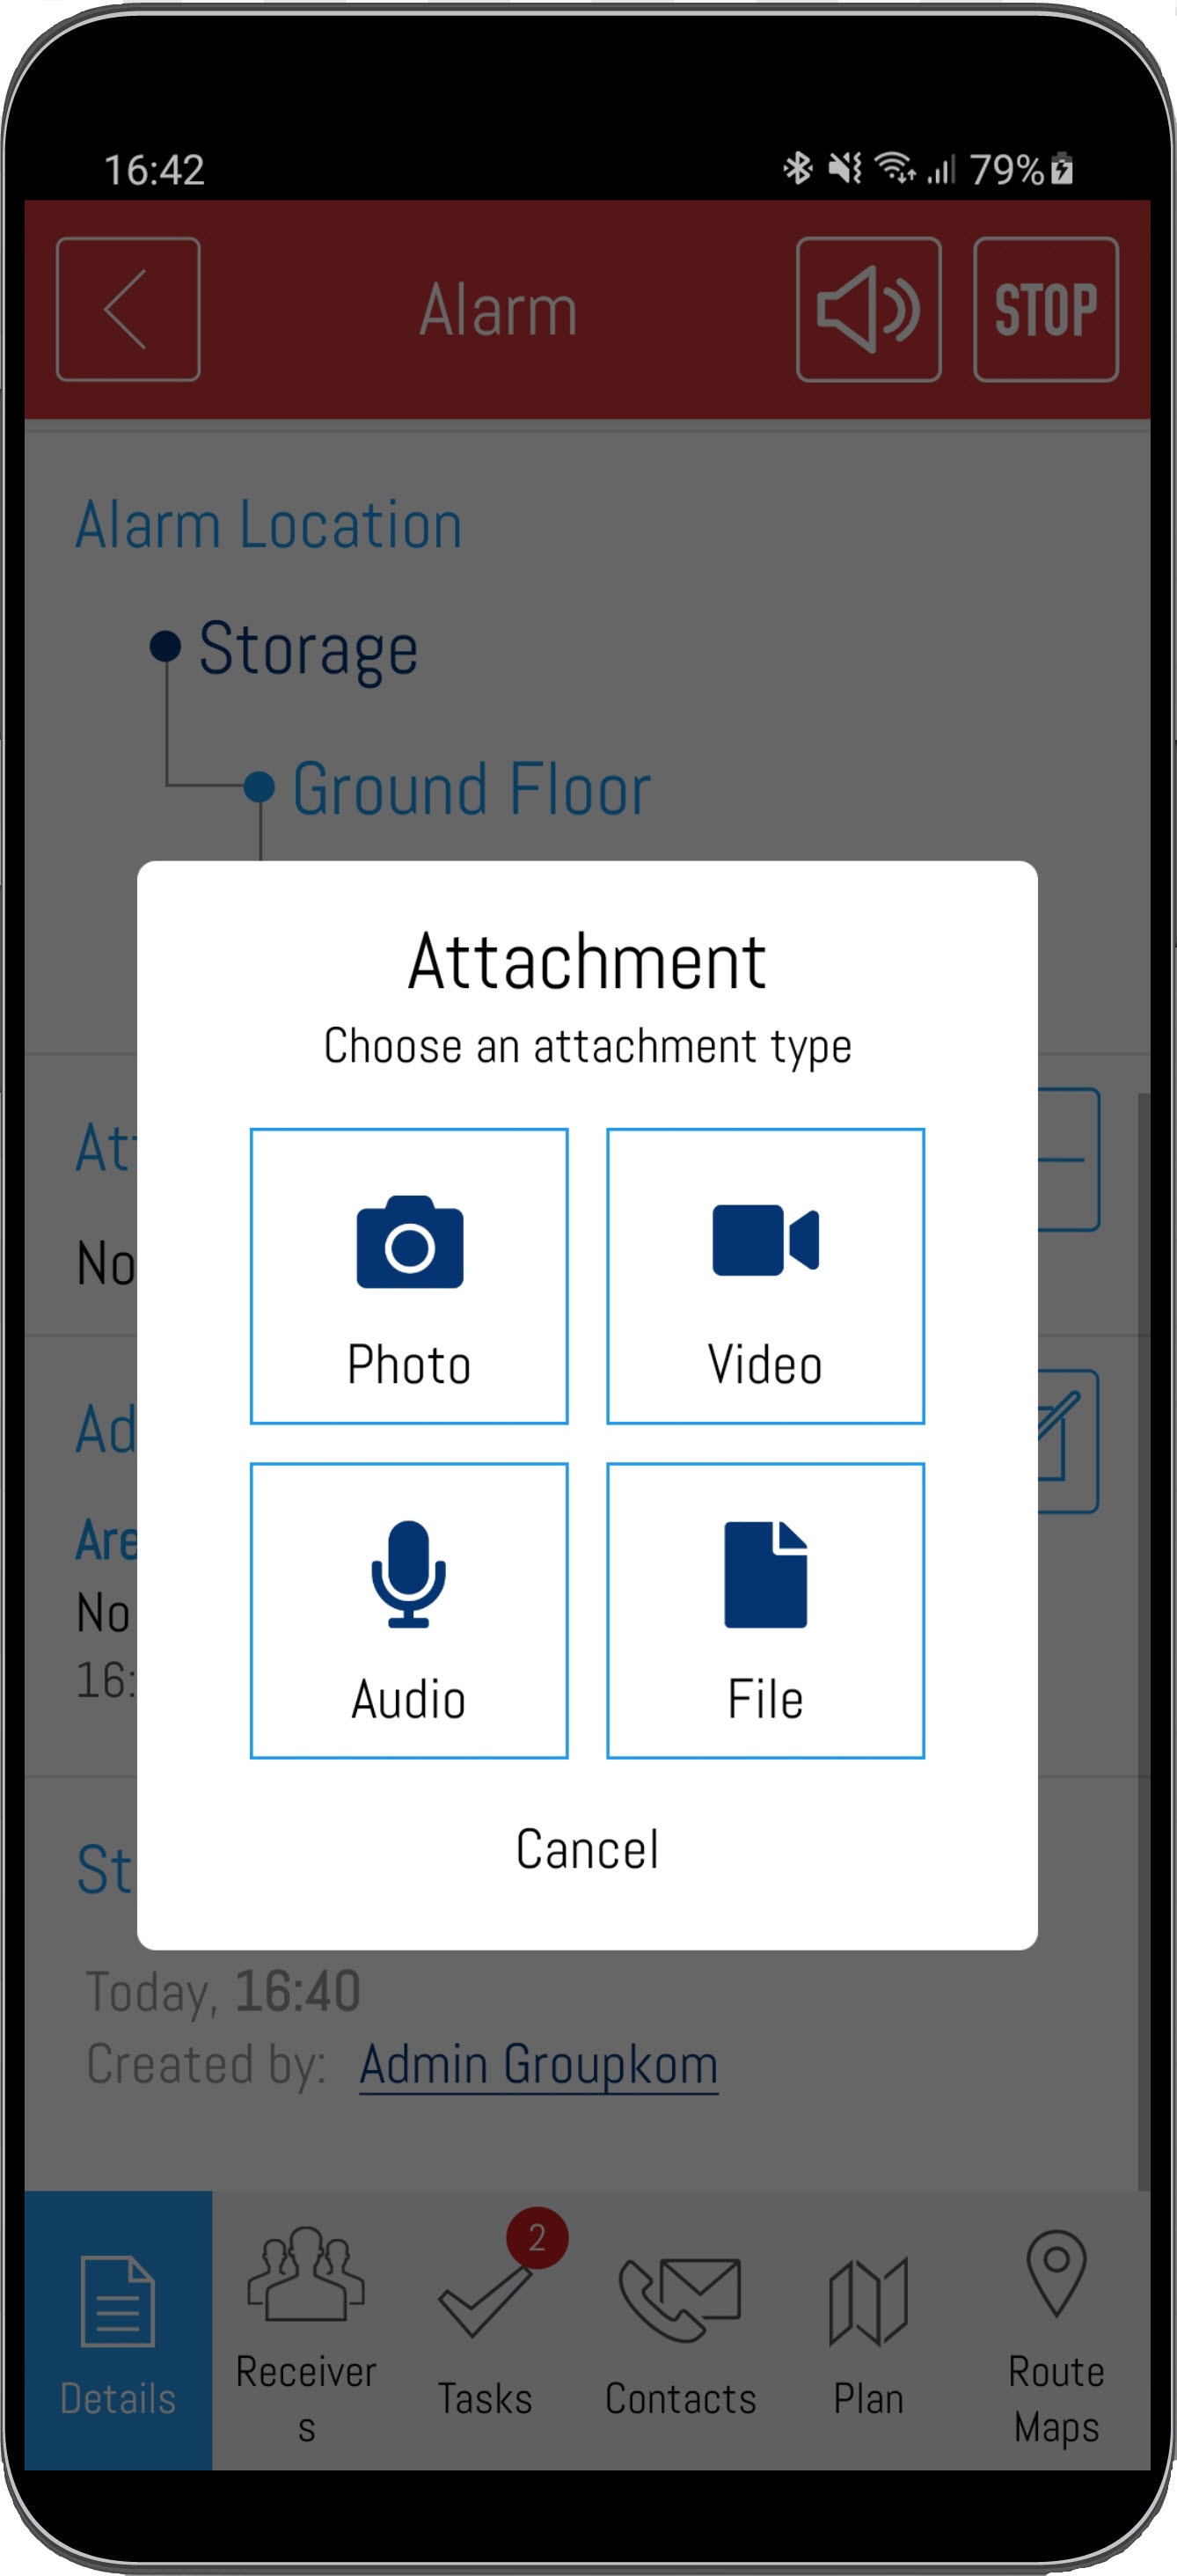
With the "Plus" symbol you can add attachments in various file formats to the active alarm. You can also create voice messages, pictures and videos to upload them as attachments.
| Info |
|---|
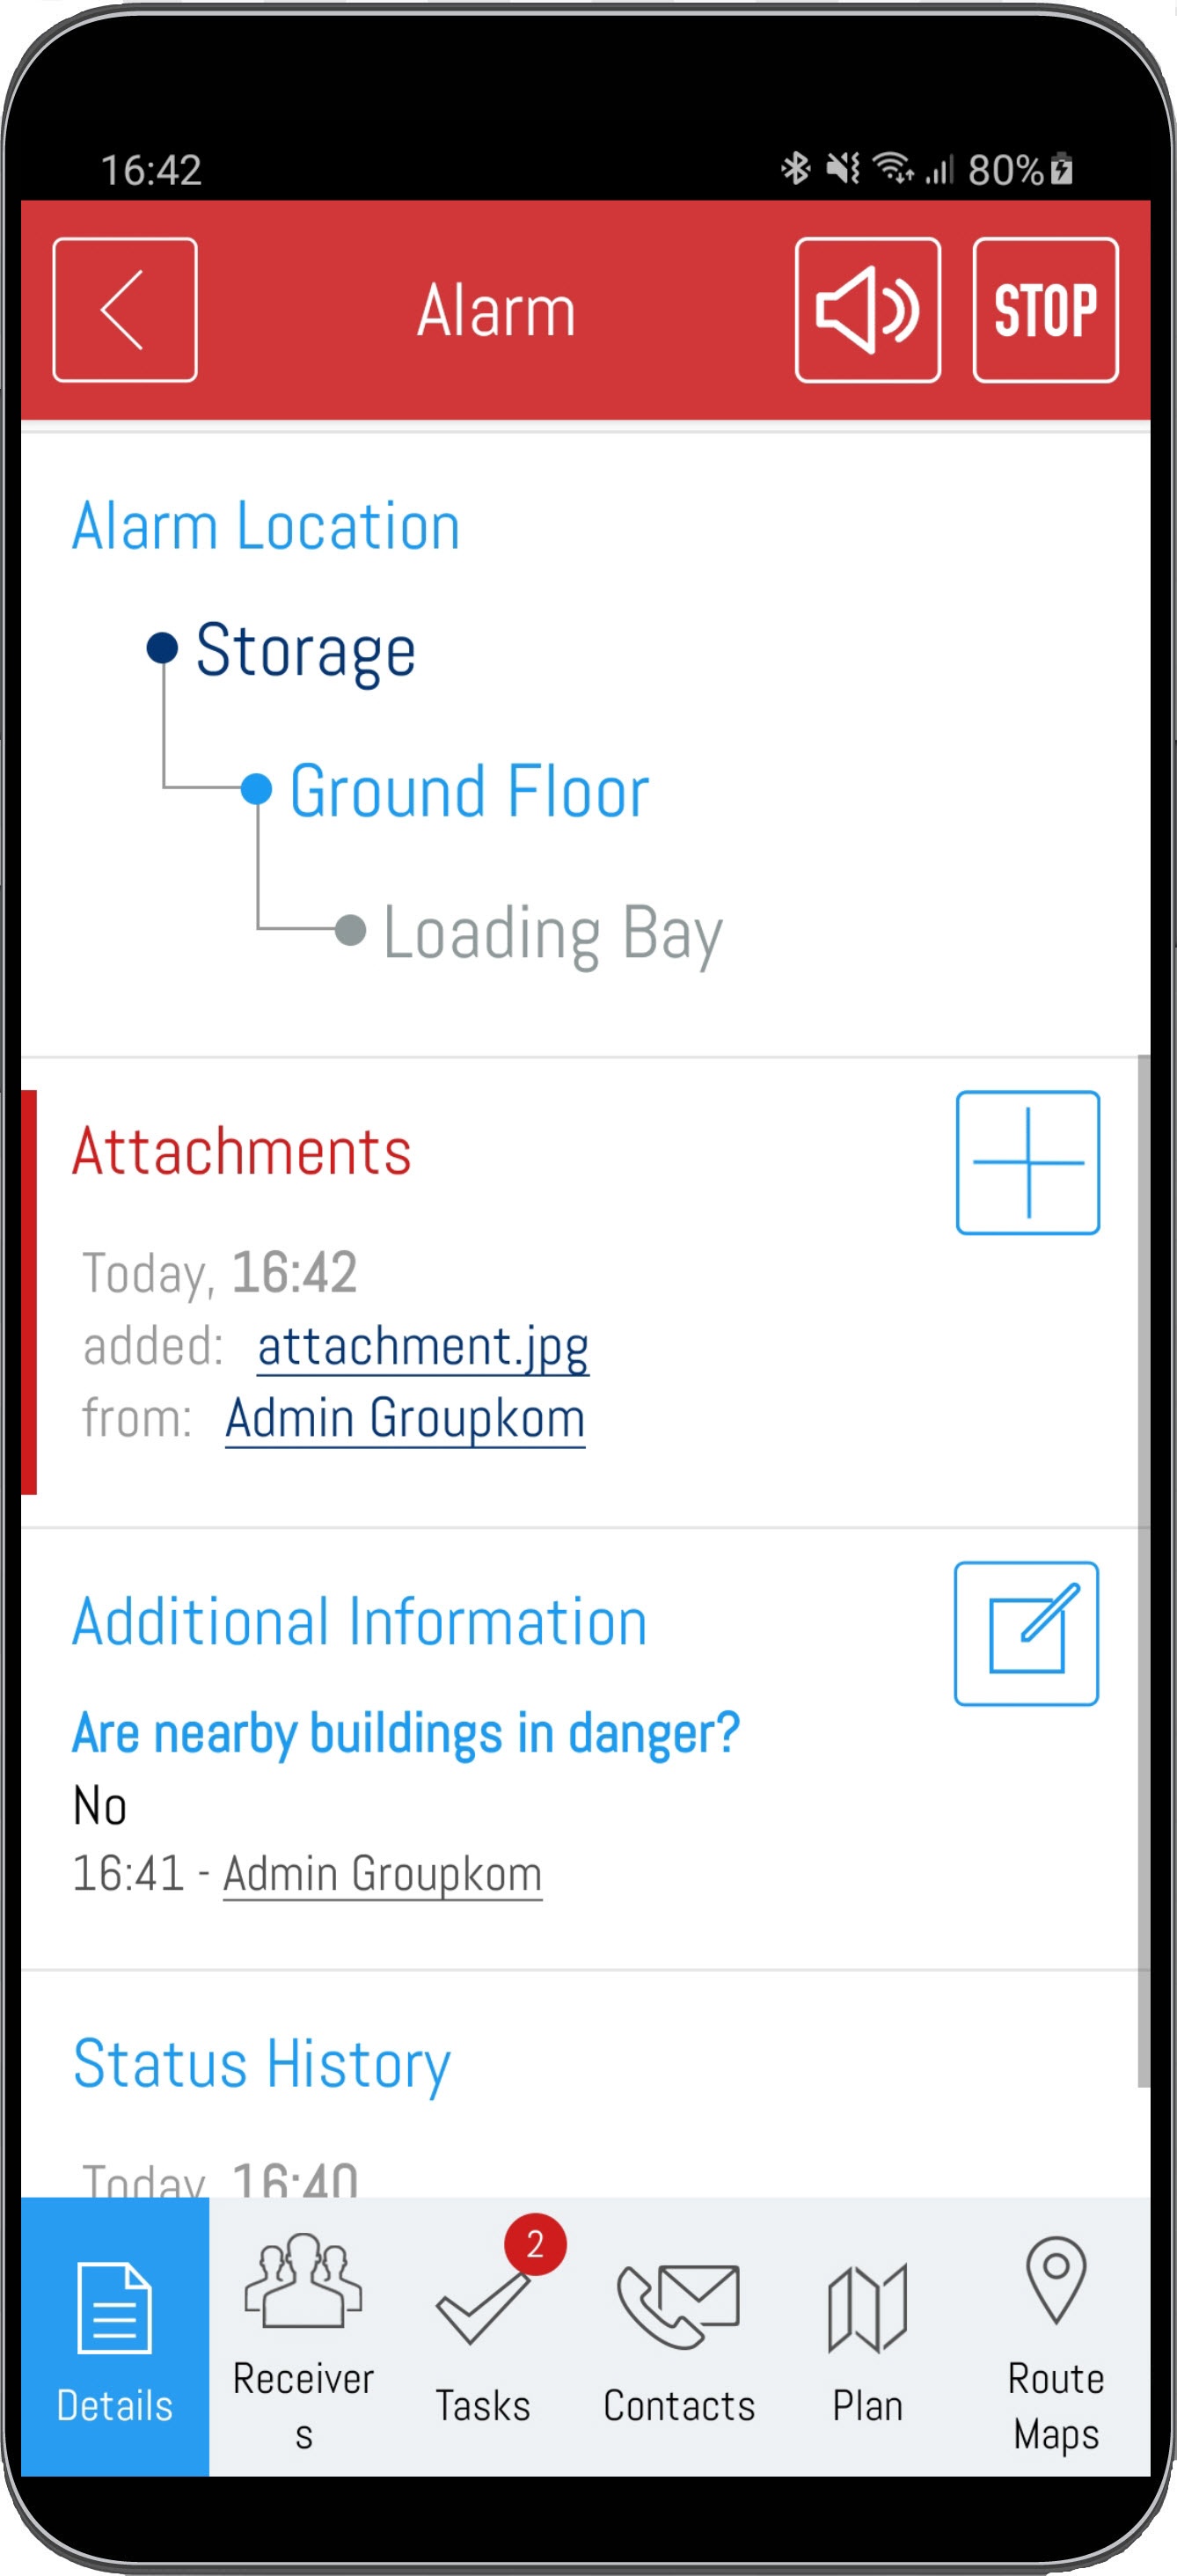
After uploading, the attachments are automatically distributed to all alarm recipients and are available for them. |
After uploading, you can view the attachment by pressing the corresponding attachment.
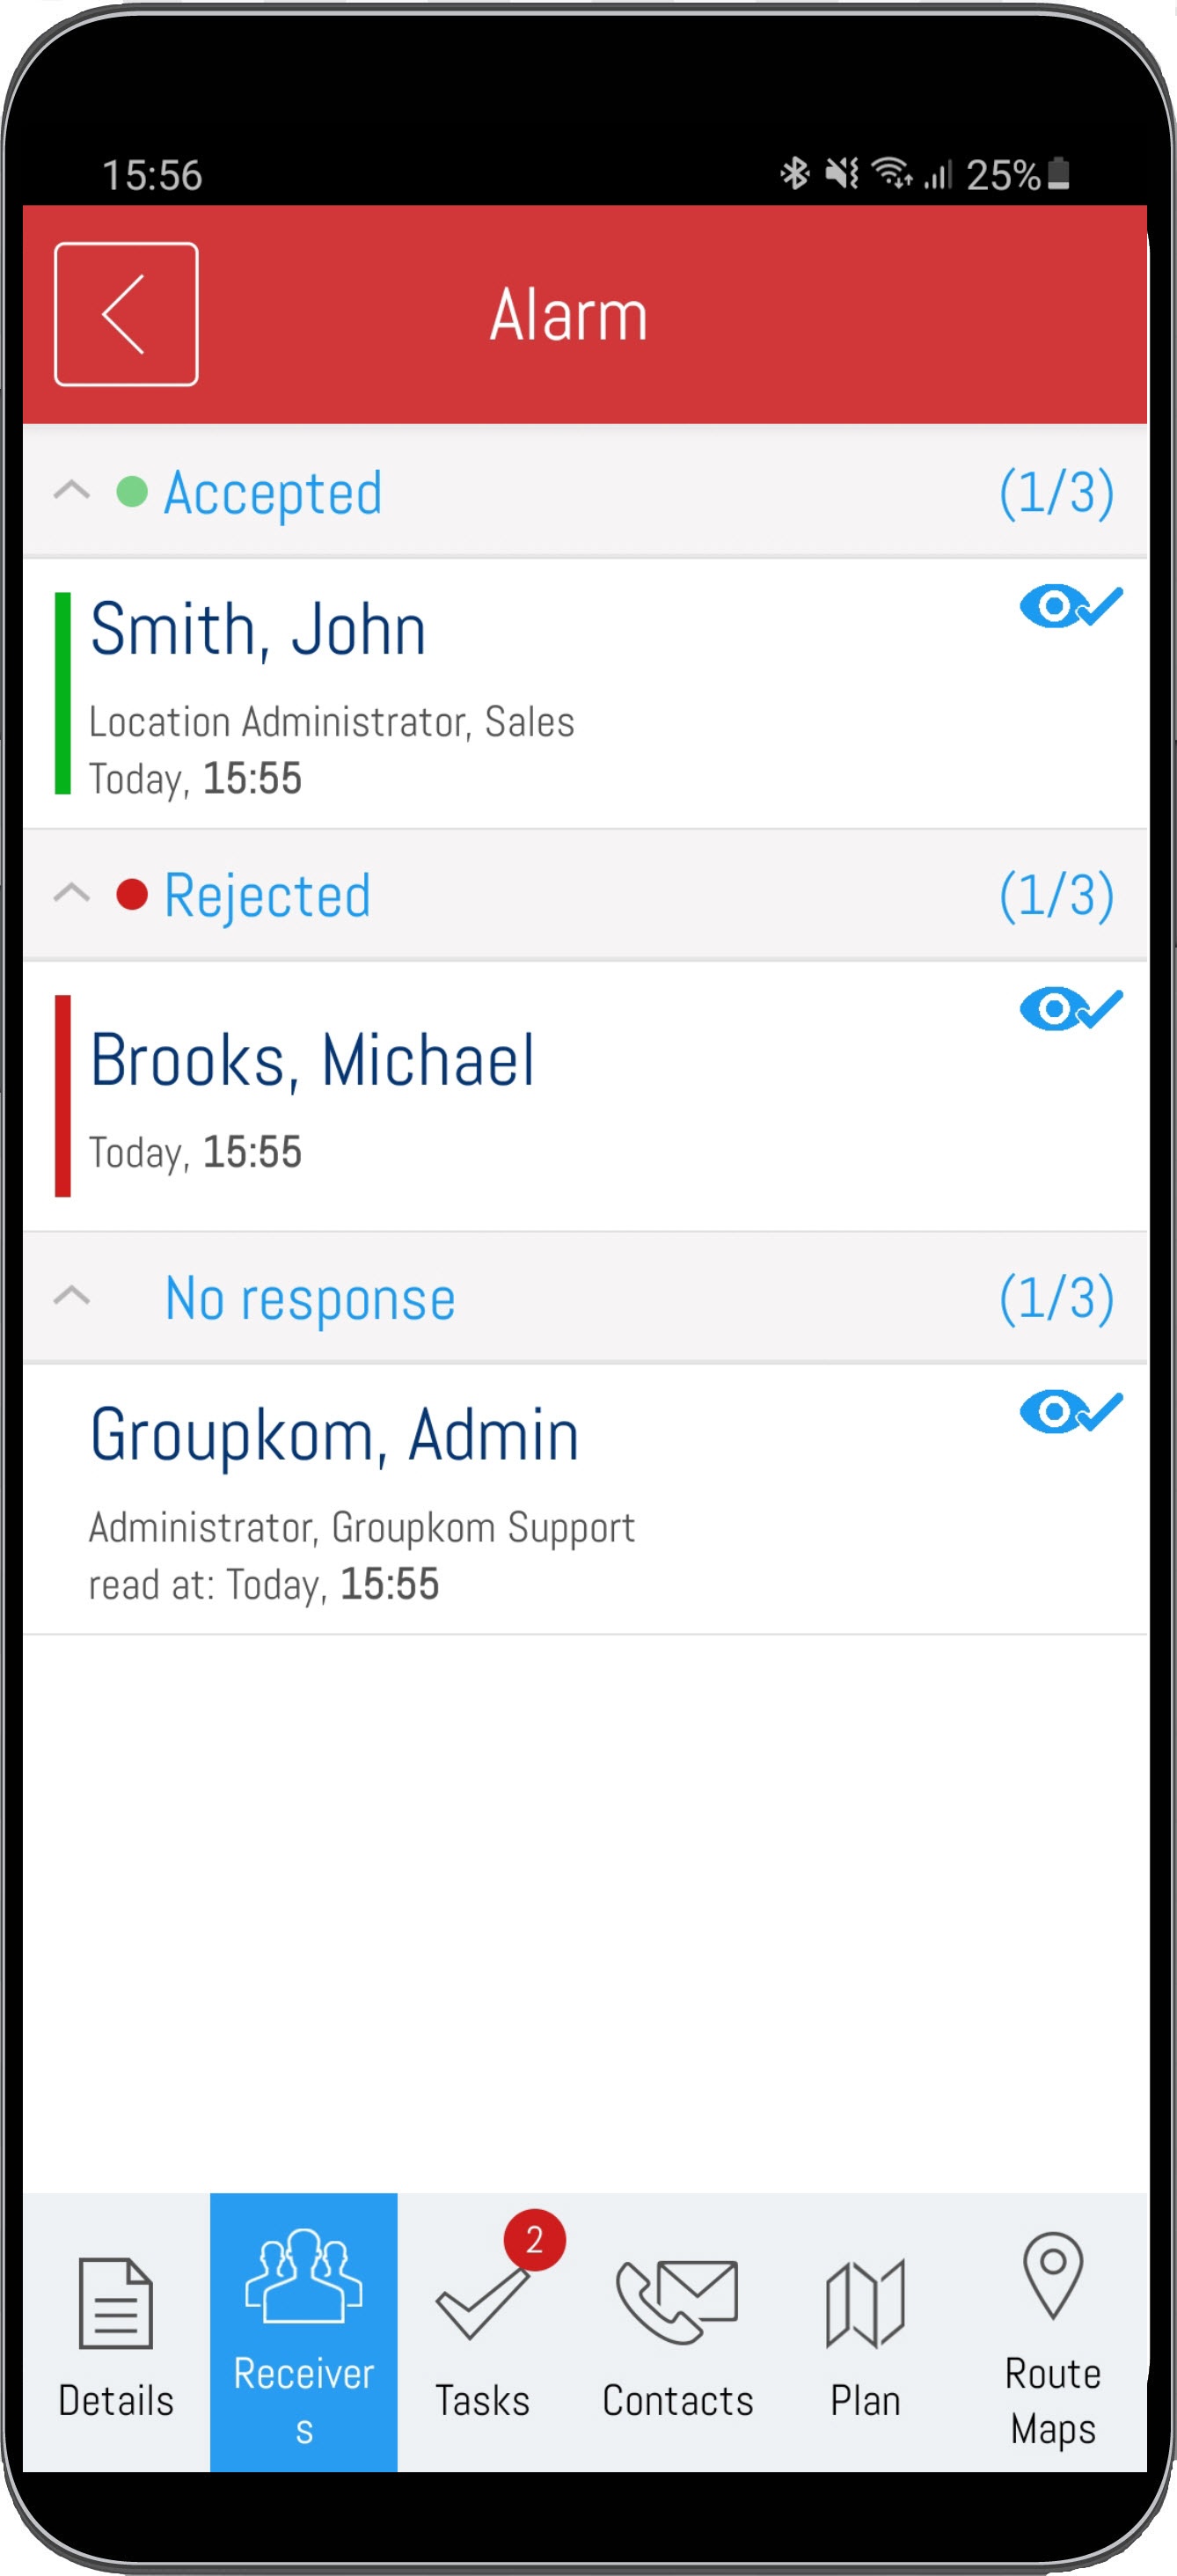
Under recievers you can see which users have accepted or rejected the alert. Beside the displaying of the response information, the lists for "Accept", "Reject" and "No response" are foldable and show the number of receivers of every list on the right site.
The eye icon at the right edge of the contacts indicates, moreover, whether the user has already seen the alert. More detailes informations about the reading confirmations, you can finde here.
To access the recipient's contact information, simply click on the appropriate user.
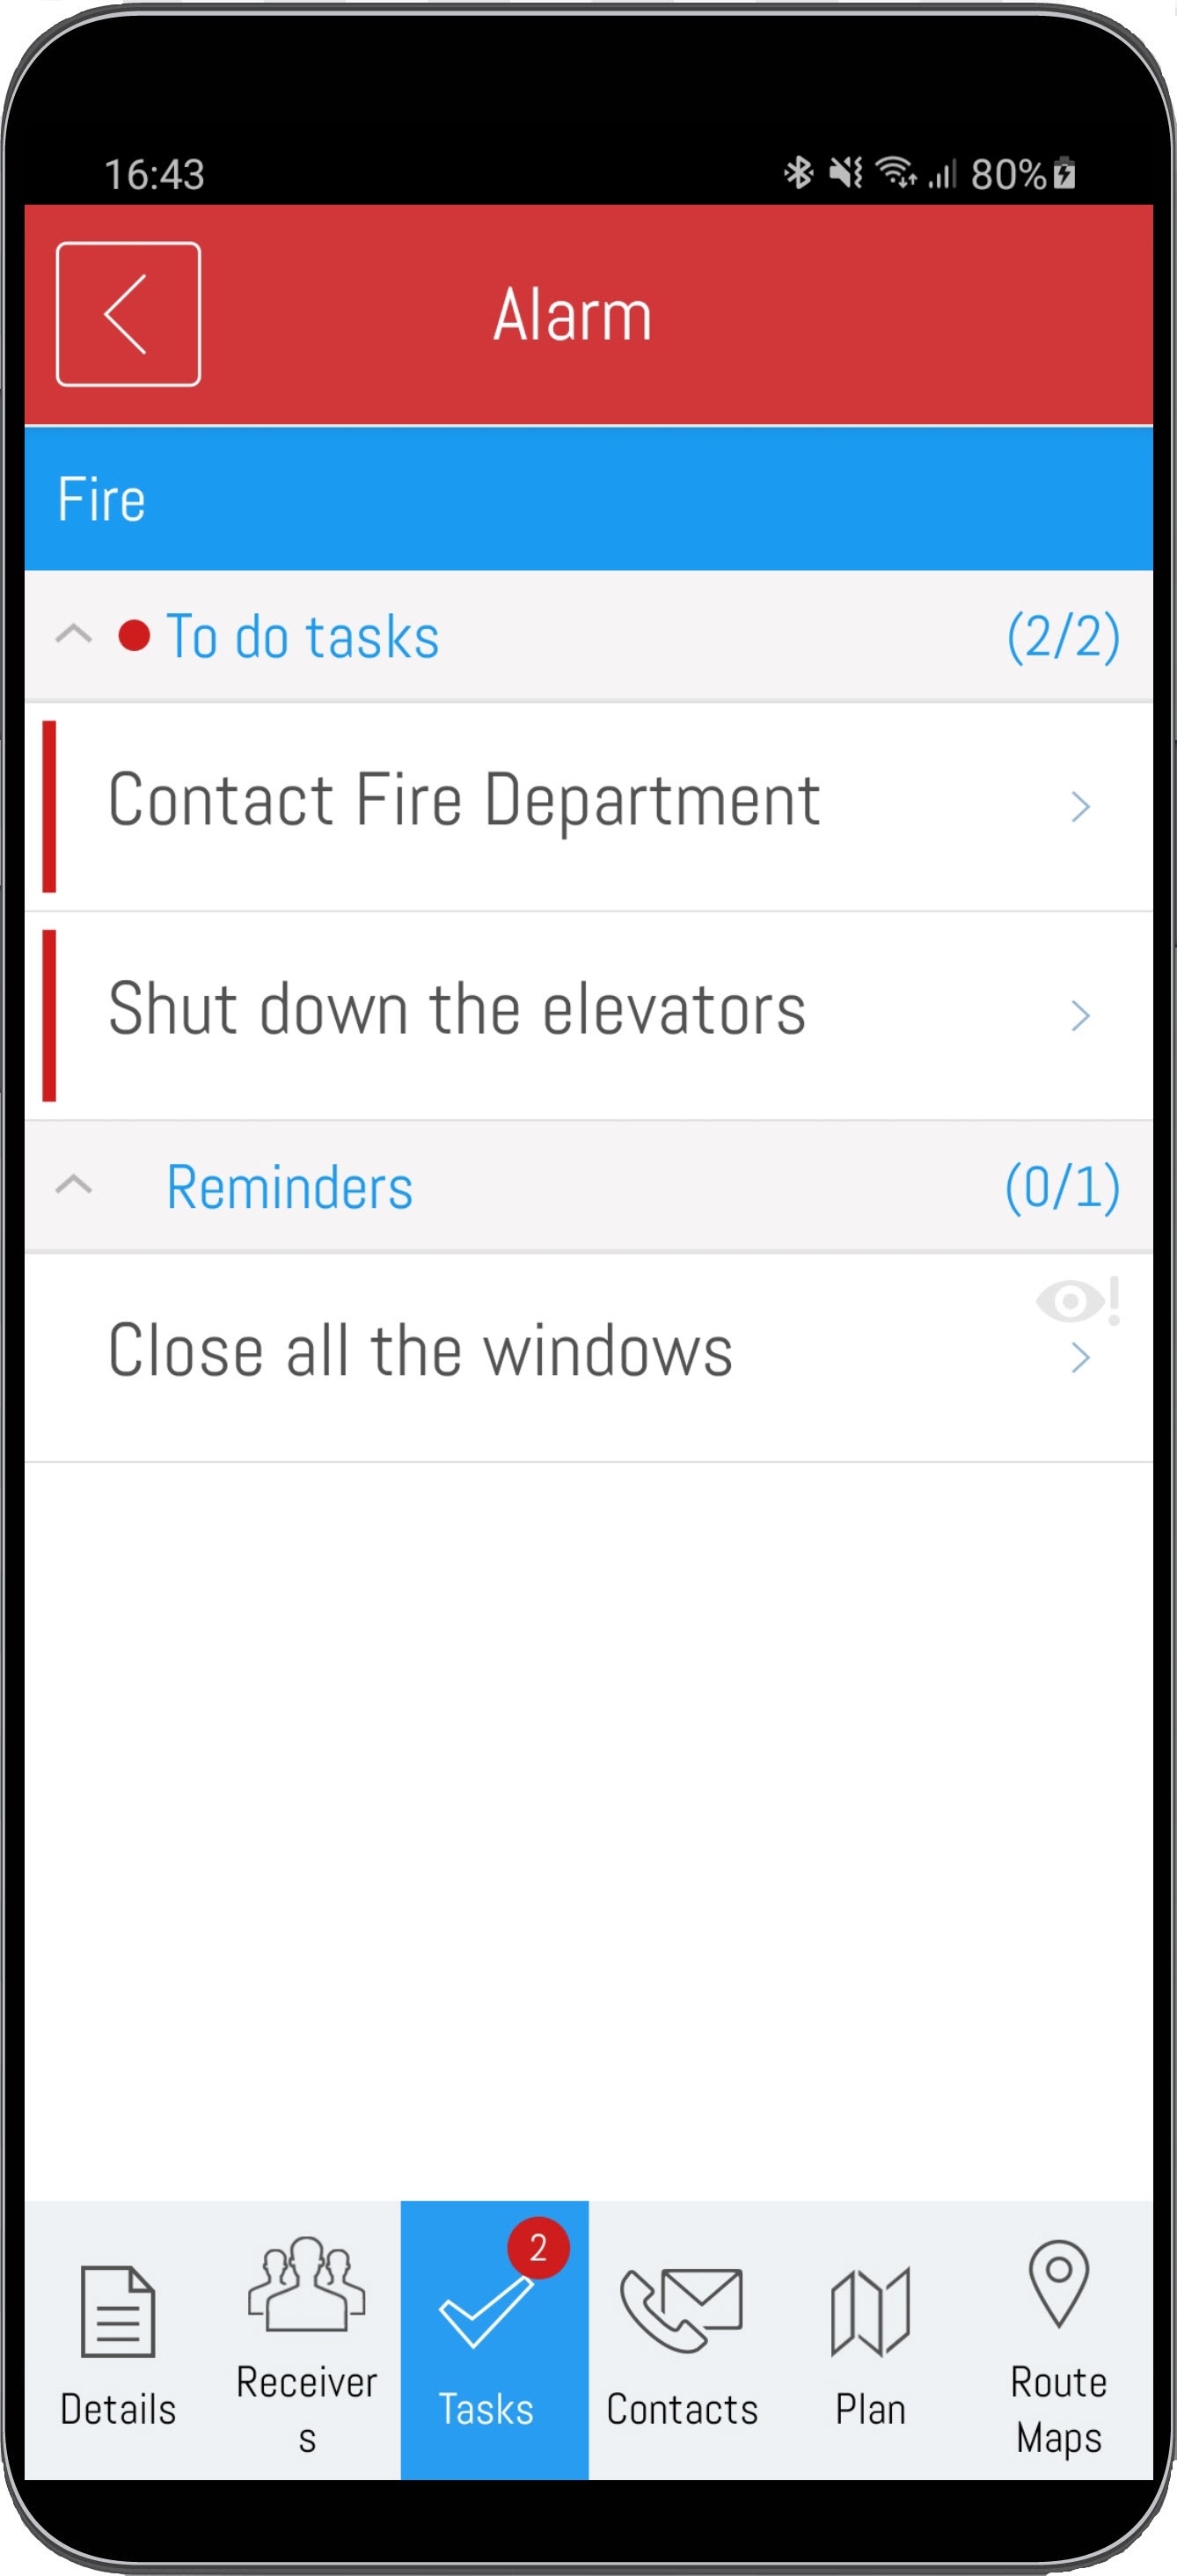
If tasks lists were desposit to you via the workflows, you can find them under Tasks. In a task list can be tasks and hints.
The completion of tasks can be done parallel by several users and the current status of the tasks gets automatically syncronized between them. Therefore all users have the current overview of the status of all task of an task list.
Hints are only displayed for every single user, to provide important and situatiuon-based informations.
If you click on a task the description and more details get displayed.
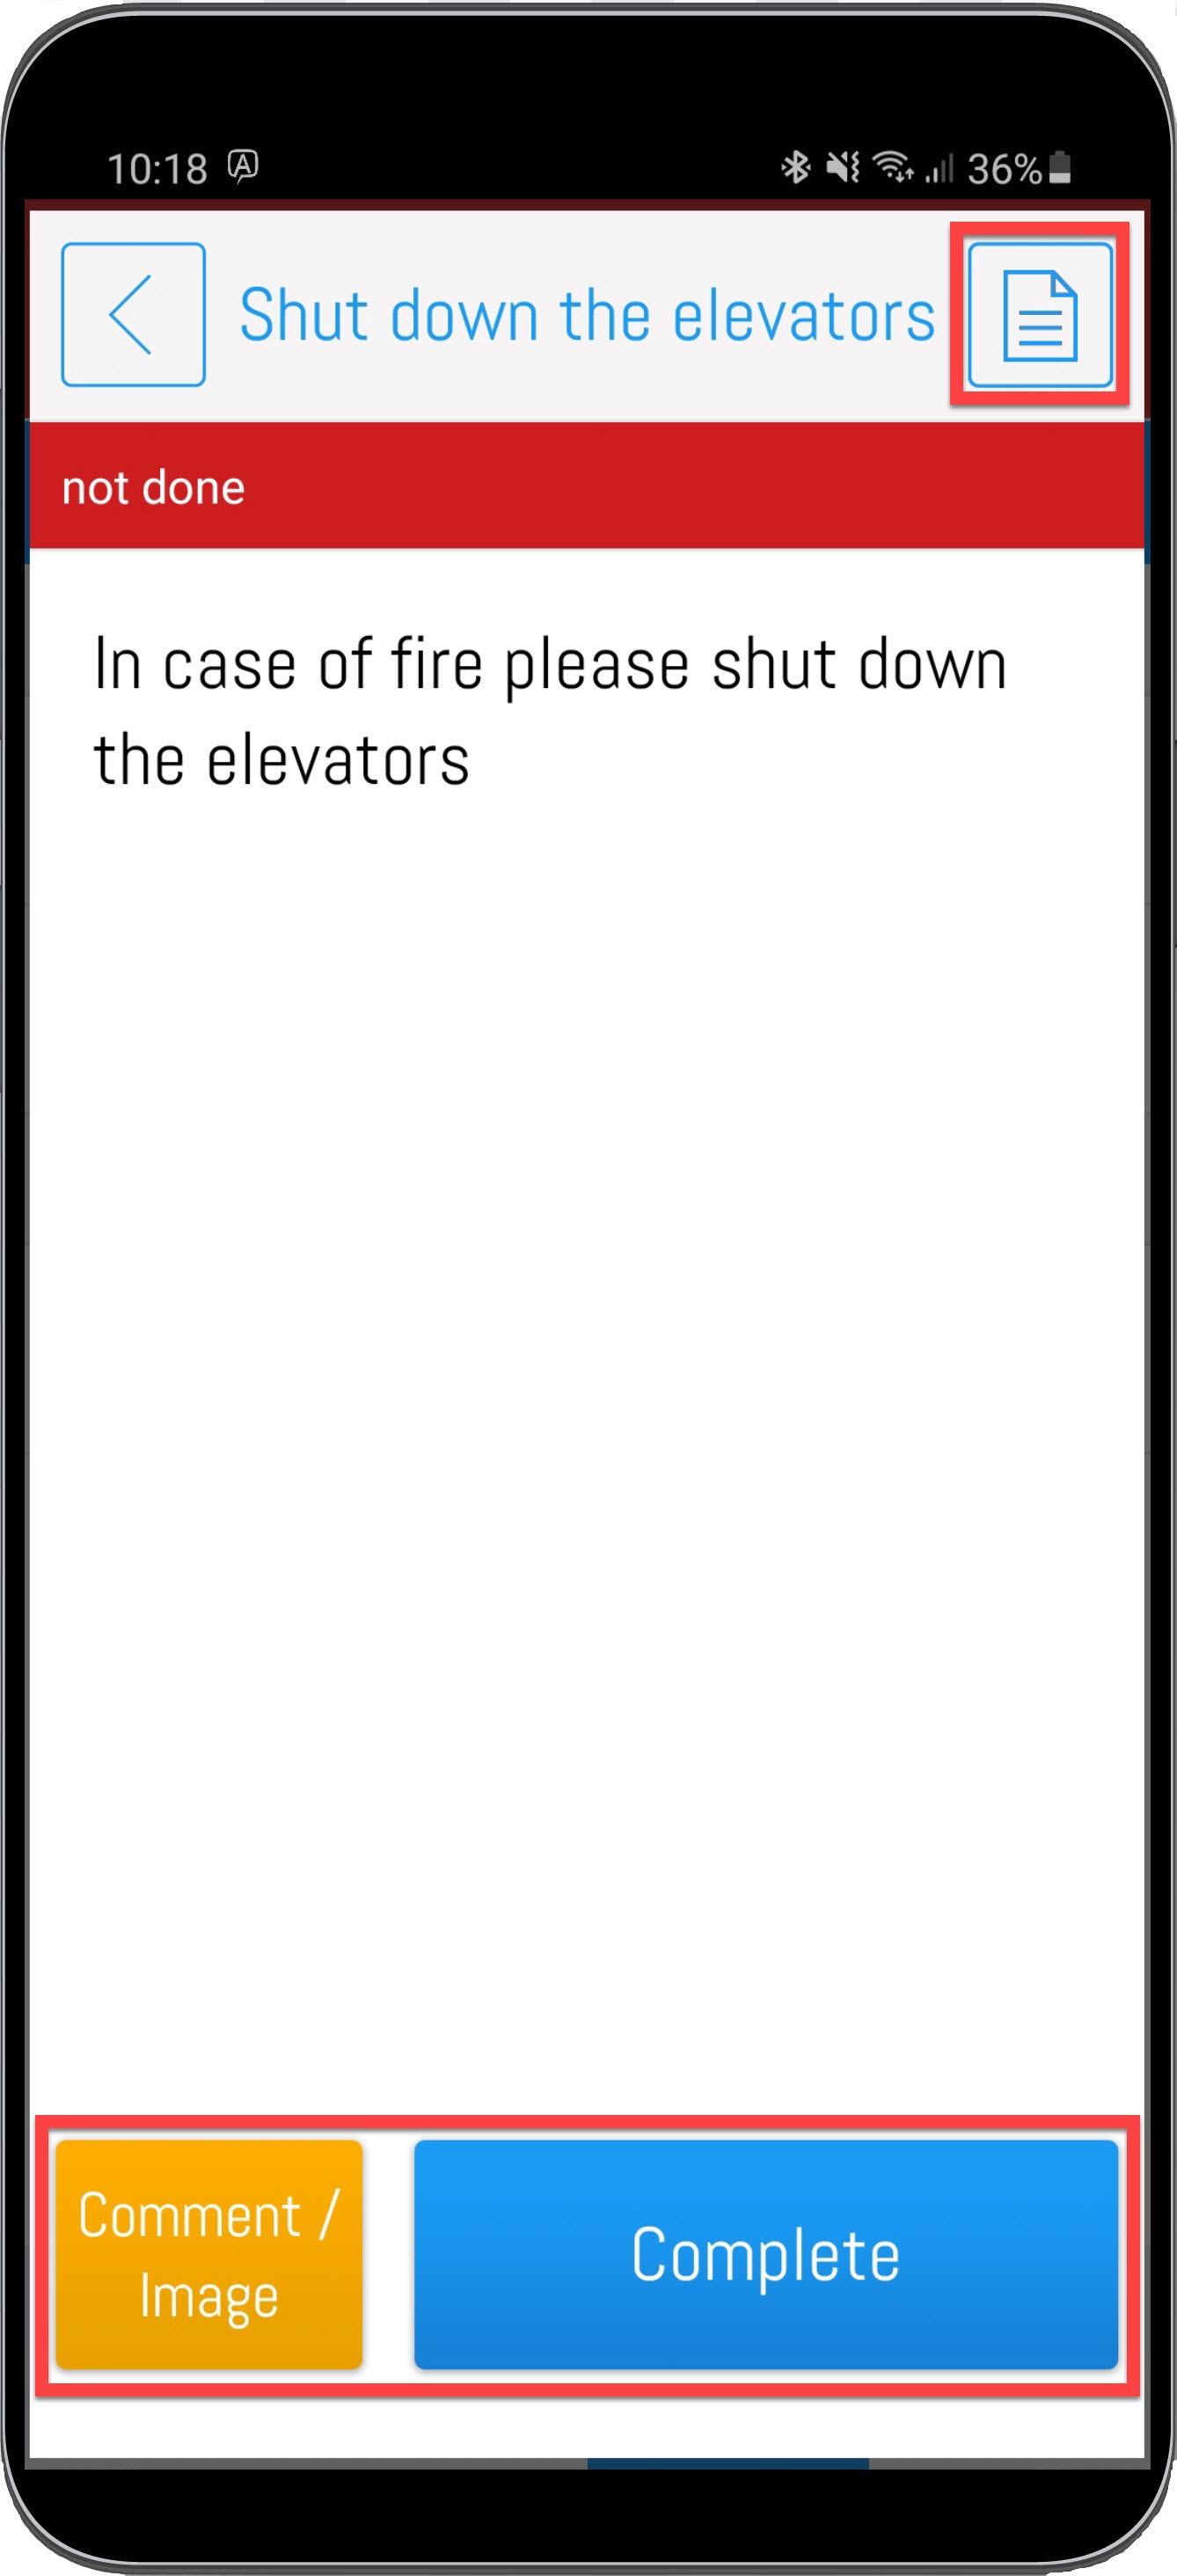
In the upper area the curent status of the task gets displayed too, in this case "not done".
If a one or more documents were attached to the task, this is indicated via the document button in the upper right corner.
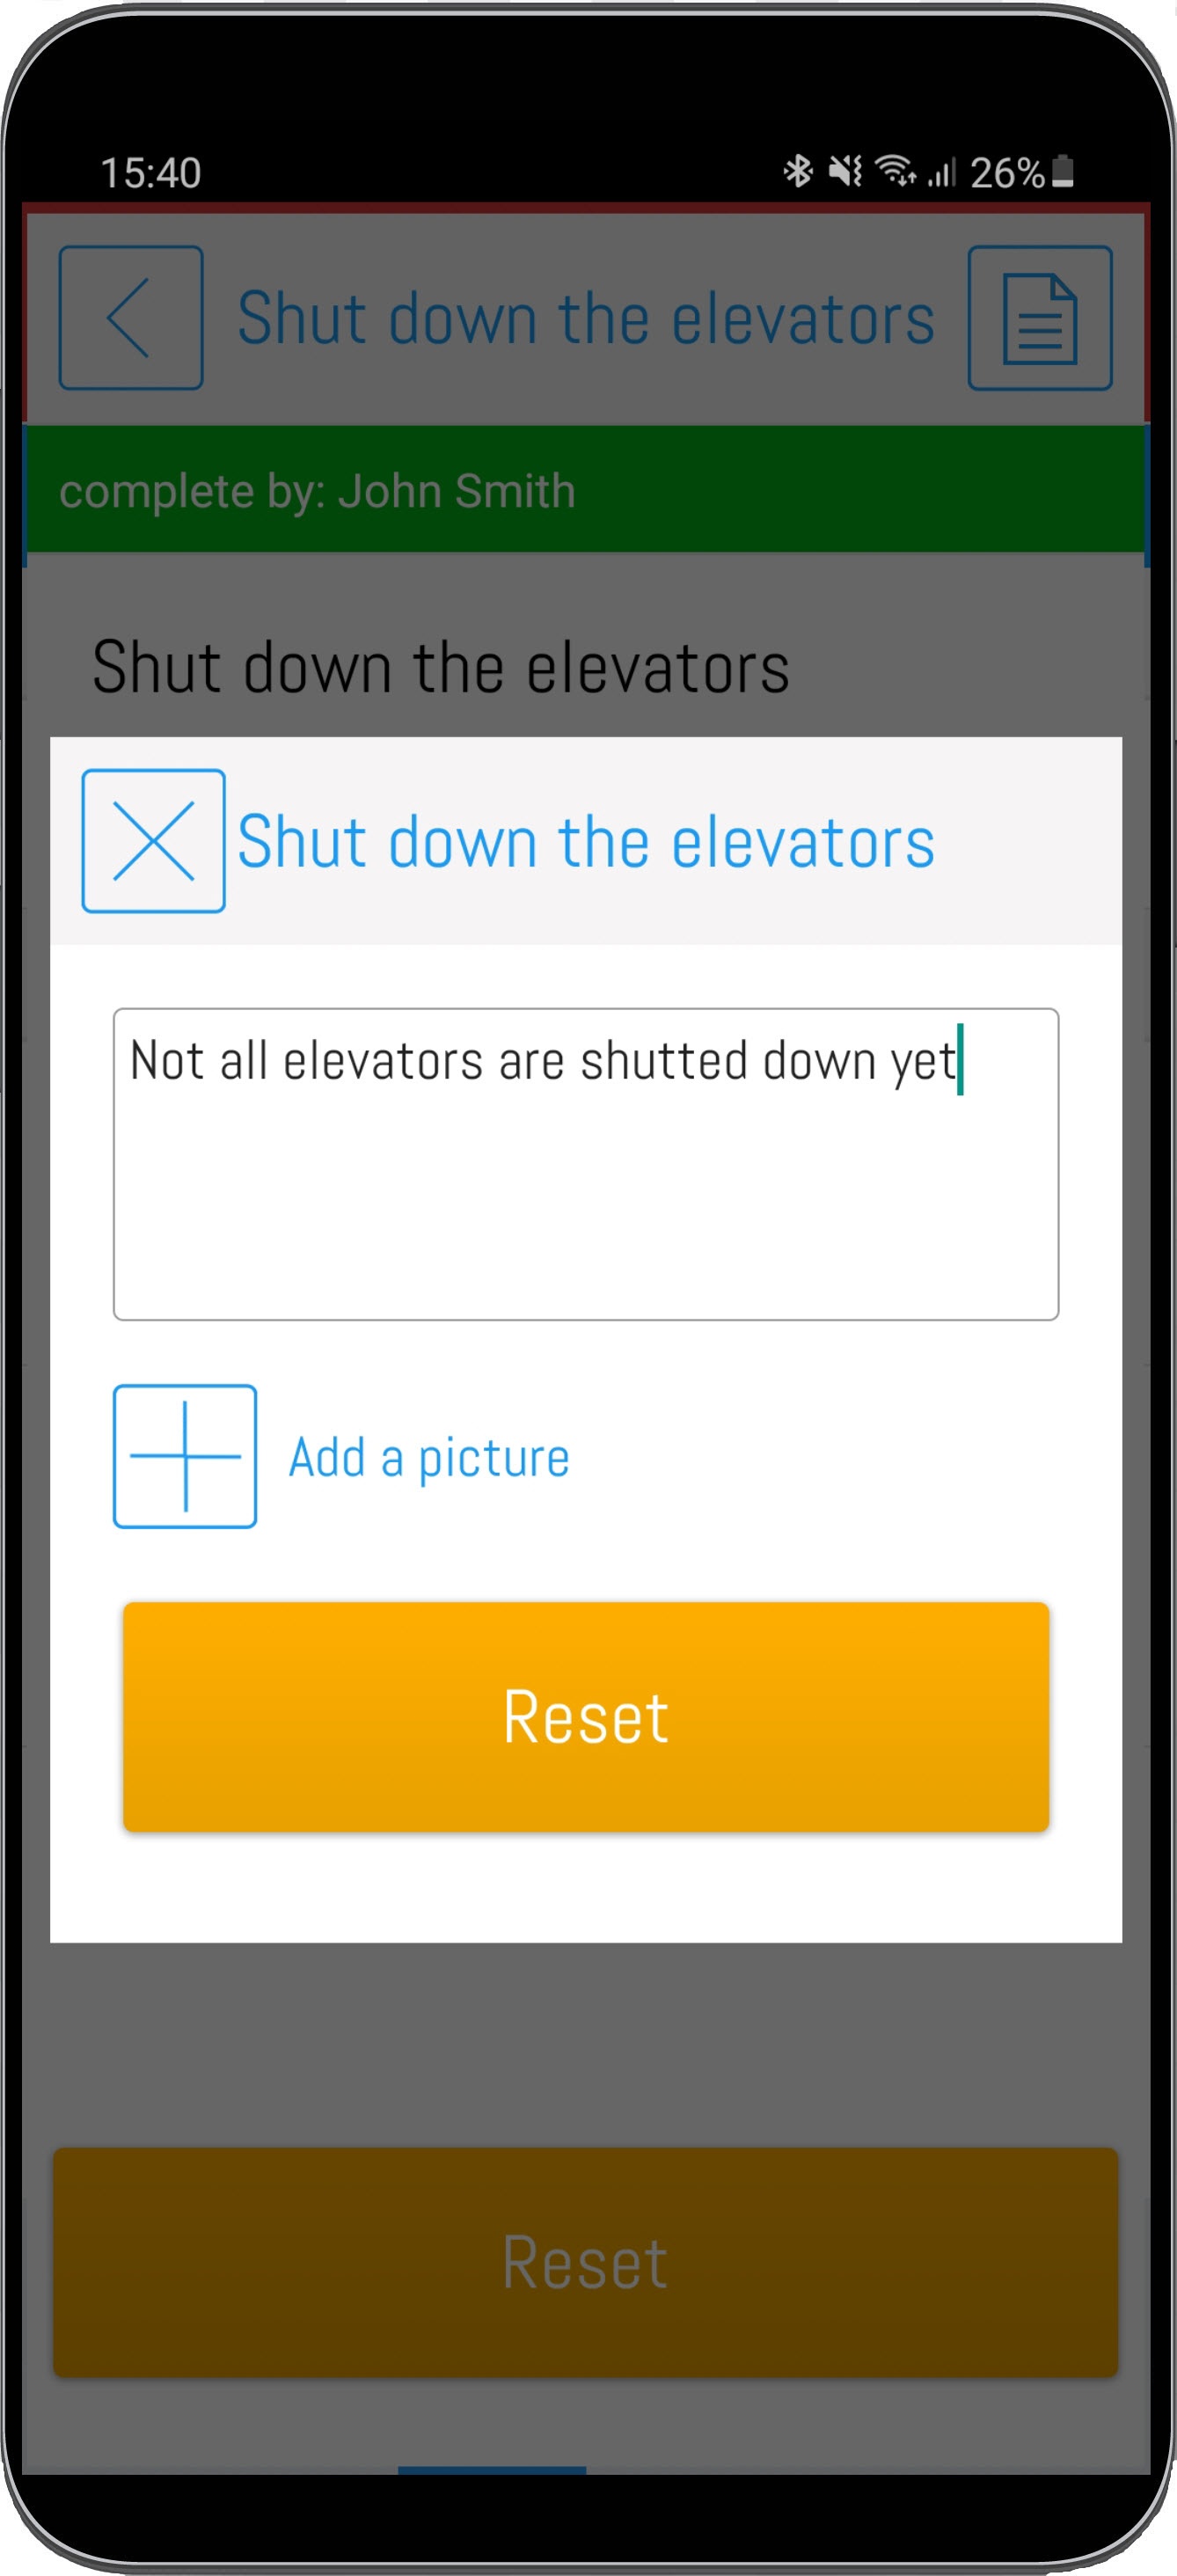
While completing a task you have the possibility to complete the task directly or add a comment/image optionally.
If you have selected "comment/image" in the previous step, you can add the comment and/or image now.
After adding the comment/image you can complete the task with the comment or just leave a comment without completing. If you just leave a comment the comment/image gets added o the taks, but the status still is "not done".

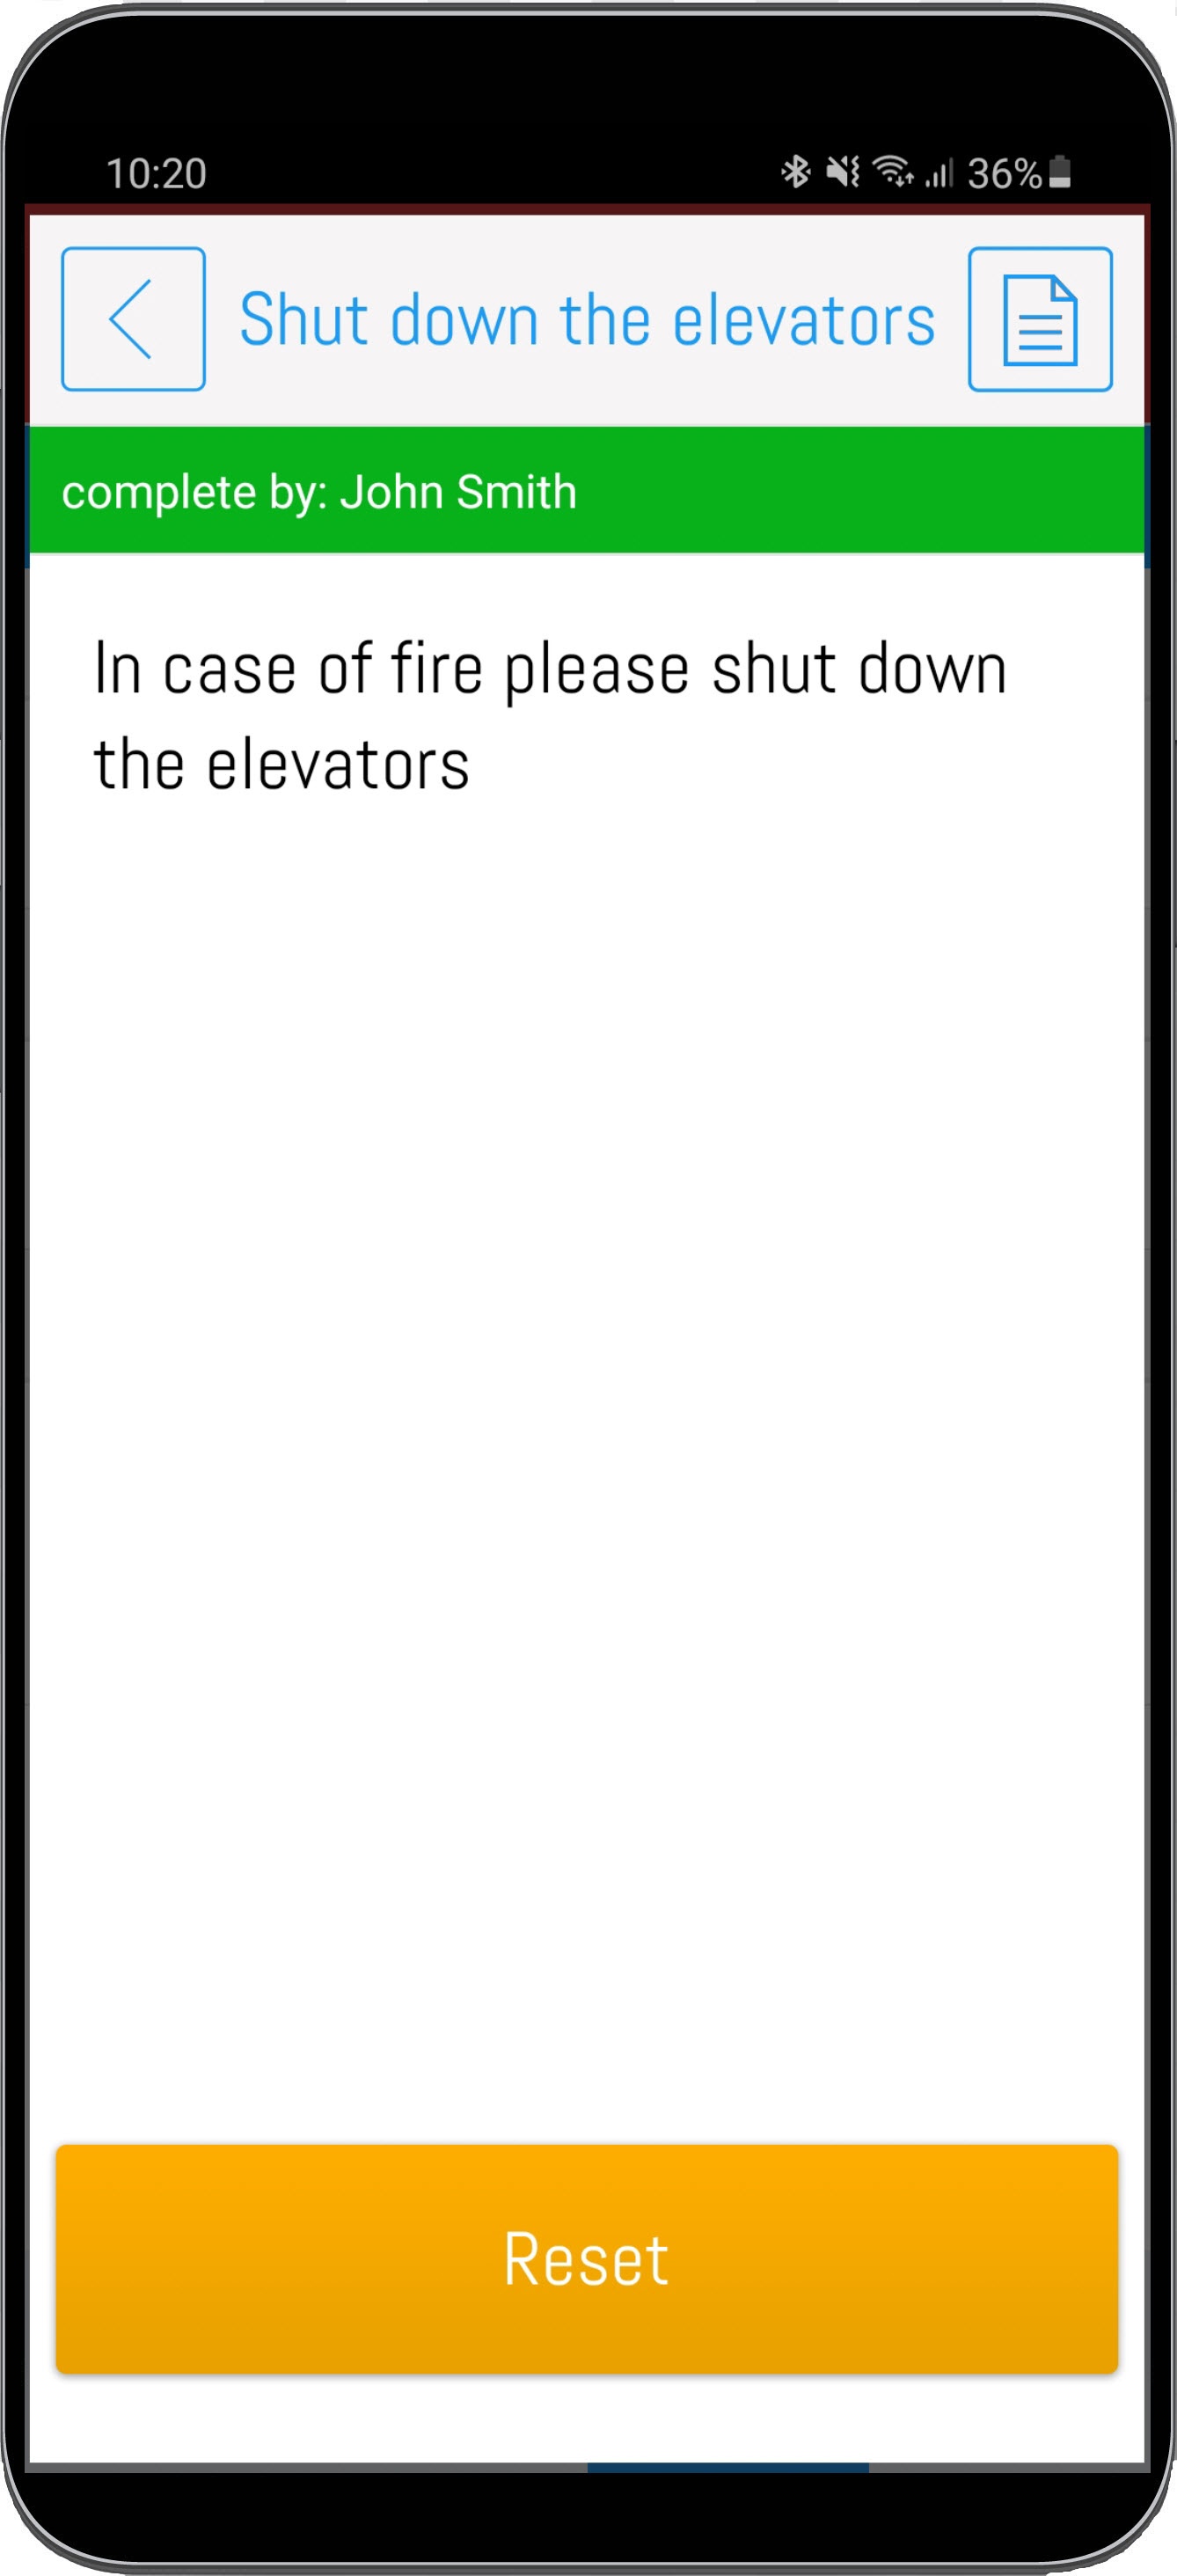
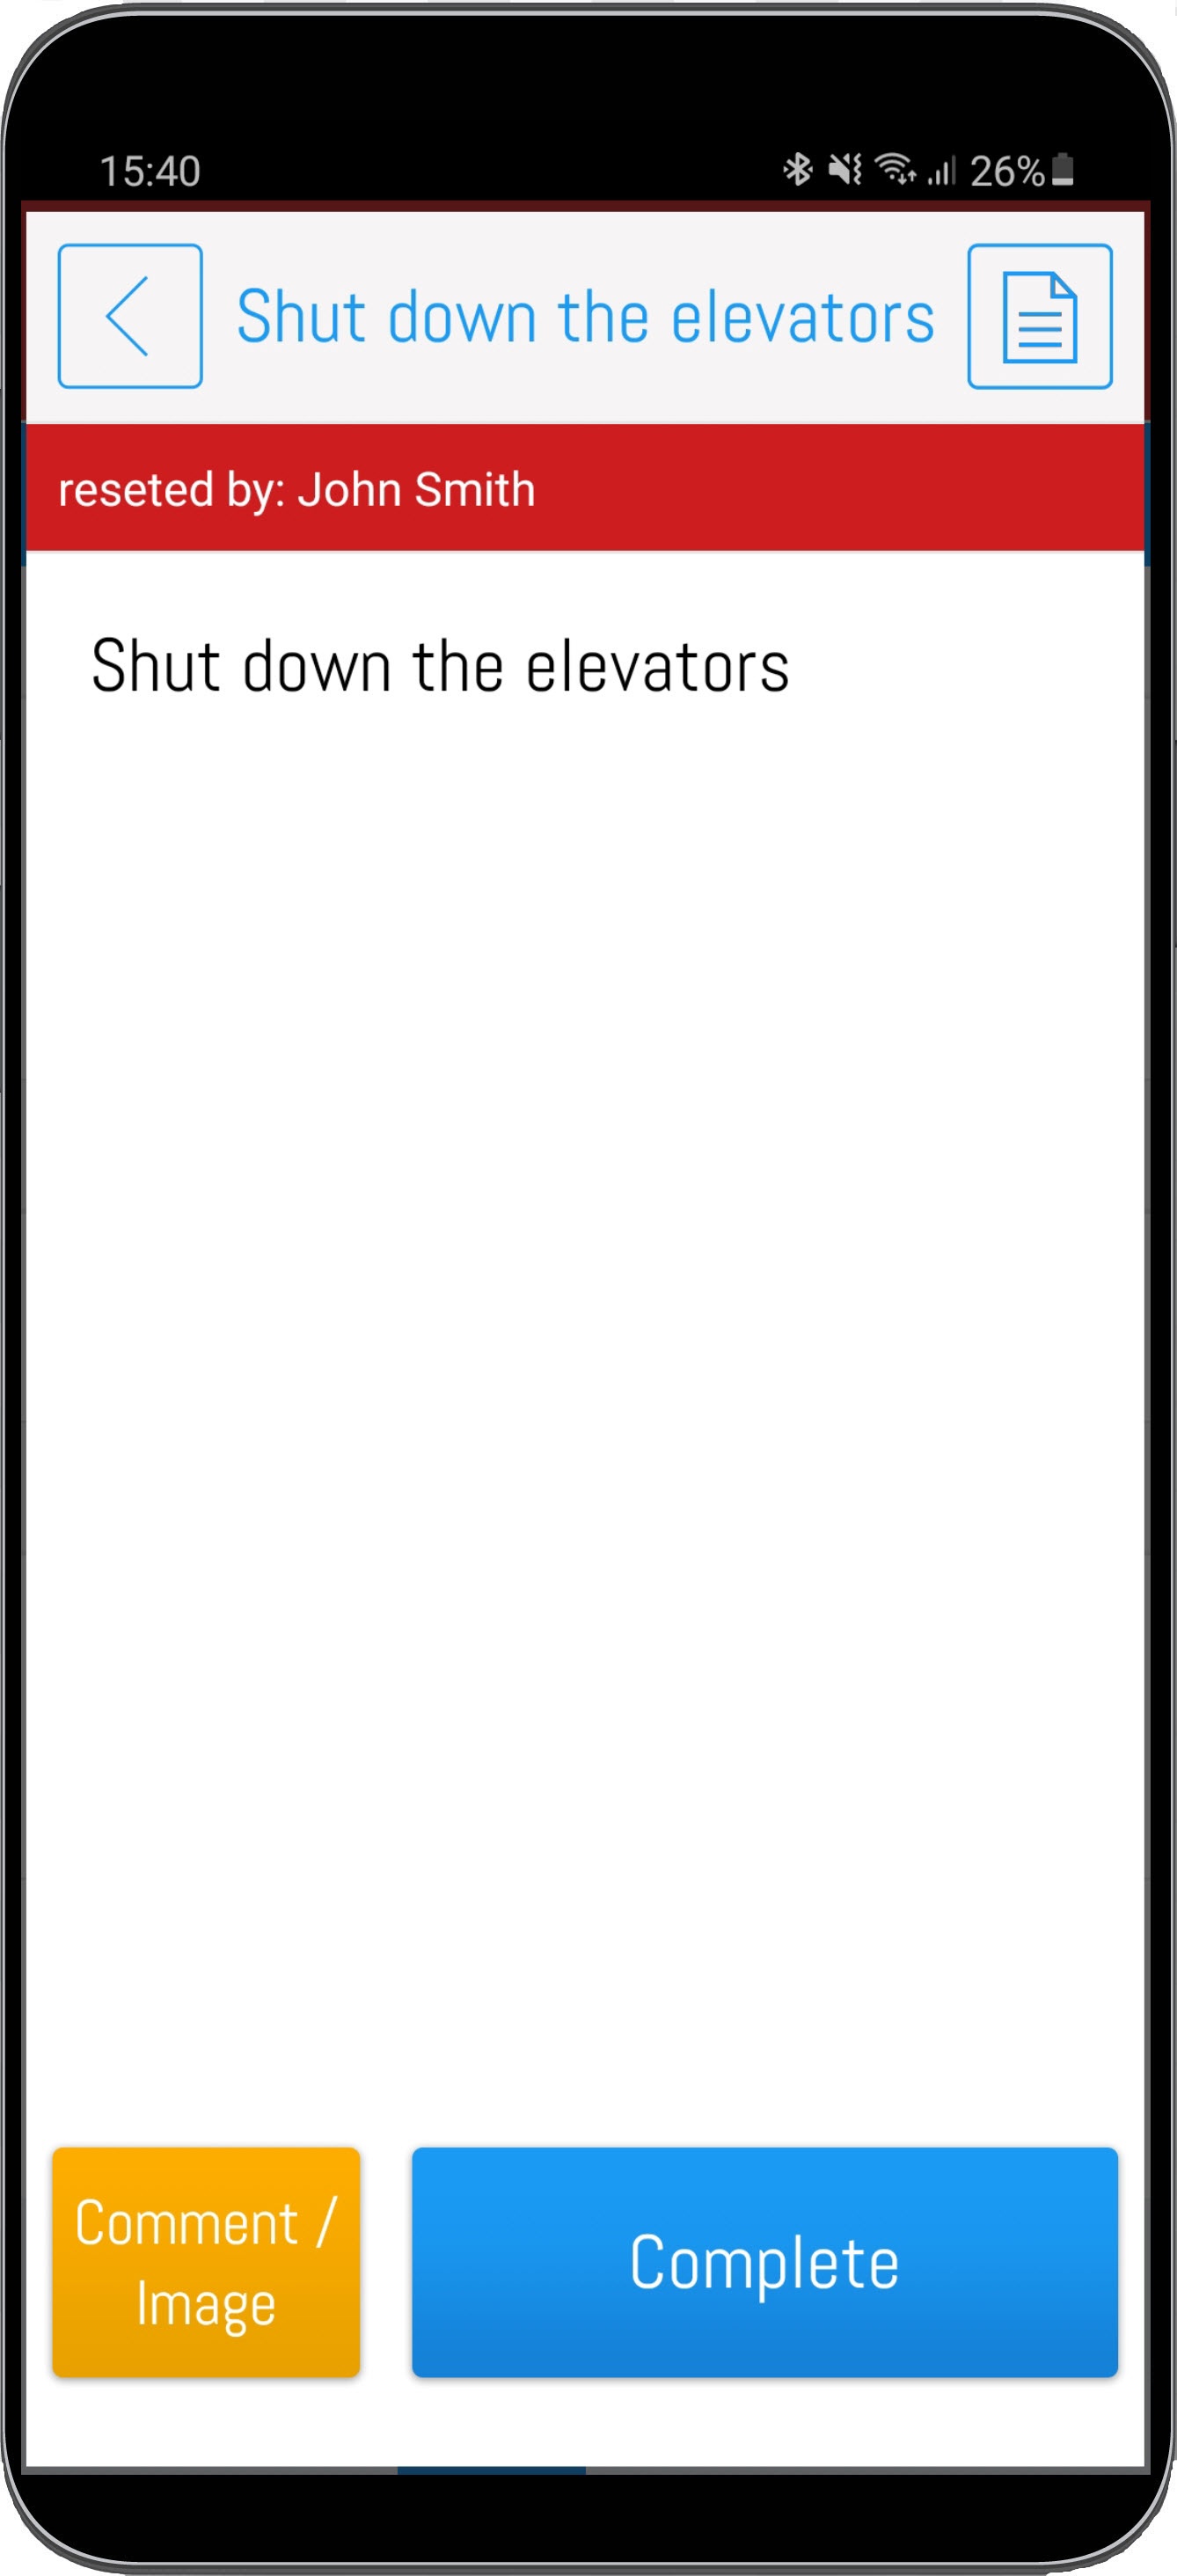
If the task was already completed (see status in the upper area), you have the possibiliy to reset the task.
To reset the task you have too add a reason as a comment. You also can add an image additionally.
If a task was reseted, the status gets also displayed in the upper area.
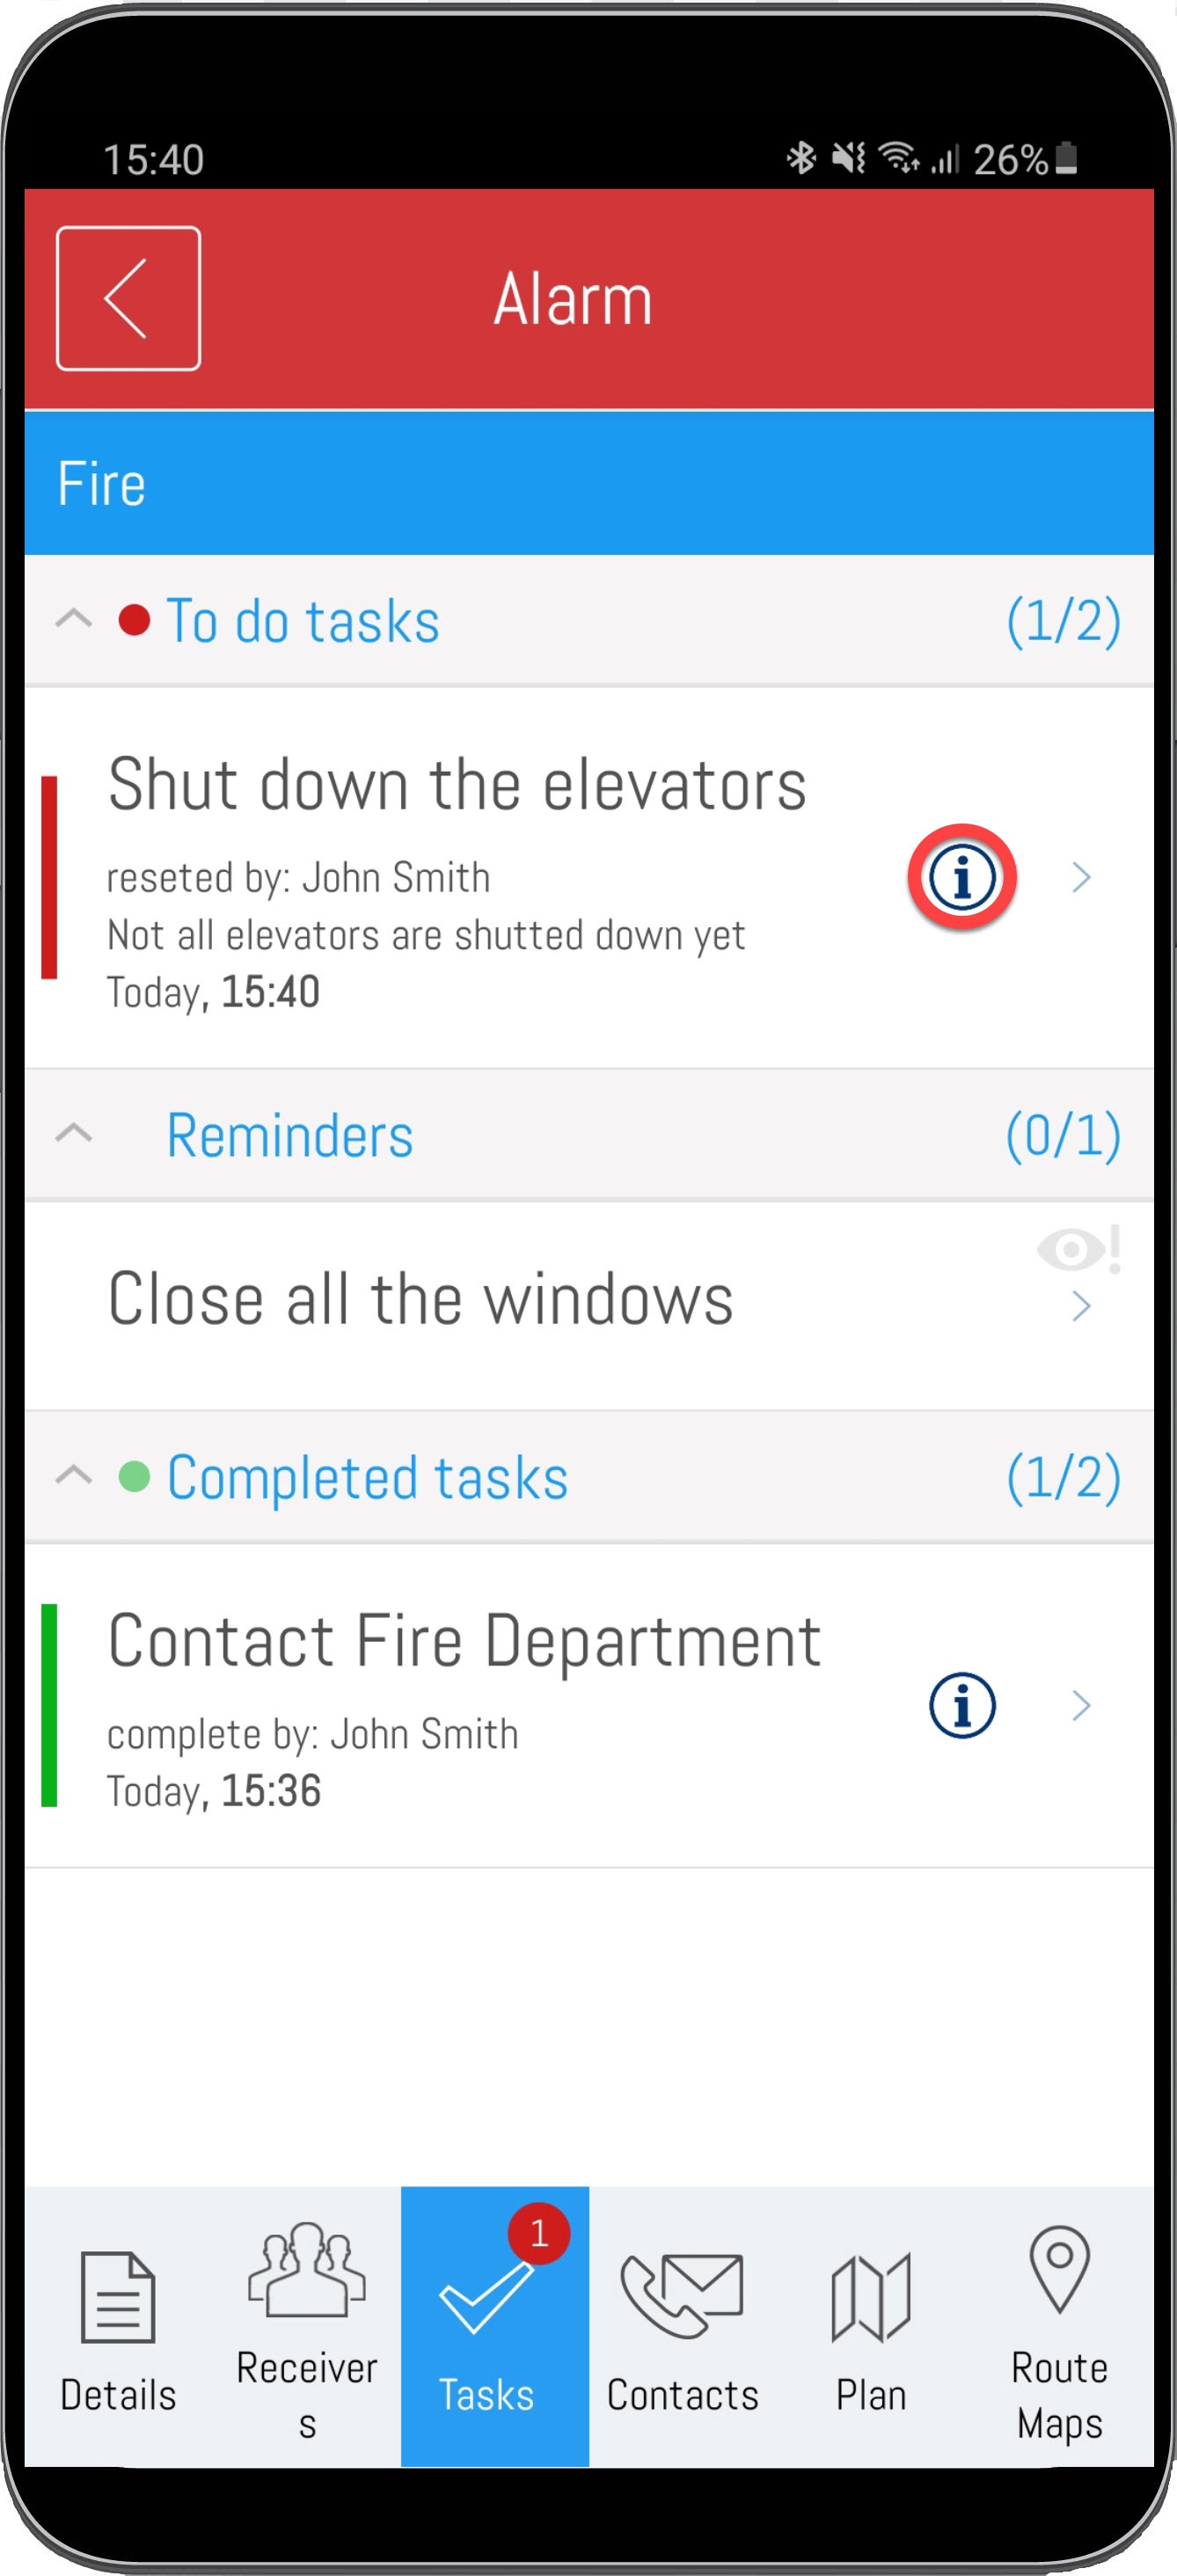
In the taks list you always have the current overviwe about all open and completed tasks. The categories are foldable and you can see the corresponding number.
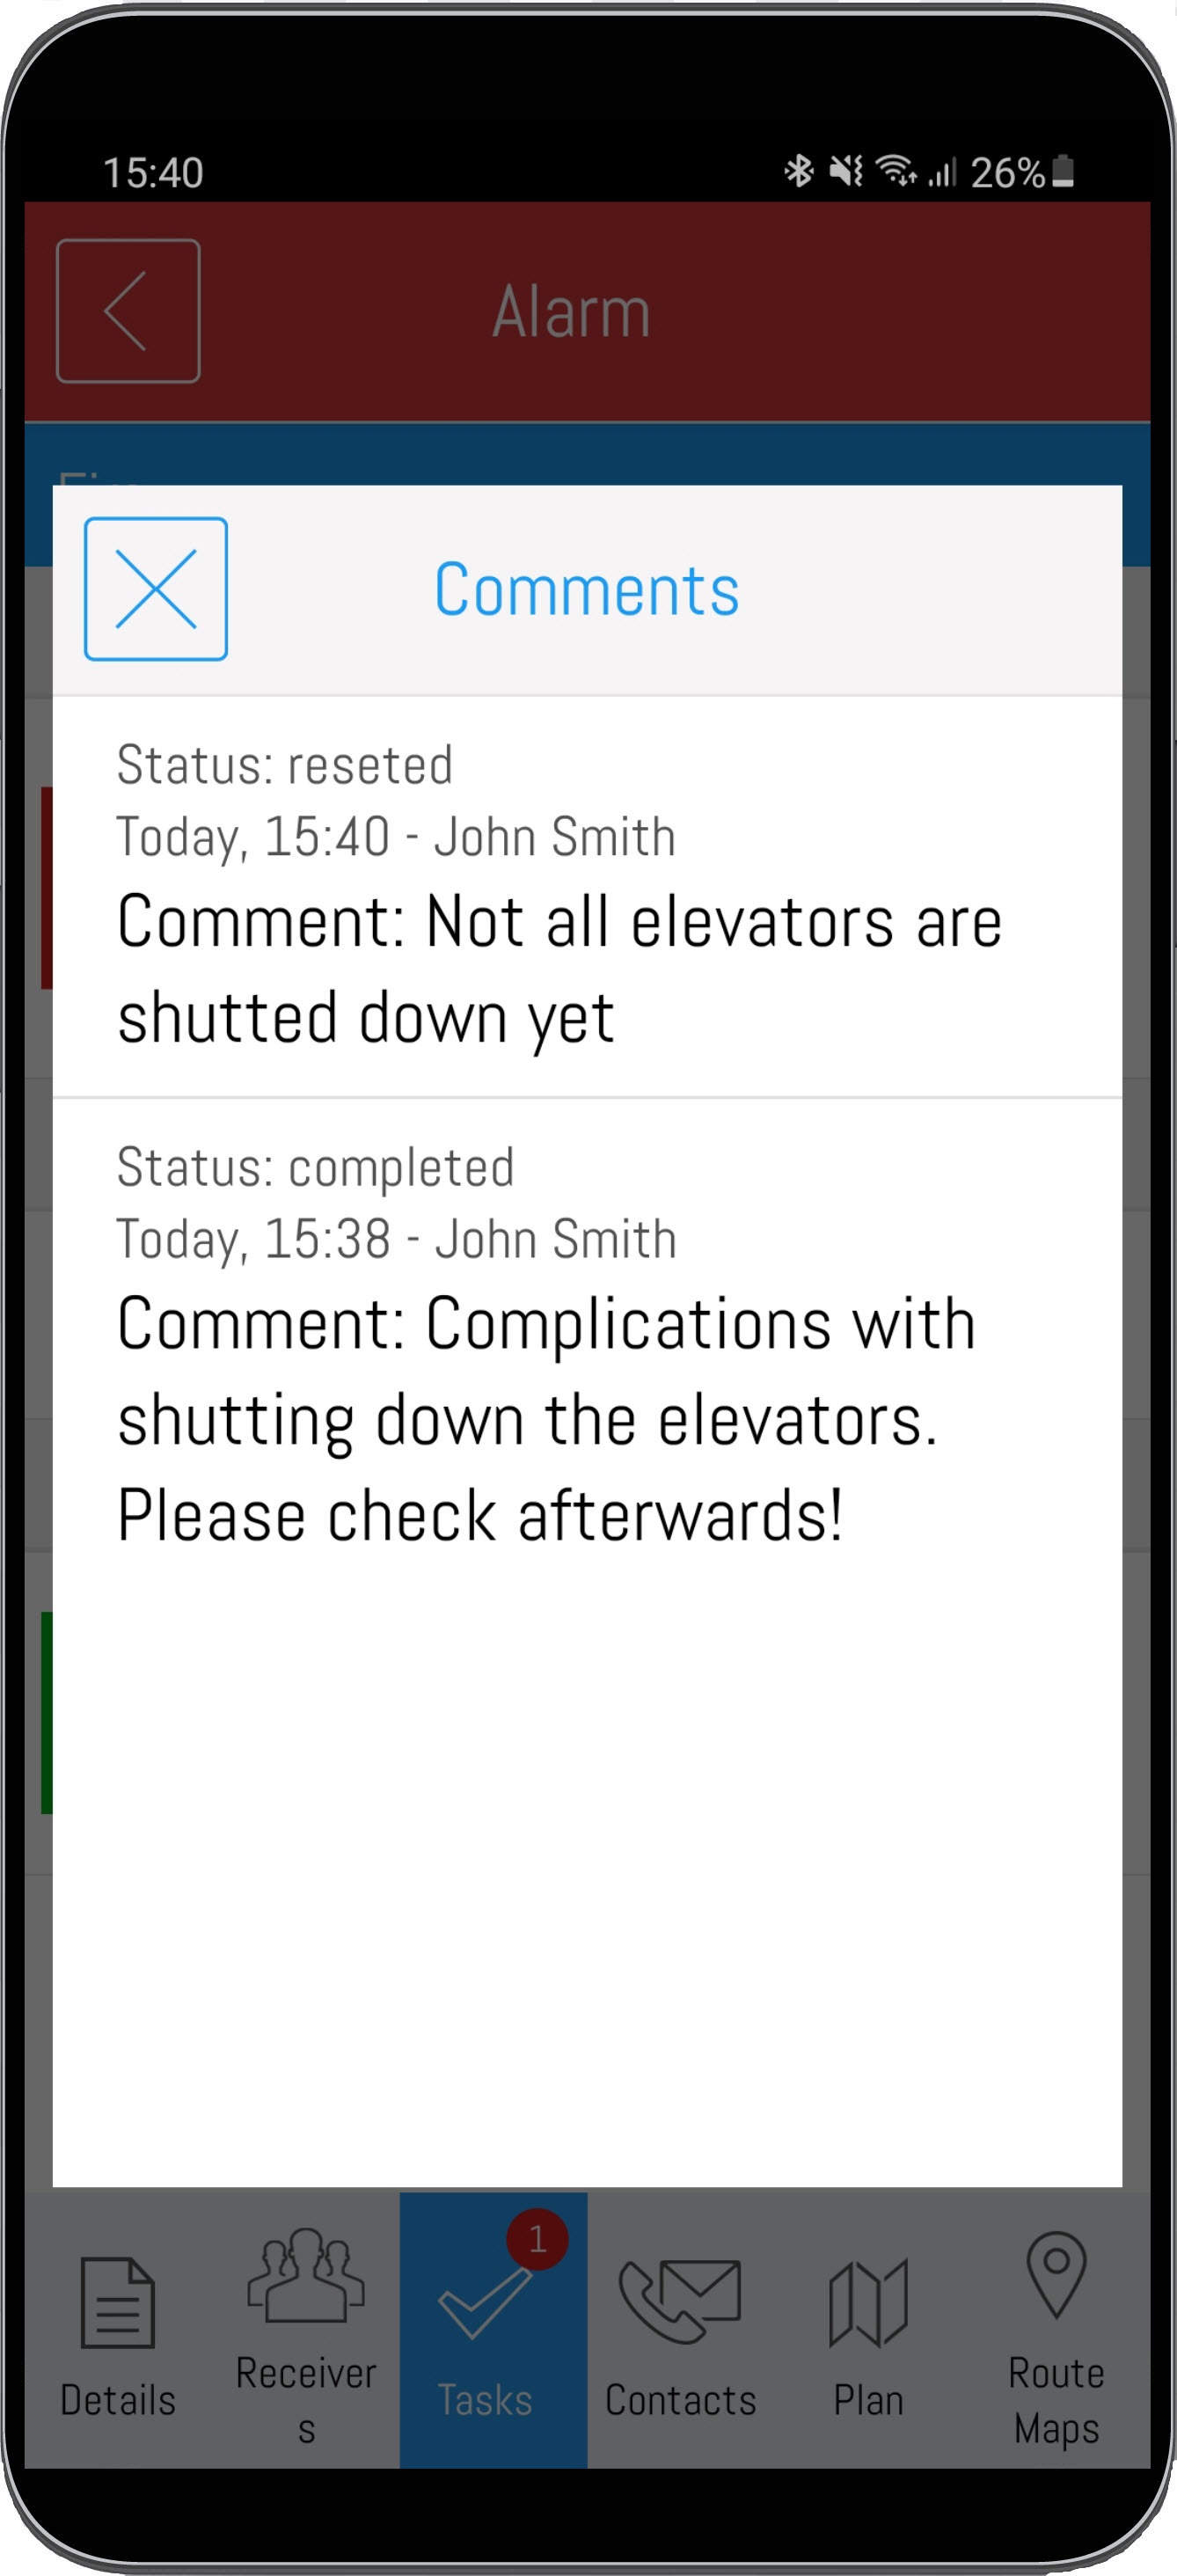
Via the info-button you can see the status history of a task. That means added comments, completions and resetings.
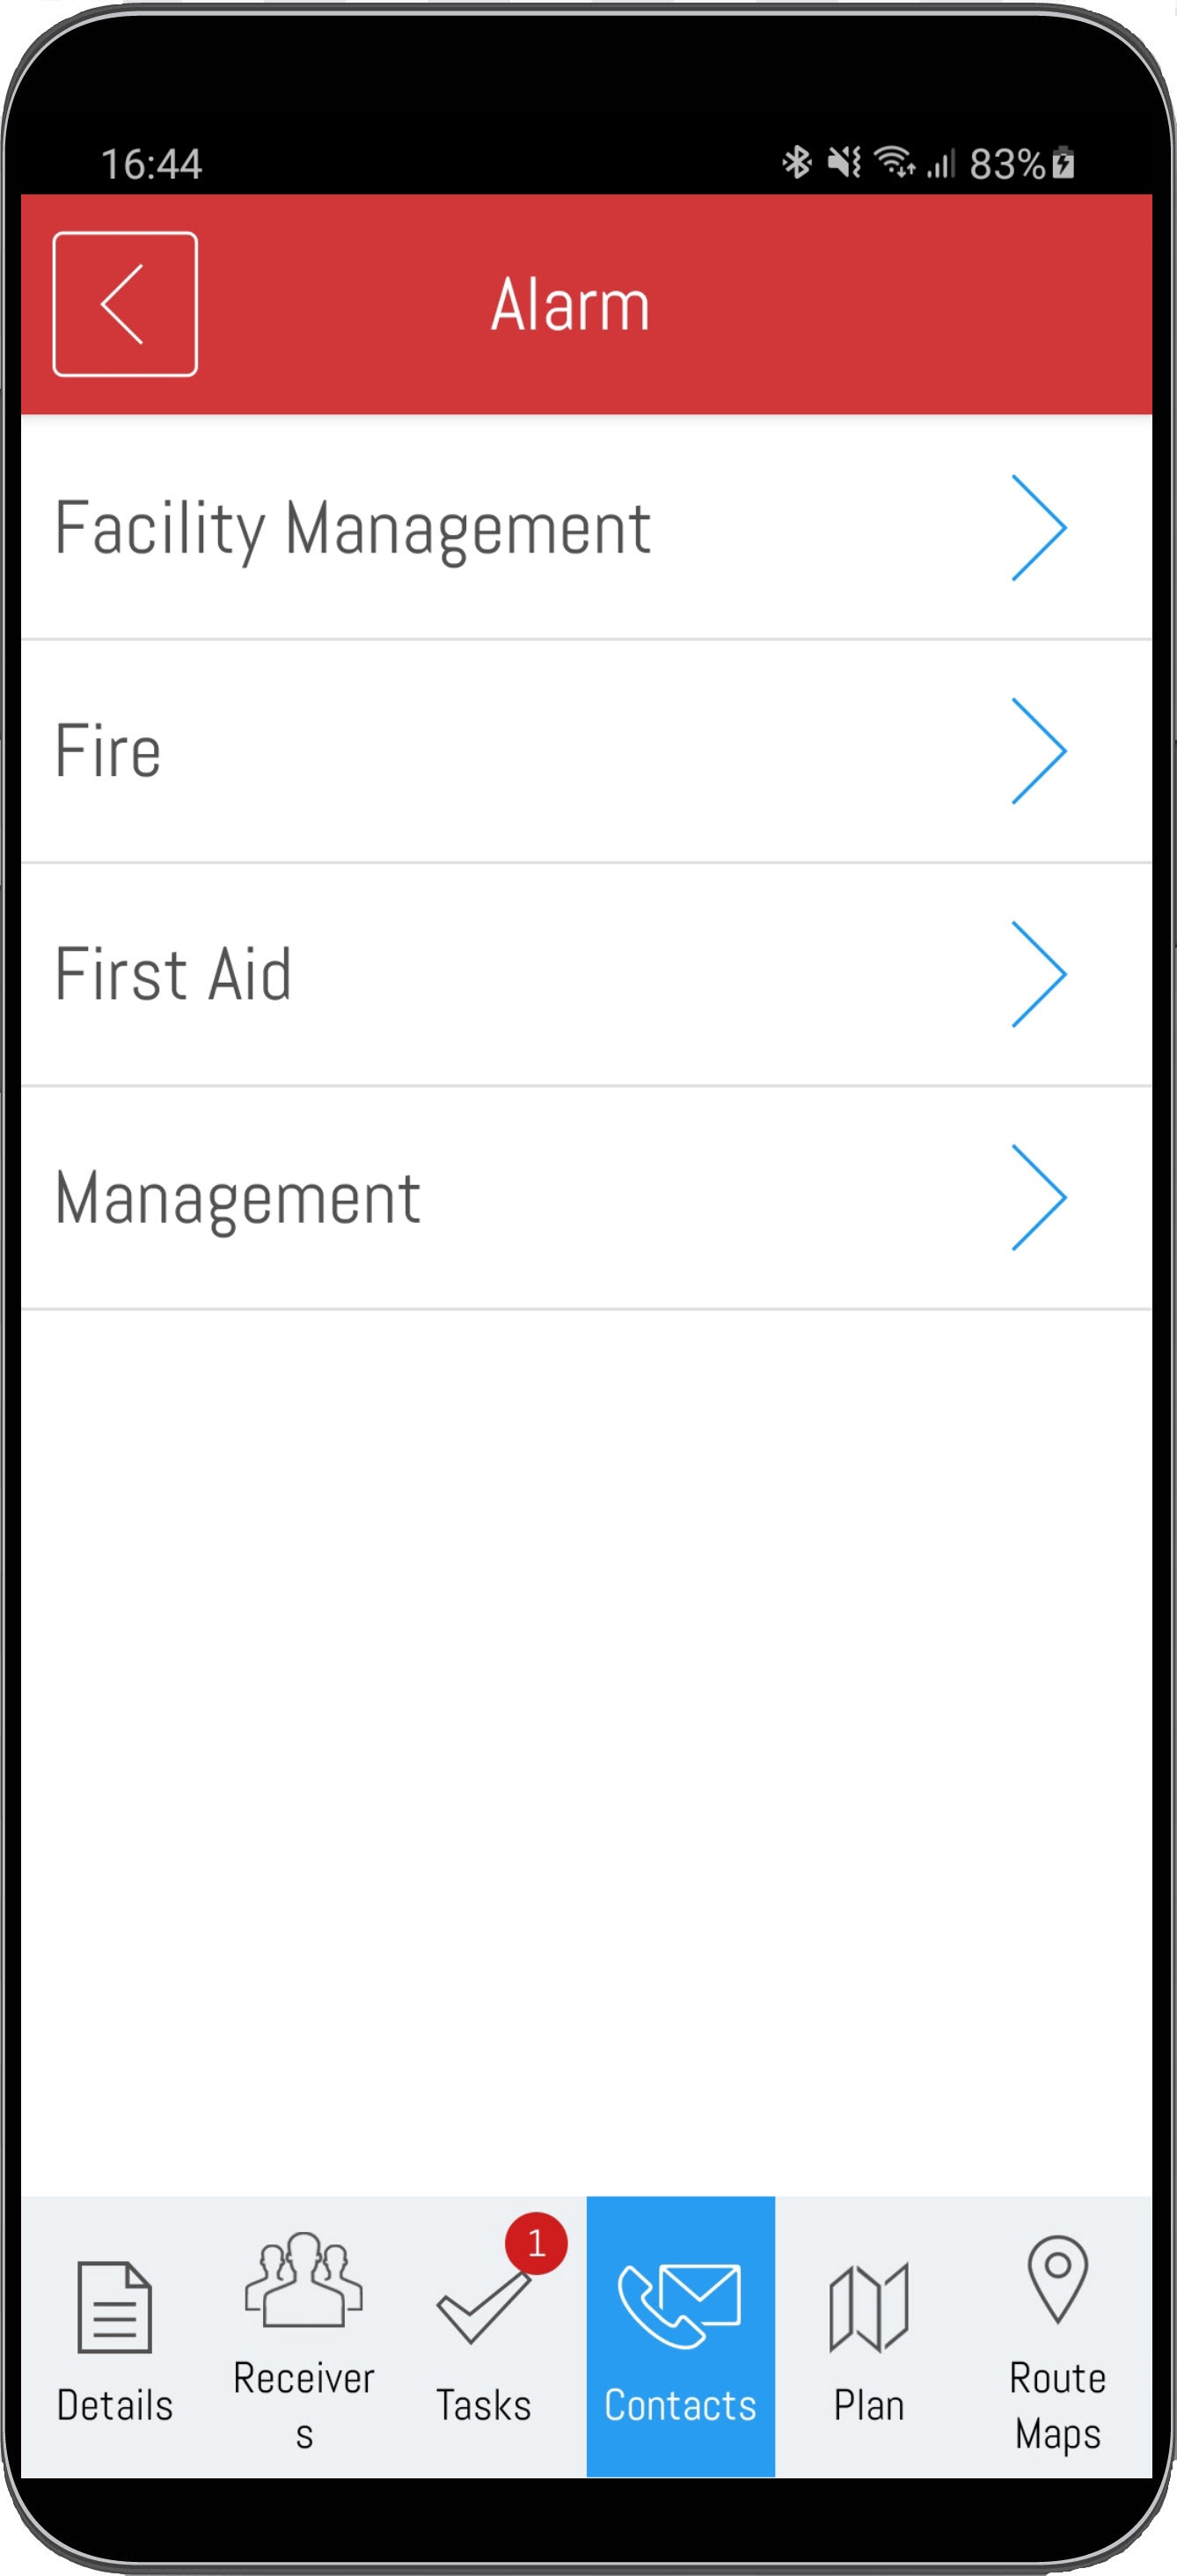
Furthermore, you can view the predefined contact lists for each alert.
Important contacts are immediately available in case of an alert.
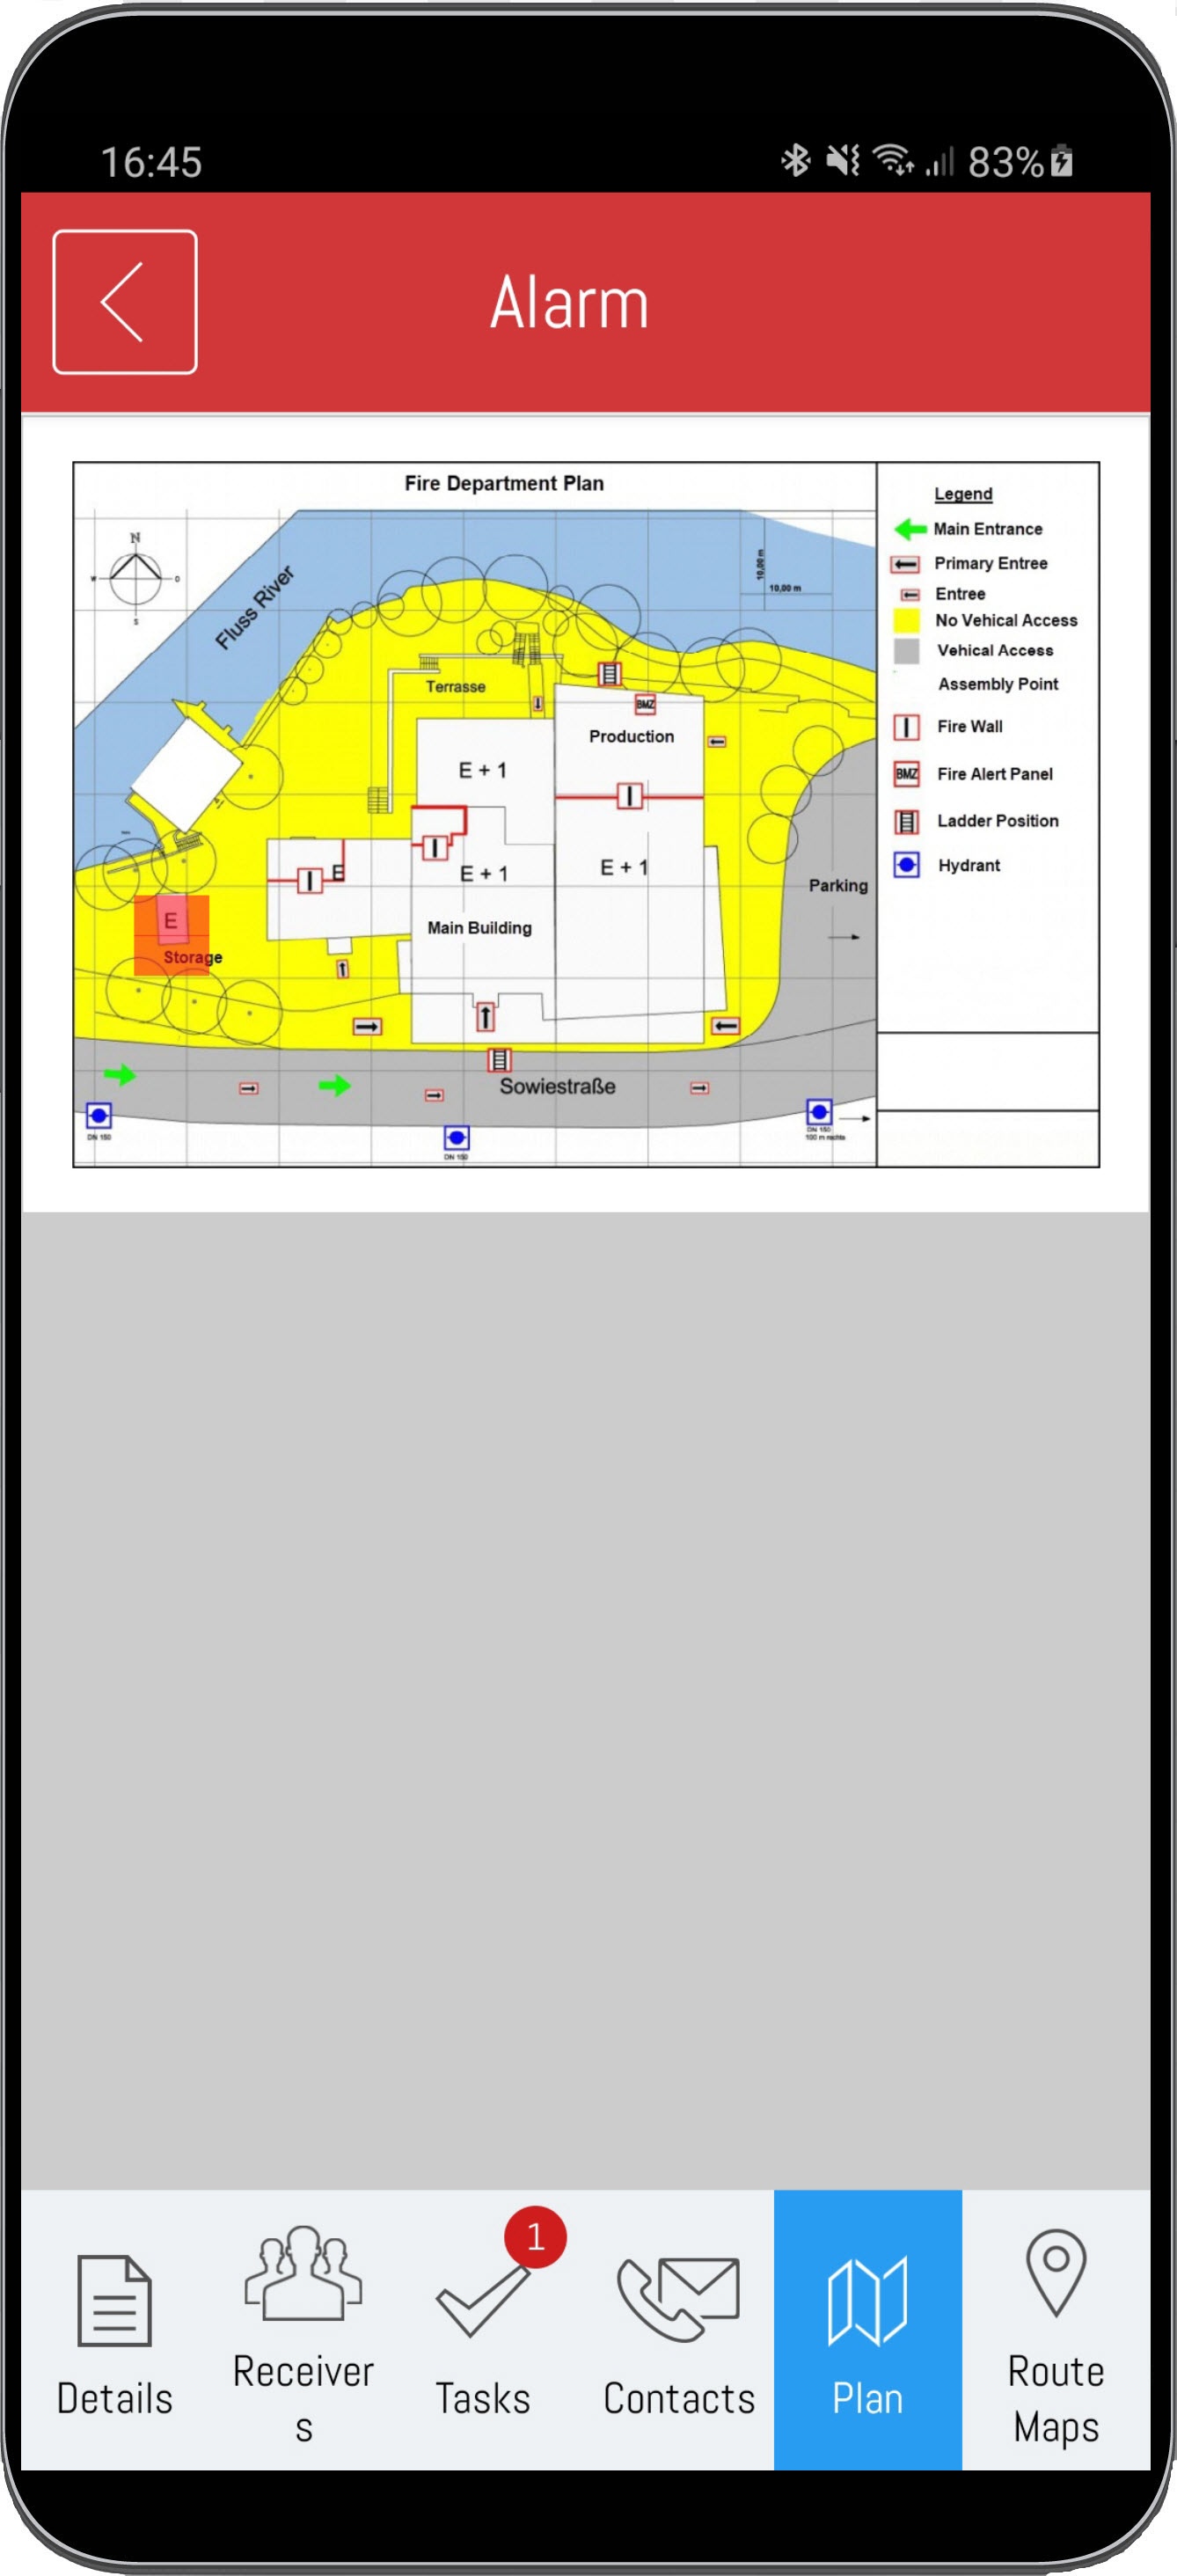
If you have set up a plan you can see it in current alert directly.
In addition, the grid positionof the affected locations on the FD plan will flash, which allows you to immediately get a spatial overview of the situation.
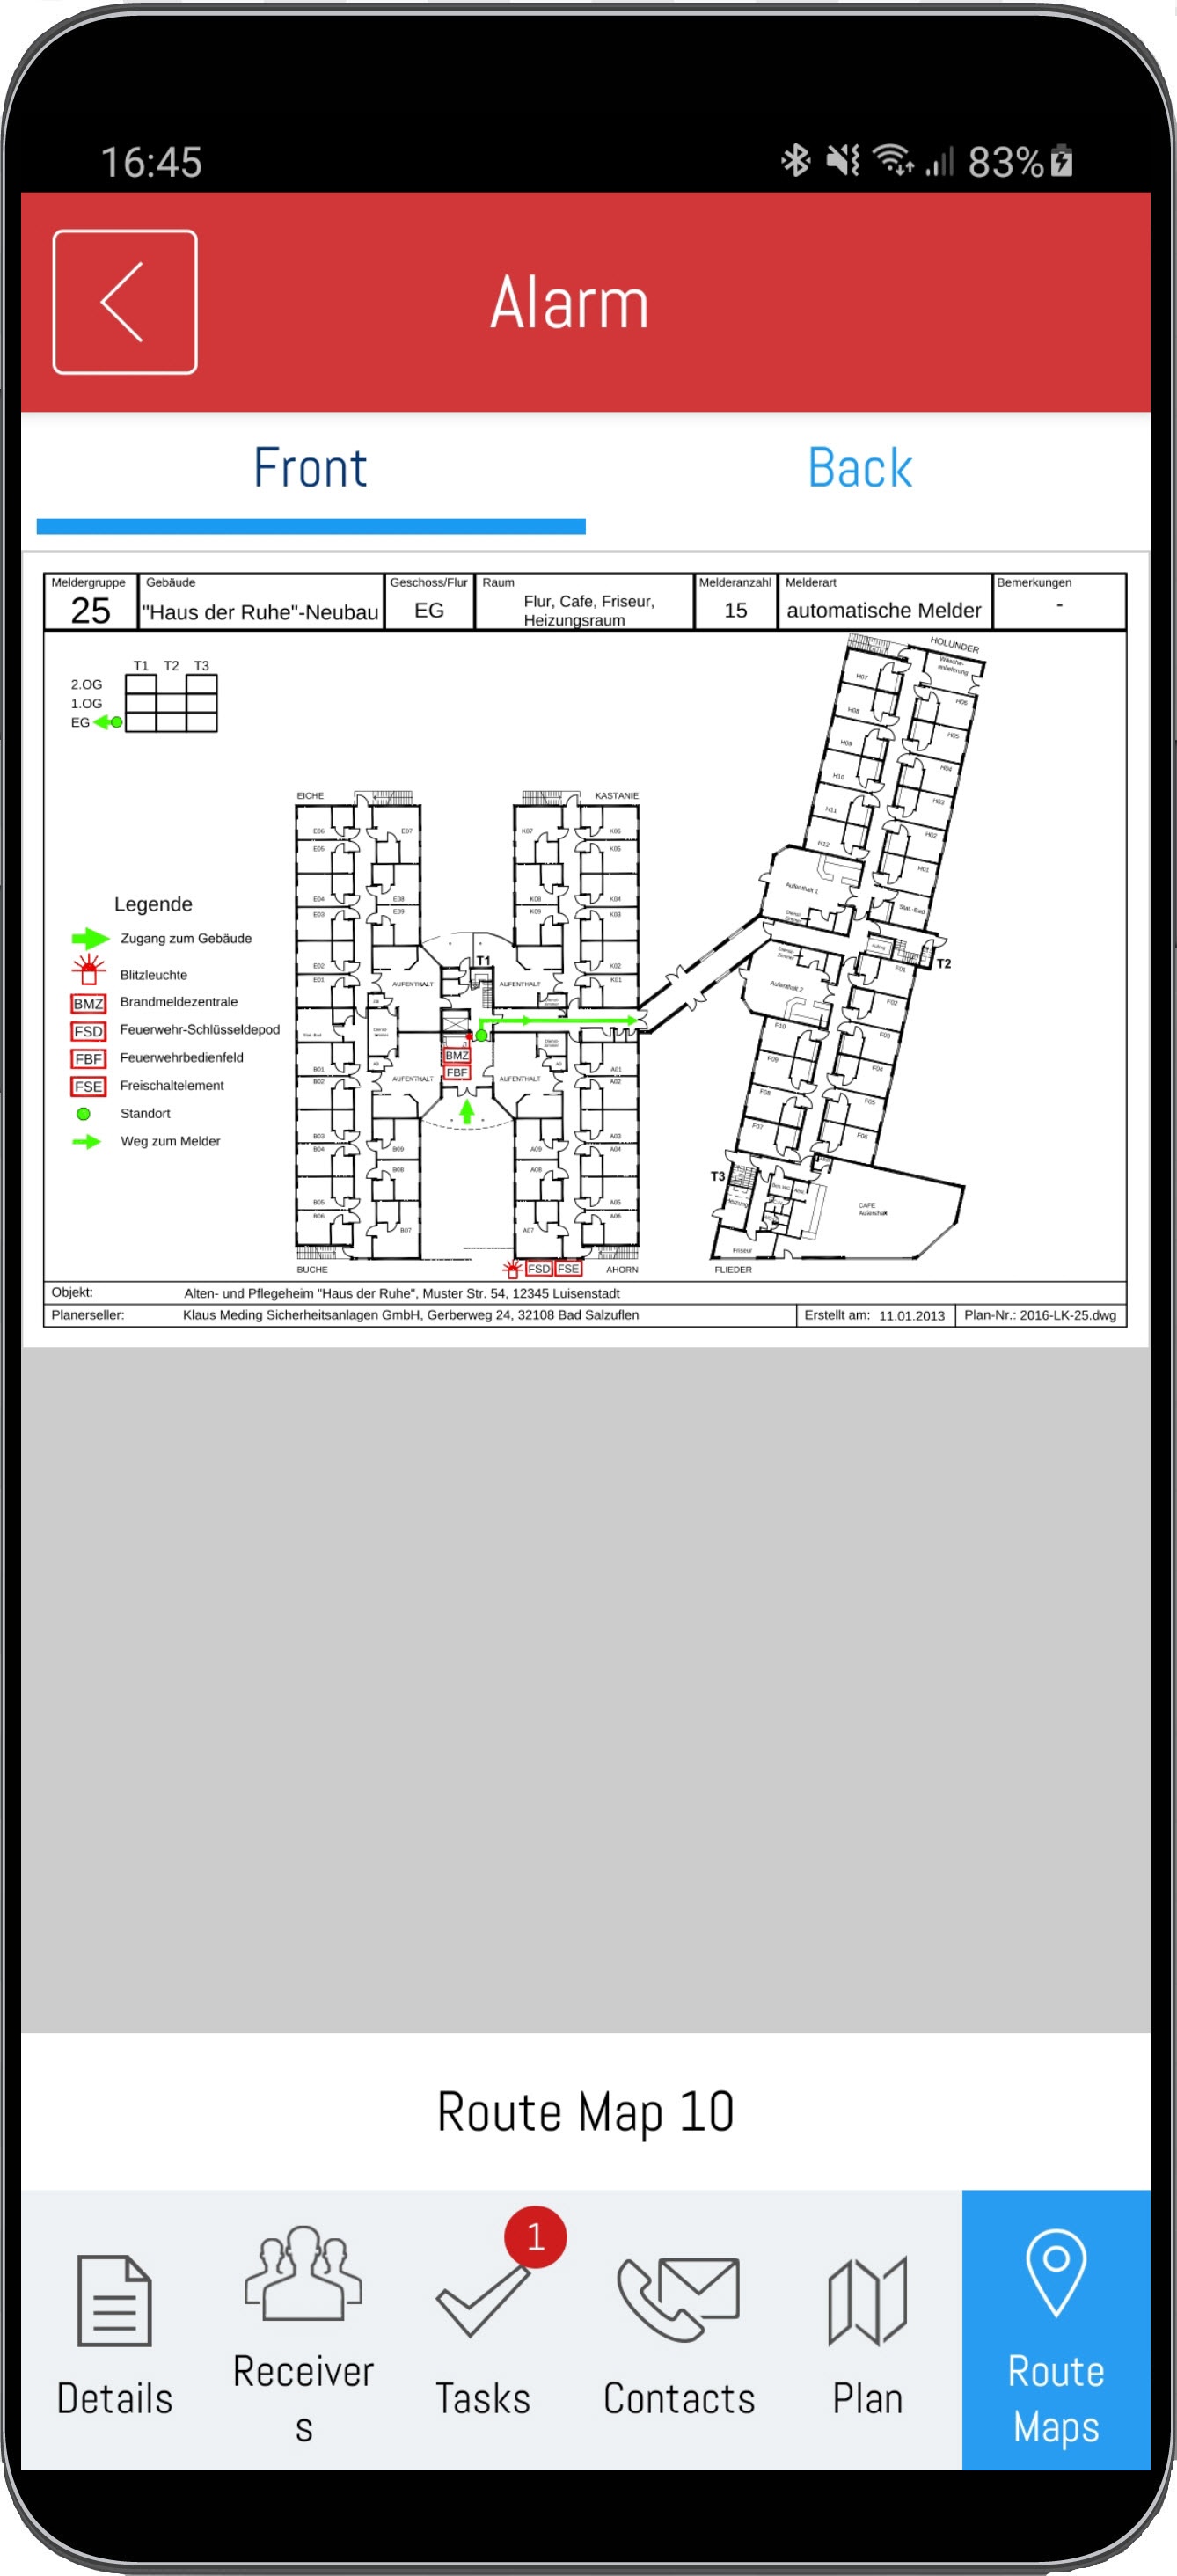
Additionally, it is possible to link digitized versions of the fire department route mapswith the locations.
Depending on the authorization and always appropriate to the current alert location, you can also view these directly in the alert.
Front and back of the map are always available.
End alarms
| Warnung |
|---|
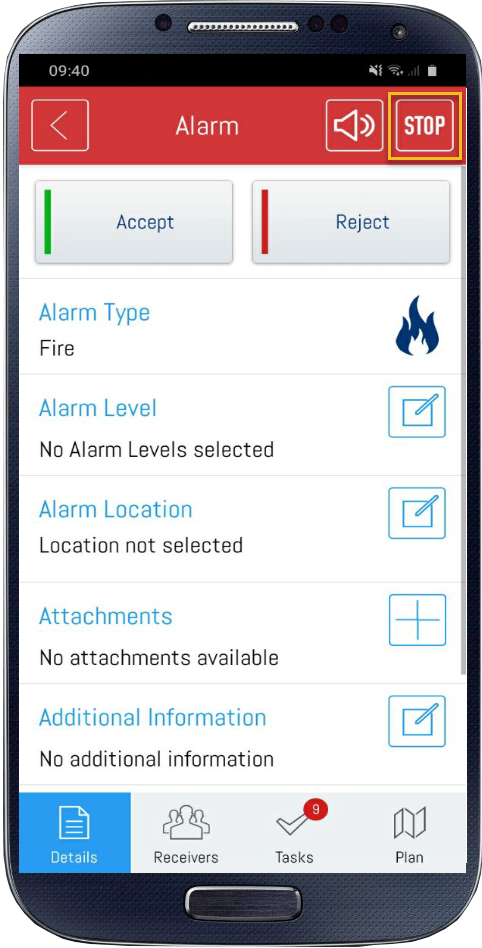
To stop an active alarm, you have to have the user role administrator or emergency and crisis team supervisor. |
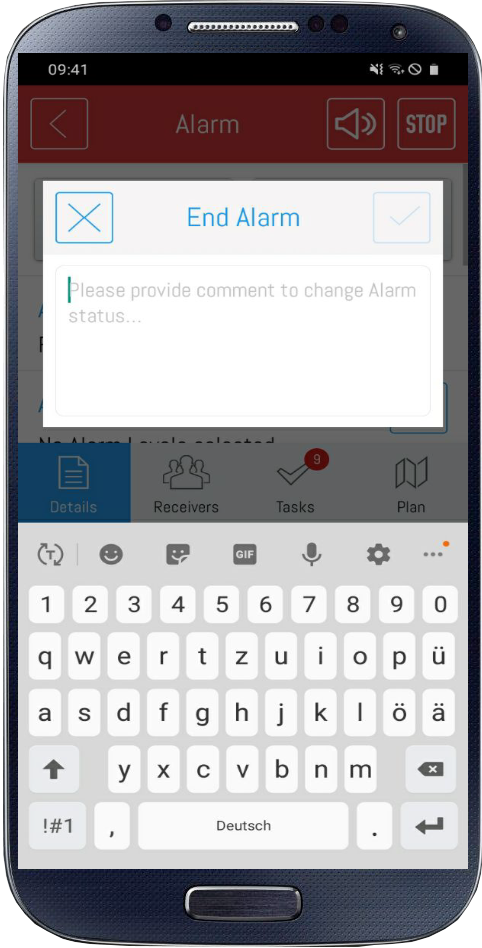
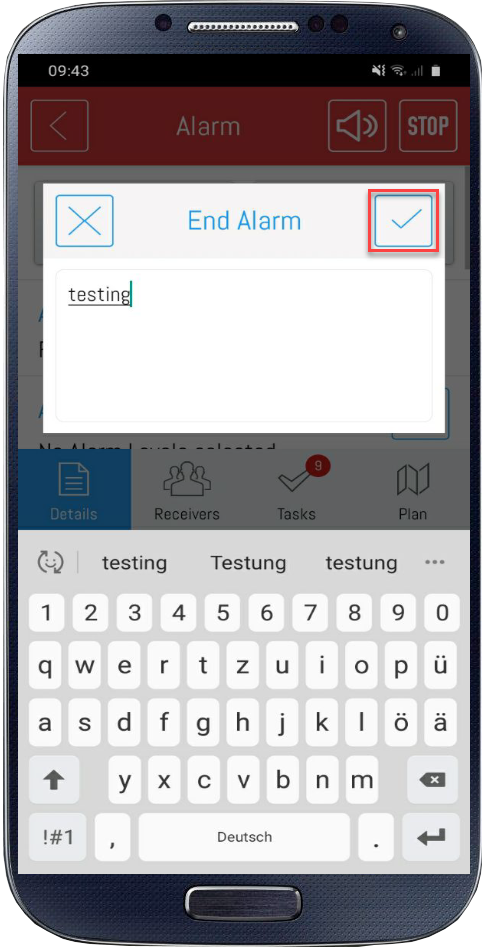
Before you can stop the alarm, you have to enter informations with the reason for the termination and confirm your entry.
To stop an active alarm, press the "STOP" symbol in the right upper corner.
After the alarm has ended, all alarm recipients are informed of the new status.
The completed alarm can be viewed in the alarm archive.
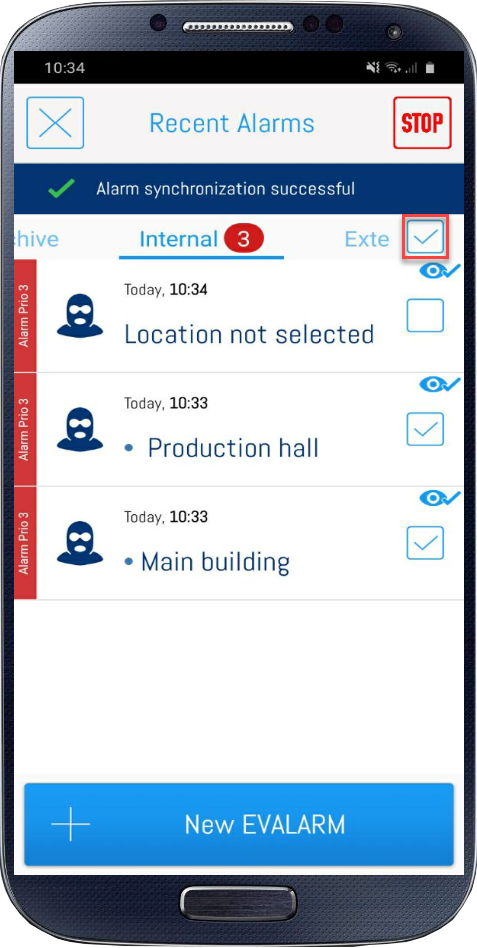
Alarms with the priority 3 can be ended with multi-selection. Hold down for a second for the corresponding alarm to activate the multiple selection.
With the "Mark all" field you can select all alarms with priority 3 at once or deselect individual alarms.
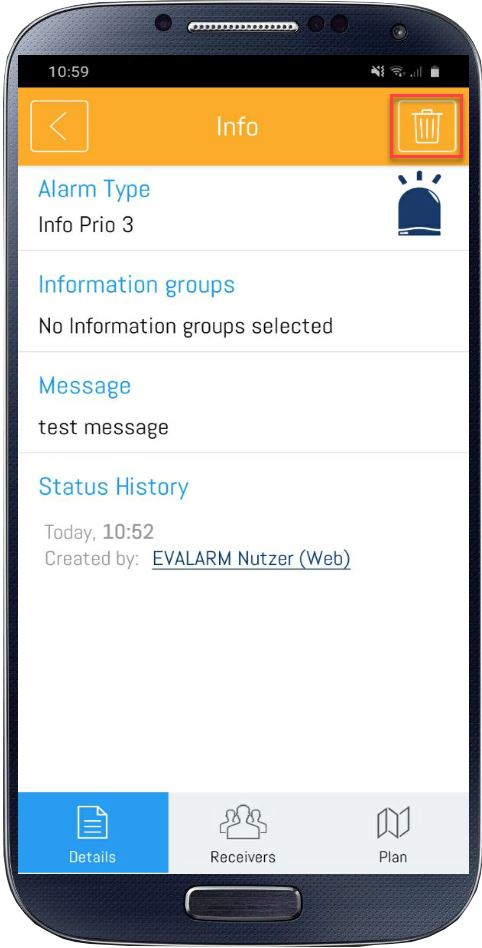
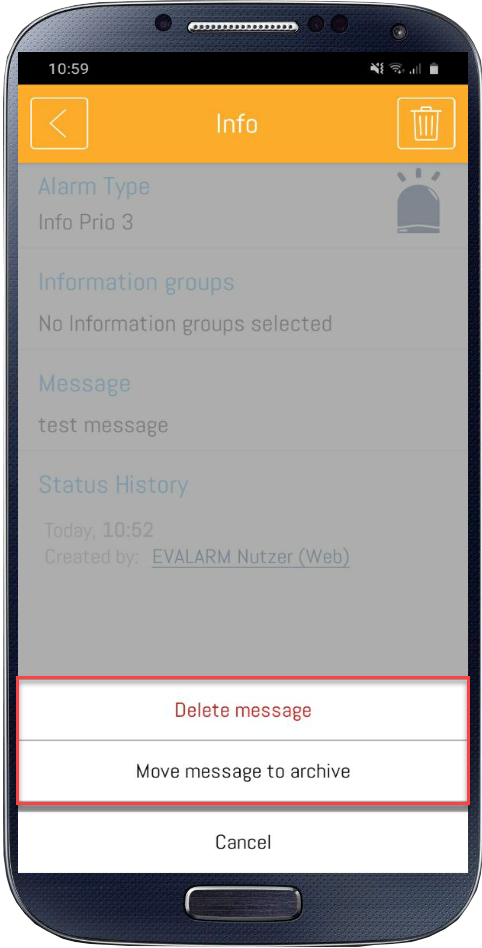
Delete/archive info alarms
When you receive an information alarm, you can either move it to the alarm archive or delete it using the icon in the real upper corner.
| Info |
|---|
Users with the role guest can only delete information alarms because they have no access to the alarm archive. |
If you delete an informational alarm, it will no longer be displayed in the app. Deleting informational alarms only affects the display of the individual user.
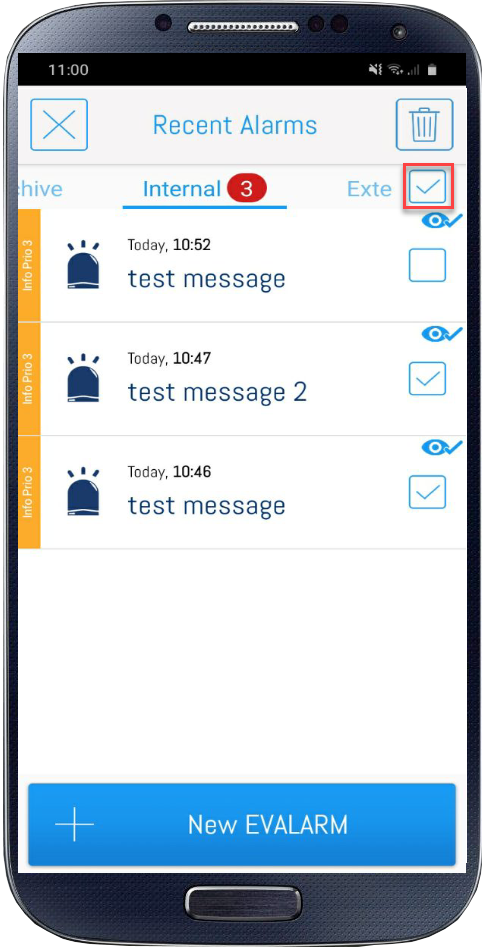
If you want to delete several information alarms with the priority 3 at once or move them to the archive, press and hold the information alarm. Thus the multiple selection appears.
Überblick
Inhalte